Park pavilion decorations for a birthday can turn a plain concrete shelter into a space your guests photograph for the next hour. I know this because I spent my daughter’s third birthday taping streamers to splintery posts while the wind ripped half of them down before anyone arrived.
That pavilion party taught me what works and what ends up in the parking lot trash can. Since then, I have decorated more park shelters than I can count — for first birthdays, toddler parties, tween celebrations, and even a couple of adult milestone events. The ideas below come from what held up against wind, what photographed well for Pinterest, and what cost less than a dinner out.
Some of these take ten minutes. One of them deserves a full afternoon of setup. All of them work with a standard park pavilion — the kind with concrete pillars, a metal roof, and picnic tables that have seen better days.
1. Wrap the Pillars with Fabric or Crepe Paper

Most pavilion pillars look rough. Chipped paint, carved initials, grime from years of weather. A few yards of fabric fixes that in five minutes per pillar.
Buy bulk tulle or cheesecloth from a fabric store — about $1.50 per yard at most chain craft stores. Cut panels roughly 3 feet wide by 10 feet long. Wrap each pillar starting from the top (secure with a zip tie hidden behind the fabric) and let the material drape loosely down to the ground. Cinch the middle with a ribbon or a small clip of faux greenery.
Total cost for a four-pillar pavilion: around $12–$18.
Crepe paper streamers work too, but only on calm days. Wind shreds them by hour two.
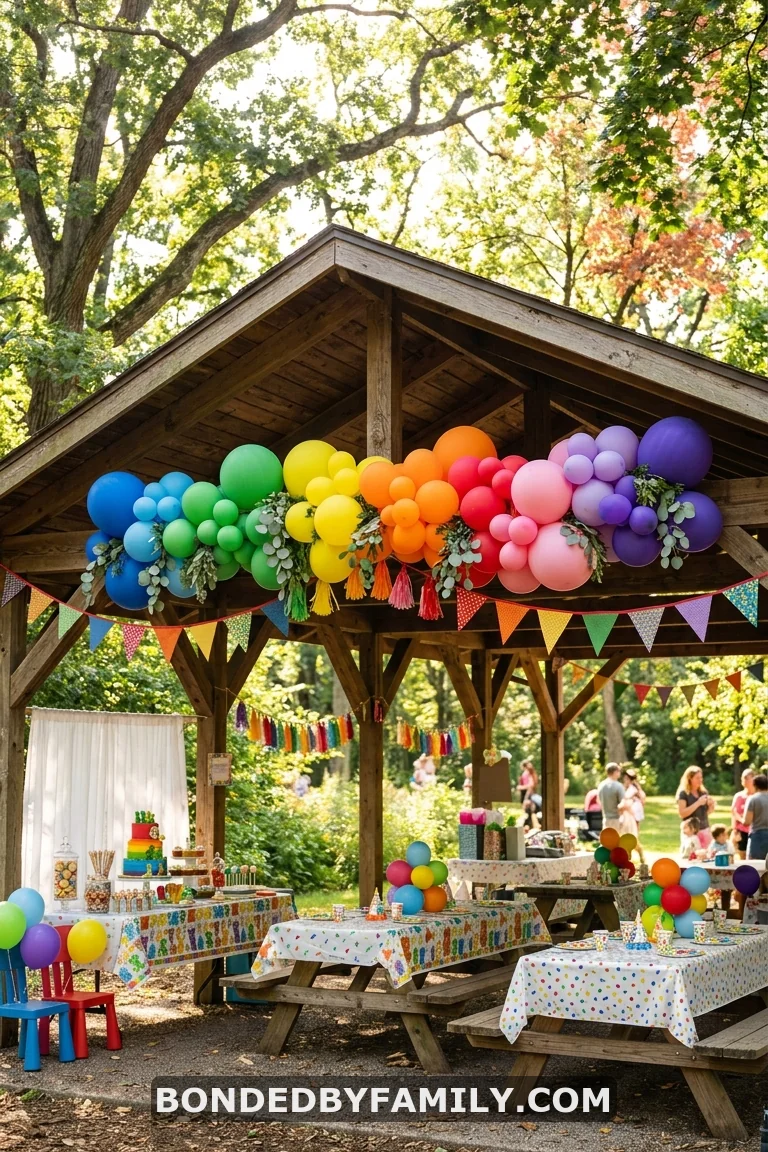
2. Hang a Balloon Garland Across the Front Beam
This is the single decoration that gets the most photos at a pavilion party.
A DIY balloon garland kit runs $15–$25 on Amazon and includes a strip, balloons, and glue dots. Inflate the balloons in different sizes — that’s the part most people skip, and it’s the part that makes it look professional. Mix 5-inch, 11-inch, and 16-inch balloons in three coordinating colors.
Attach the garland strip to the front beam of the pavilion with command hooks (the outdoor kind rated for 5 lbs). One garland spanning 8–10 feet across the entrance beam gives you a built-in photo backdrop for every guest who walks in.
Blow up balloons at home before you leave. Bring them in large black trash bags to keep them from escaping in the car. They hold air for 8–12 hours without helium.
3. Throw Heavy-Duty Tablecloths Over the Picnic Tables
Plastic tablecloths from the dollar store blow off in five seconds. I learned this the hard way. Twice.
Fabric tablecloths or heavy-duty flannel-backed vinyl versions stay put. Flannel-backed vinyl costs about $3–$5 per roll at discount stores, and you can cut it to fit. It clings to the table surface. No tape. No clips. No chasing tablecloths across the grass.
If you already own fabric tablecloths, clip them to the table edges with binder clips (the big black office kind). They grip the table lip perfectly, they’re invisible from a few feet away, and a 12-pack costs a dollar.
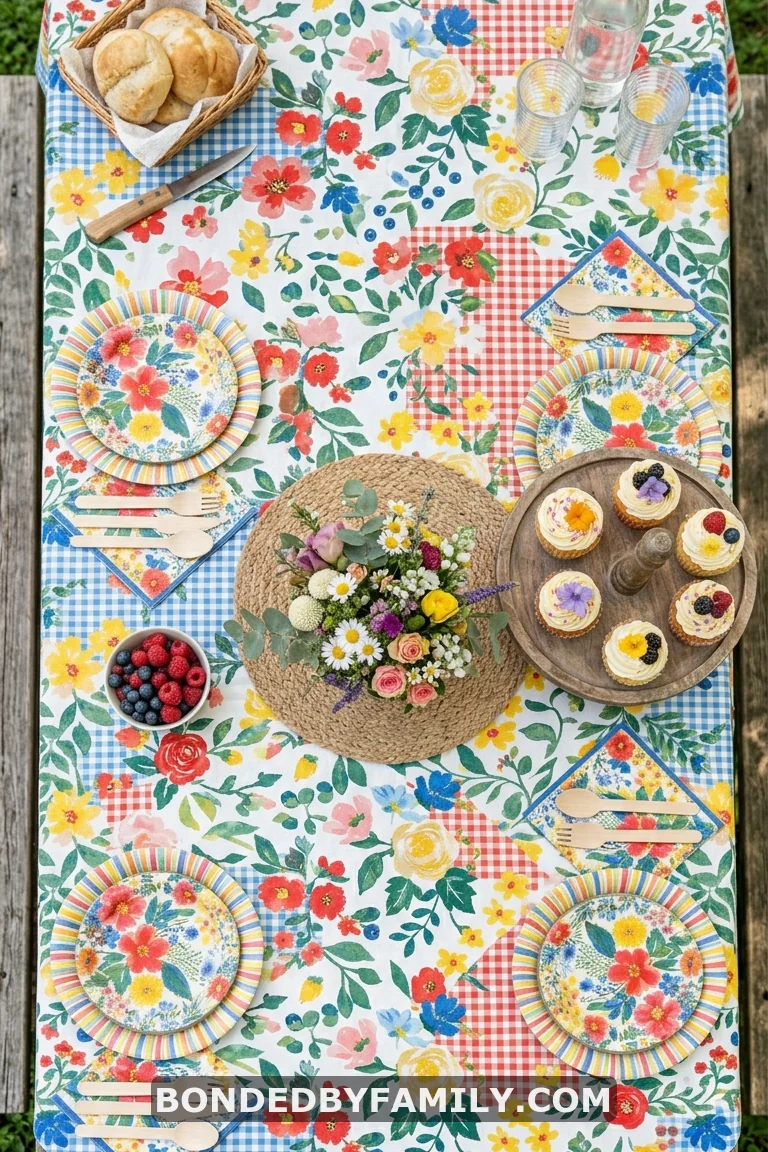
4. Create a Themed Centerpiece for Each Table
Short on time? Mason jar, grocery store flowers, ribbon. Done. Three minutes per table.
Want more theme punch? Fill a clear jar with items that match the party — rubber ducks for a “One” party, small dinosaurs for a dino theme, candy in the party color palette for a tween birthday. Top it with a balloon on a stick.
Cost per centerpiece: $2–$6 depending on what you already own.
5. Build a Photo Backdrop on One Pillar
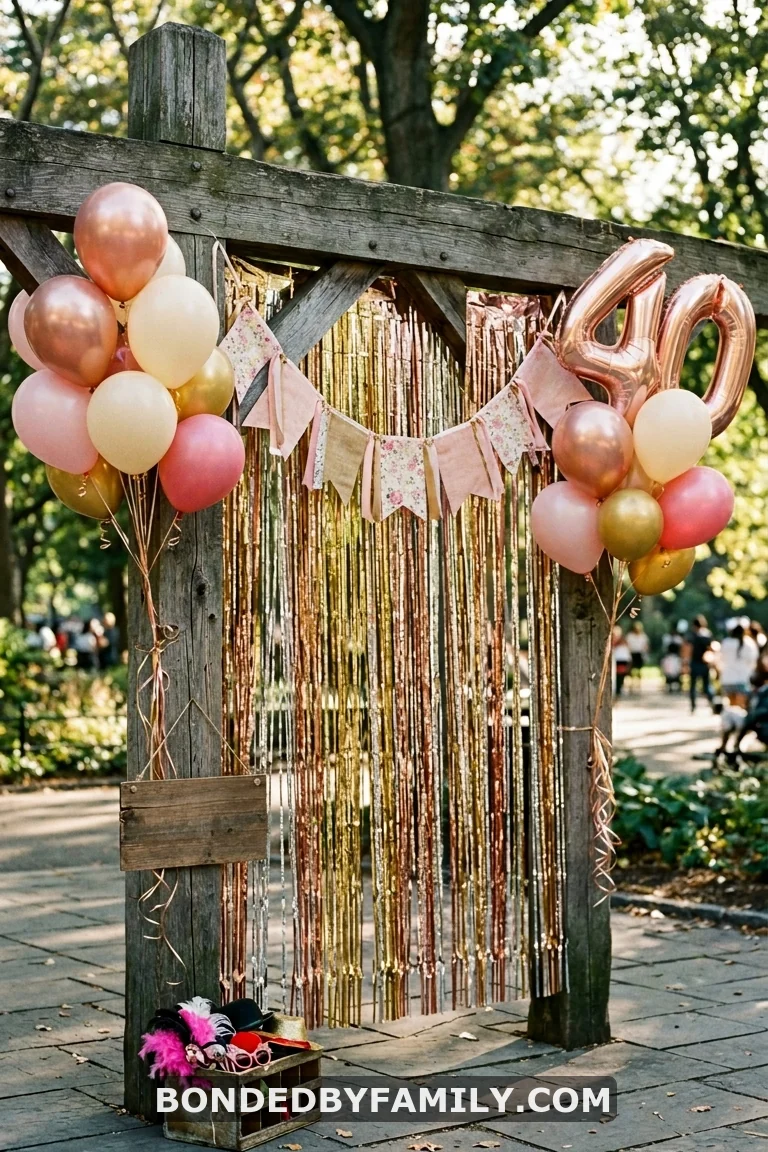
Foil fringe curtains cost $1–$3 each. Hang two side-by-side from the beam behind a pillar, and you have a shiny photo wall in under a minute. Add a personalized banner with the birthday kid’s name and age across the top. Place a small basket of props nearby — party hats, oversized sunglasses, themed headbands.
This becomes the spot where every parent takes a phone photo. Which means your party shows up all over social media. Which means your kid feels like a celebrity. Worth it.
6. Use Pennant Banners and Bunting Between the Pillars
Fabric pennant banners are wind-resistant, reusable year after year, and add color without any effort. String them pillar to pillar at about 7 feet high so adults can walk underneath.
One continuous run of triangular pennants across the pavilion’s open sides creates a “room” feeling inside a roofless structure. It defines the space as yours.
Buy fabric bunting on Amazon for $8–$12, or make your own from scrapbook paper and twine if you enjoy a craft project. The fabric version survives wind better.
7. Anchor Balloon Bouquets to Every Table
Skip helium. Tape a balloon stick (the kind with a cup base) to the center of each table using painters tape on the underside. Cluster three balloons per table.
Total cost for six tables: under $10. Setup time: 15 minutes.
8. Set Up a Dedicated Dessert and Cake Station
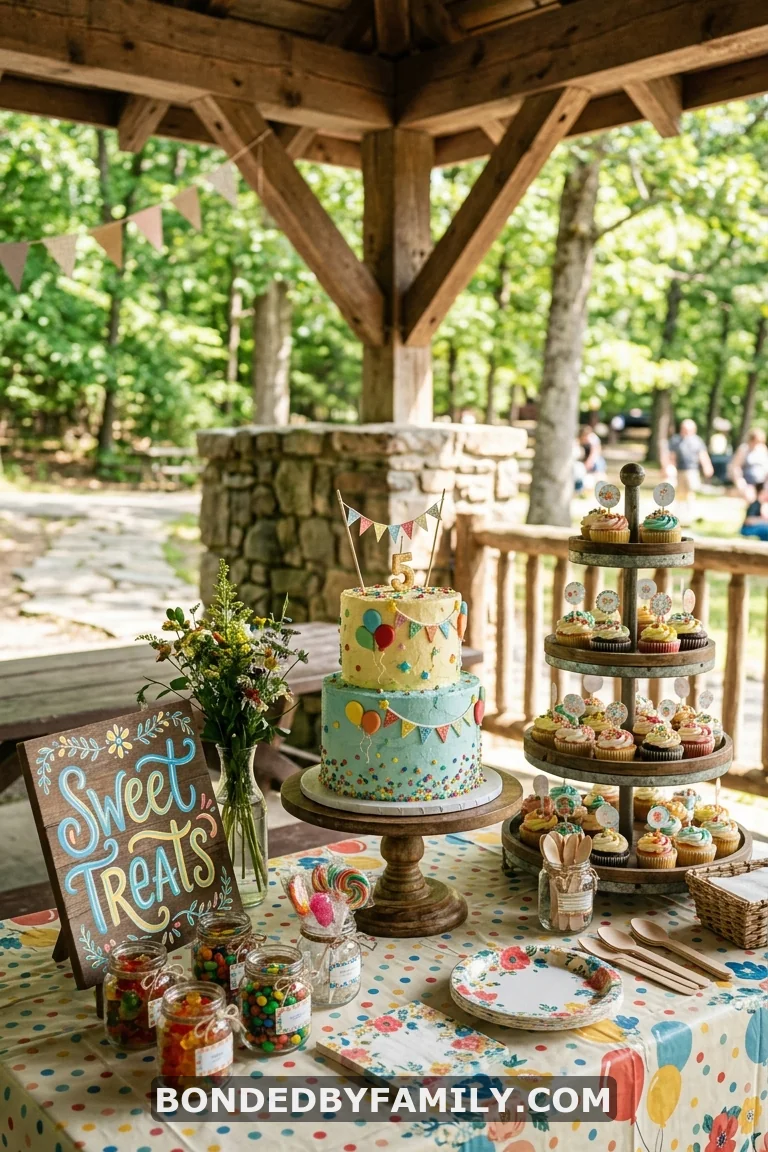
One table becomes the dessert station. Cover it with your nicest tablecloth. Place the cake on a raised stand — even a cardboard box wrapped in wrapping paper works as a riser. Flank it with cupcakes, a cookie tray, or themed treats.
The trick is height variation. Put some items on stands, some flat, some in jars. It photographs well and draws guests over.
Behind the table, hang a small backdrop or a cluster of balloons so every cake photo has a clean background instead of a trash can or parking lot.
9. Drape Tulle or String Lights from the Ceiling Beams
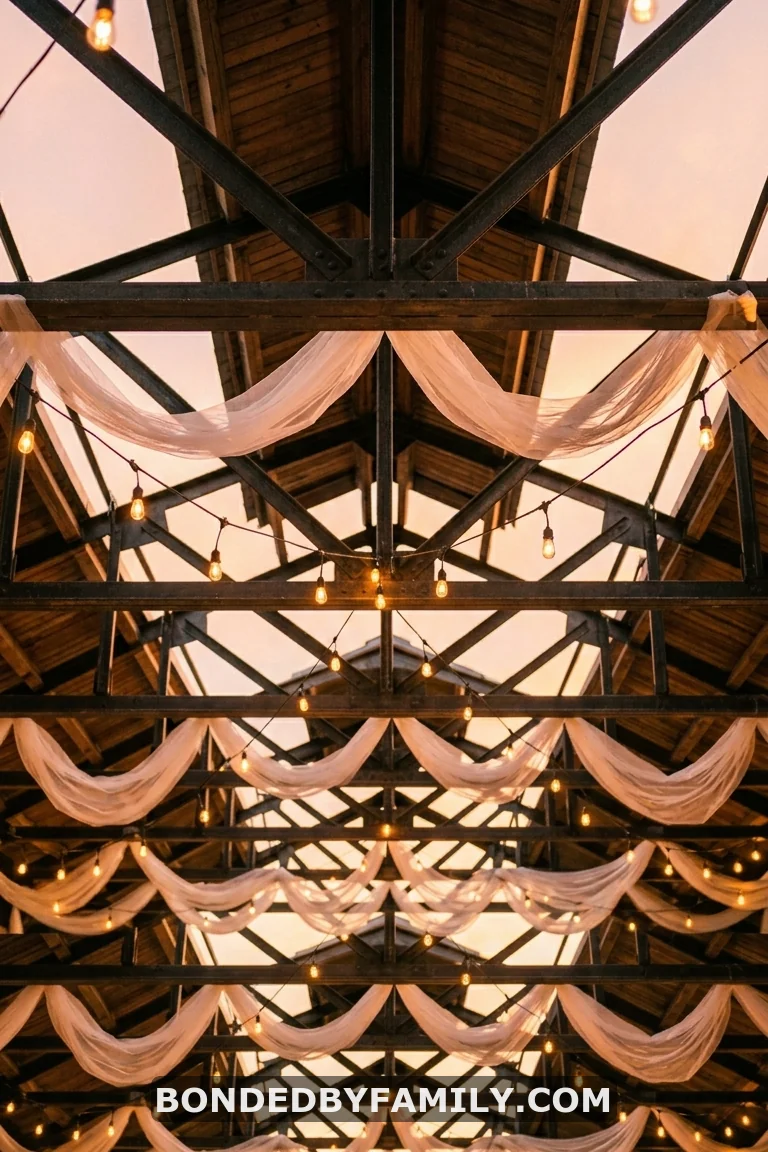
Battery-operated string lights changed the pavilion party game. You need zero outlets. A $9 pack of warm-white fairy lights on a copper wire strand gives you 30 feet of coverage. Drape them in a zigzag pattern across the beams using S-hooks or zip ties.
For a daytime party, swap lights for tulle swags. Buy a roll of tulle in your theme color, drape it loosely from beam to beam, and it catches the breeze in a way that looks intentional rather than chaotic.
If the party runs into the evening, use both. The tulle softens the light. The whole pavilion starts to glow. Guests notice the shift. They stay longer.
10. Place a Welcome Sign at the Pavilion Entrance
A framed chalkboard sign costs $8–$15 and you reuse it for every party for the next decade. Write the birthday kid’s name, age, and a short greeting.
Prop it on a small easel right where people walk in. It signals “you are in the right place” and it gives the first impression that this pavilion party is put together.
11. The Full Pavilion Transformation on a $75 Budget — A Step-by-Step Deep Dive
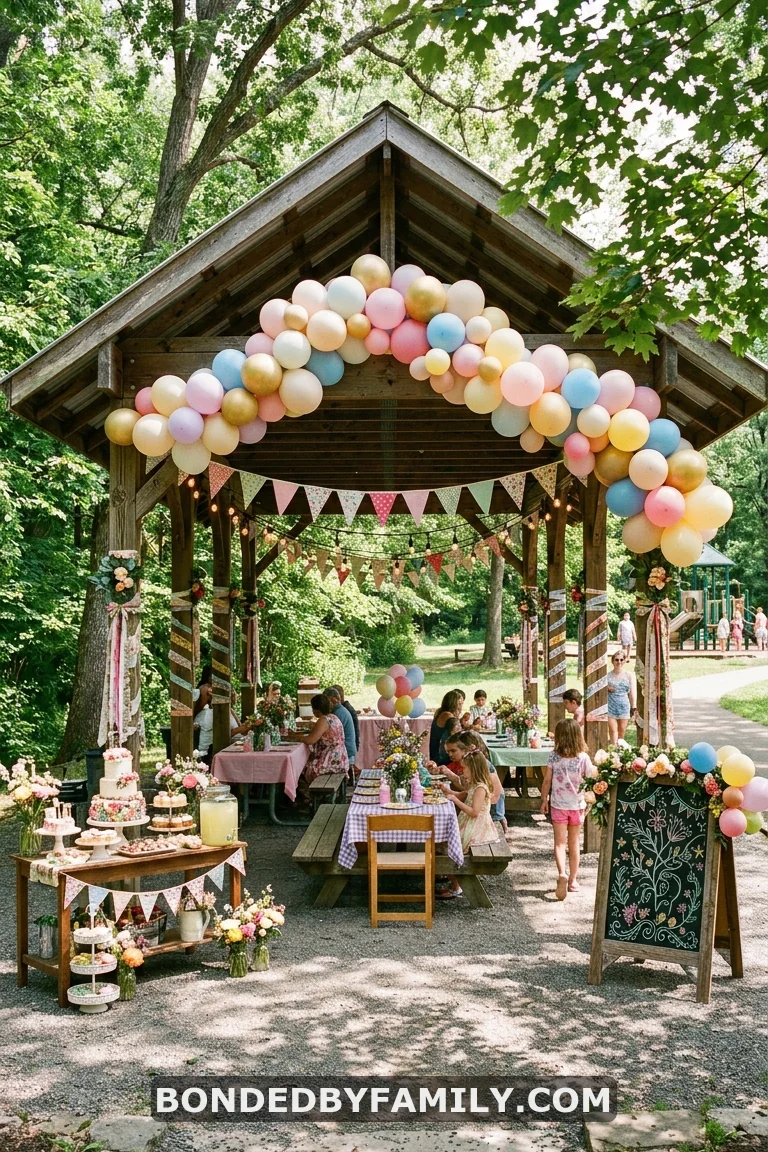
This is the one for anyone who wants to walk into a pavilion and make it unrecognizable. I have done this exact setup four times and it takes about 90 minutes with two people.
What You Need (Full Materials List)
- 1 DIY balloon garland kit, 16 ft: ~$18 (Amazon or Party City)
- 6 yards of tulle or cheesecloth, cut into pillar wraps: ~$9
- 6 heavy-duty flannel-backed vinyl tablecloths: ~$18 (Dollar Tree or Walmart)
- 6 mason jars + 2 bunches of grocery store flowers: ~$10
- 1 pack of battery-operated string lights (30 ft): ~$9
- 1 foil fringe curtain for photo backdrop: ~$2
- 1 fabric pennant banner (12 ft): ~$9
- Total: approximately $75
Step-by-Step Setup (90 Minutes for Two People)
- Arrive 90 minutes before guests. Unload everything onto one picnic table.
- Tablecloths first (10 min). Cover every table. Secure edges with binder clips if it’s breezy.
- Pillar wraps next (15 min). Zip tie the fabric at the top of each pillar, let it drape, cinch with ribbon at waist height.
- String lights overhead (10 min). Drape across beams in a zigzag. Use S-hooks or zip ties at each attachment point. Turn on to test.
- Balloon garland (25 min). This is the longest task. Thread balloons onto the strip, vary sizes, attach to the front beam with command hooks.
- Pennant banner (5 min). String pillar to pillar at roughly 7 feet.
- Photo backdrop (5 min). Hang the fringe curtain from a beam. Add a birthday banner across it.
- Centerpieces (10 min). Place a mason jar with flowers on each table. Add themed elements around them.
- Dessert station (10 min). Set up the cake, cupcakes, and candy on the designated table with the backdrop behind it.
Why This Works
Every Instagram-worthy pavilion party I have seen follows this exact layering formula: table level decorations (tablecloths + centerpieces), eye level decorations (pillar wraps + banners + balloon garland), overhead decorations (lights + tulle). Three layers create the illusion of a fully decorated room.
Common Mistakes to Avoid
- Inflating balloons at the pavilion instead of at home — this eats 45 minutes you do not have
- Using regular scotch tape on outdoor surfaces — it fails within minutes in heat or humidity
- Hanging decorations from trees instead of the pavilion structure — park regulations often prohibit this
- Forgetting scissors, zip ties, and a step stool — bring a “tool bag” with backup supplies
- Setting up the dessert table in direct sunlight — frosting melts in 20 minutes on a warm day
The Cost Reality
Professional pavilion decoration services charge $200–$600 depending on your city. This $75 DIY version gets 80% of the visual impact at 15% of the cost. The gap? A professional uses fresh flowers and helium. You use grocery store bouquets and air-filled balloons. From 6 feet away in a photo, nobody can tell the difference.
12. Add a Drink Station with Labeled Dispensers
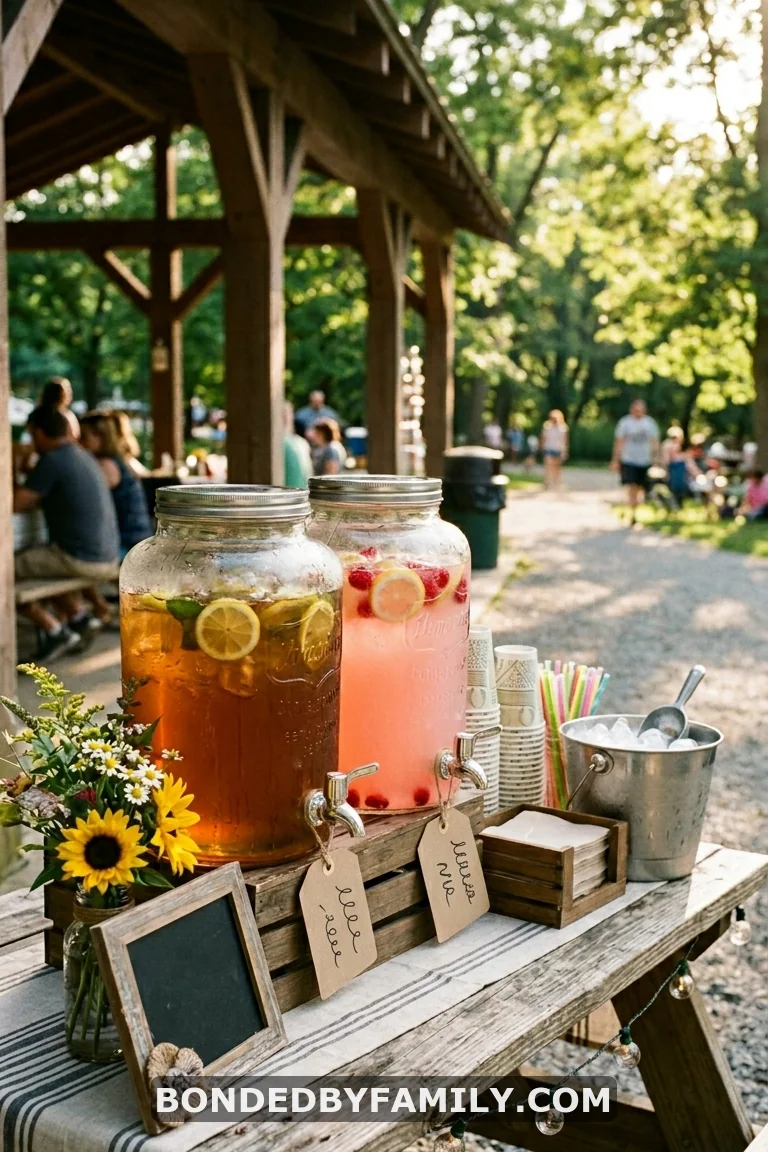
Fill two clear beverage dispensers with lemonade and fruit-infused water. Set them on a separate small table near the entrance. Label each one with a themed name — “Dino Juice” for a dinosaur party, “Mermaid Water” for an under-the-sea theme.
Guests serve themselves. You avoid running back and forth with drinks. The dispensers double as decoration.
13. Use Nature as Free Decor
The park is already pretty. Work with it.
Scatter pine cones along the center of each table for a woodland party. Collect wildflowers and put them in jars. Lean fallen branches against a pillar with a ribbon tied around them. Place smooth rocks painted with the birthday kid’s name at each table setting.
Cost: zero dollars. Time: whatever you have on your morning walk to gather materials.
14. What NOT to Bring to a Pavilion Party (The Cautionary List)
I watched a friend set up a gorgeous pavilion party with tissue paper pom-poms, lightweight streamers, confetti, and tall skinny candlesticks. It looked stunning for twelve minutes. Then the wind picked up.
The pom-poms detached and rolled through the playground. Confetti scattered into the grass and she spent thirty minutes picking it out of the lawn (the park had a “leave no trace” rule). A candlestick toppled onto the cake table. Kids popped balloons that had been left floating without anchors. One streamer wrapped itself around a toddler’s leg.
Here is what to leave at home:
Loose confetti or glitter — most parks prohibit it, and it’s nearly impossible to clean off grass. Tall, narrow candles — wind and open structures make these a fire risk. Lightweight tissue paper decorations without anchors — they become litter within minutes. Helium balloons without weights — they escape and become environmental hazards. Glass vases or containers — one kid running by a table is all it takes. Piñatas in many parks require a permit, and the candy scatters into places you cannot reach.
Stick with decorations that are weighted, clipped, zip-tied, or otherwise secured to the structure. If it can blow away, it will.
15. Create a Personalized Birthday Banner
A custom “Happy Birthday [Name]” banner from Etsy costs $10–$20 and arrives within a week. Hang it across the front beam below the balloon garland or across the back wall of the pavilion.
For a free version, print large letters at home on cardstock, punch holes in the corners, and string them onto twine. Five-year-olds do not care if the font is fancy. They care that their name is huge and everyone can see it.
16. Lay a Ground Blanket for a Picnic Zone
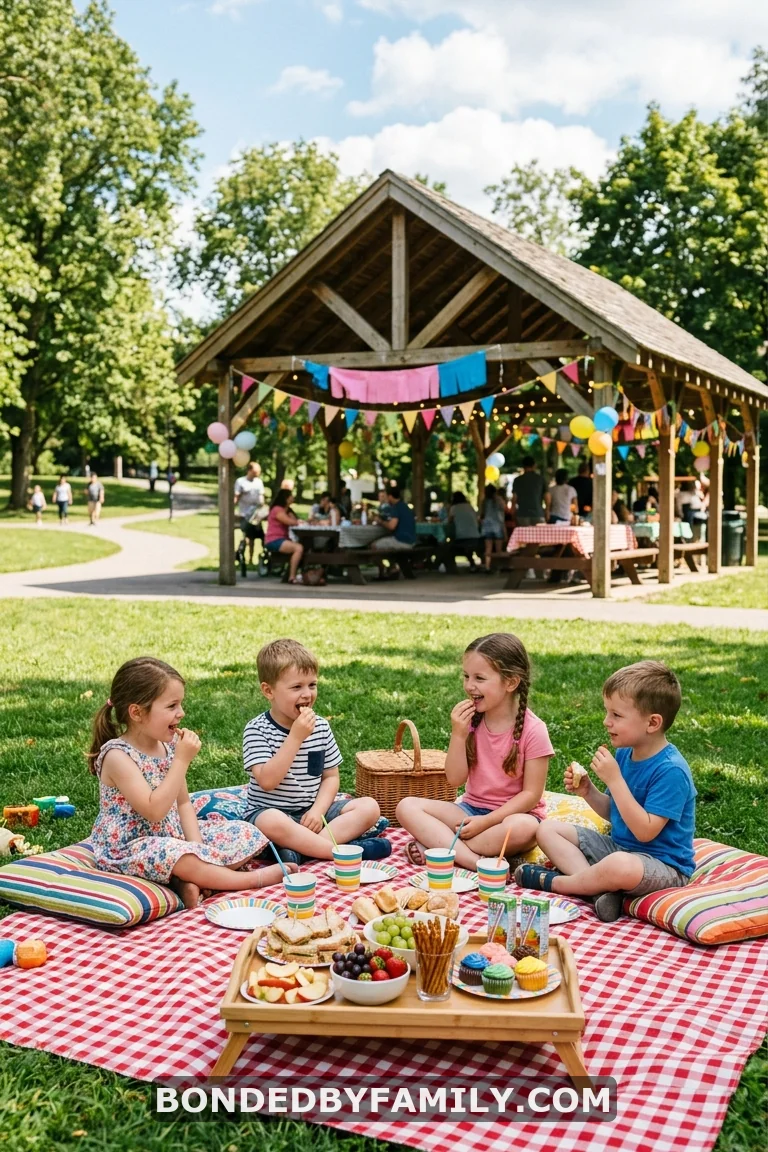
Not every guest fits at the picnic tables. Spread a large blanket or two on the grass beside the pavilion and toss a few outdoor cushions on it. Add a low tray with snacks.
Kids migrate to the ground naturally. This gives them their own space while adults use the tables. It also extends the party beyond the pavilion footprint without any extra rental cost.
17. Plan Your Cleanup Kit Before You Decorate
Bring a large trash bag, a recycling bag, a broom, and a pack of wet wipes. Stash them under a table when you arrive.
When the party winds down, cleanup takes 15 minutes if everything is organized. Zip-tie decorations cut fast with scissors. Fabric wraps fold into a tote bag for next time. Balloon garlands compress into a single trash bag. Your deposit stays safe. The park stays clean. You leave feeling like you handled the whole thing like a pro — because you did.
FAQ
How do you decorate a park pavilion for a birthday on a tight budget?
Start with tablecloths and a balloon garland — those two items create the biggest visual impact for the least money. Add mason jar centerpieces with grocery store flowers and a personalized banner. You can transform a pavilion for under $30 if you focus on table-level and entrance-level decorations only.
How far in advance should I reserve a park pavilion for a birthday party?
Book at least 3–4 months ahead, especially for spring and summer weekends. Many parks and recreation departments fill their pavilion calendar quickly. Call your local parks department or check their website for reservation forms and fees, which typically run $30–$100 depending on location and amenities.
What decorations hold up best in the wind at a park pavilion?
Fabric wraps, heavy-duty tablecloths, secured balloon garlands (attached with command hooks), and weighted centerpieces handle wind far better than paper streamers or loose confetti. Zip ties and binder clips are your best tools for securing anything to a pavilion structure.
Can I hang things from a park pavilion’s beams and pillars?
Most parks allow temporary, non-damaging attachments. Use command hooks, zip ties, or painter’s tape rather than nails, staples, or duct tape. Check your specific park’s rules when you reserve. Some parks include decoration guidelines in their rental agreement.
How long does it take to set up park pavilion decorations for a birthday?
A basic setup (tablecloths, centerpieces, banner, balloon bouquets) takes about 30 minutes. A full transformation with a balloon garland, pillar wraps, string lights, photo backdrop, and dessert station takes about 90 minutes with two adults working together. Arrive early and bring a step stool.