I’ll be honest with you—when I started planning my sister’s baby shower last spring, I nearly had a heart attack looking at centerpiece prices. $40 for ONE arrangement? For something people will glance at for three seconds?
No, thank you.
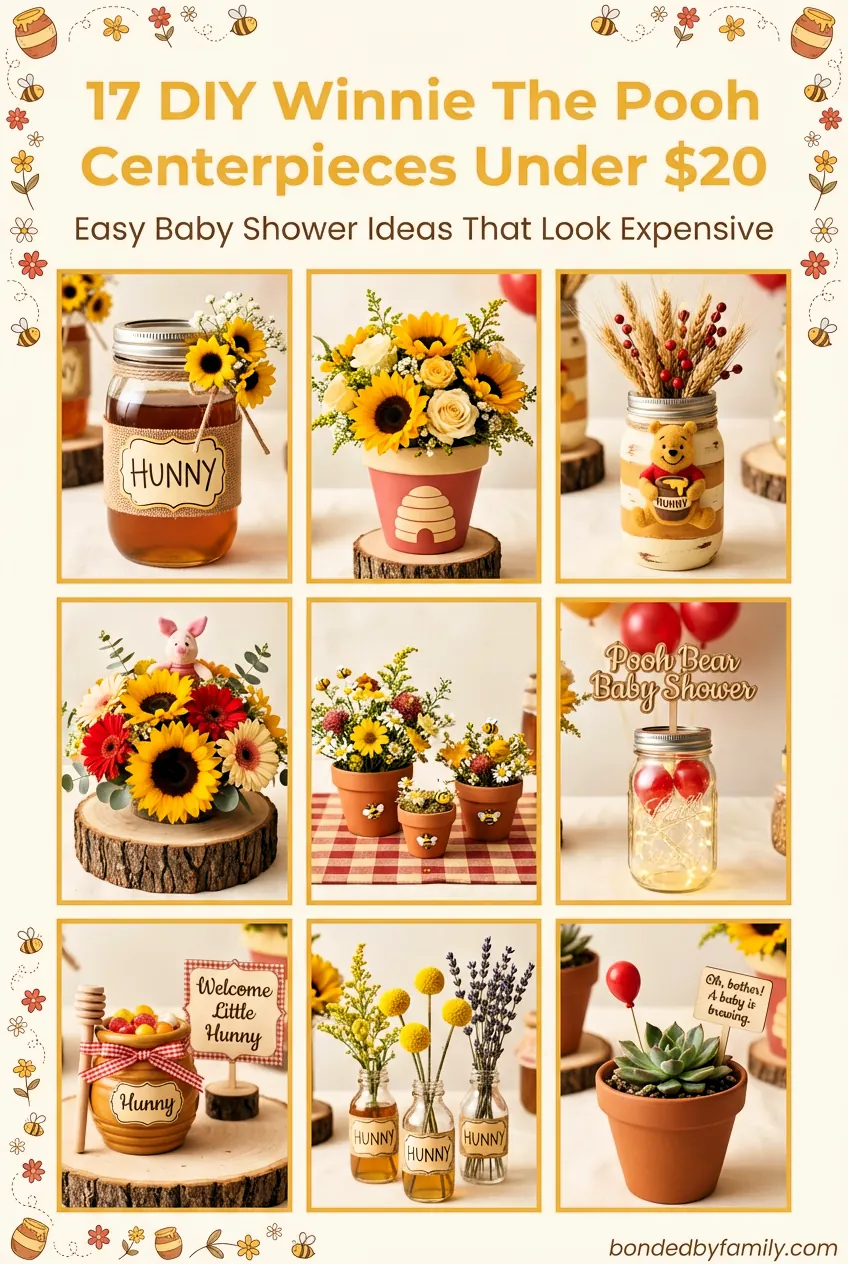
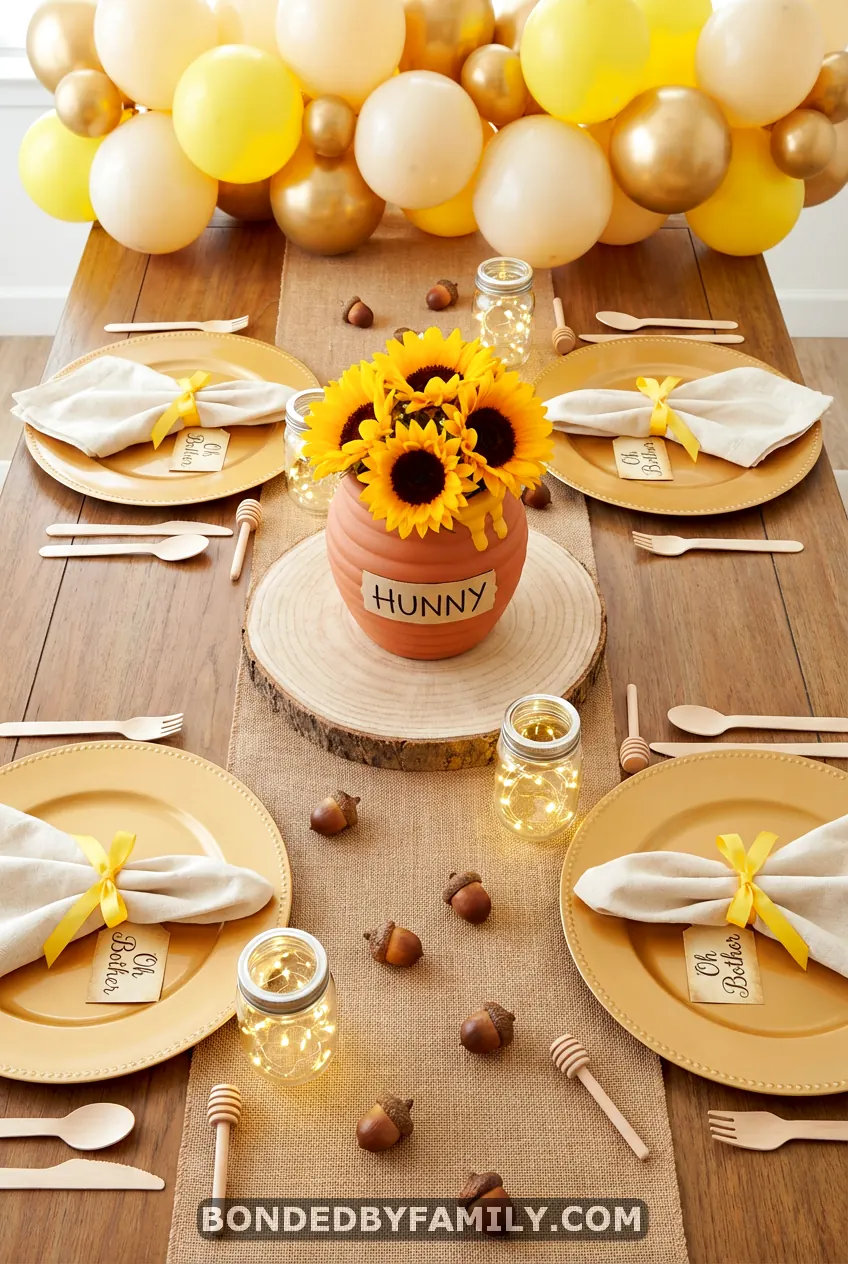
That’s when I dove headfirst into DIY Winnie the Pooh centerpieces, and let me tell you, I discovered something magical. You can create these adorable Hundred Acre Wood centerpieces for a fraction of the cost, and they’ll look like you hired a professional event designer. I’m talking mason jar honey pots dripping with baby’s breath, rustic wood stumps topped with sunflowers, and terracotta pots that scream “hunny” without screaming at your wallet.
The best part? Most of these take less than 30 minutes to make, and you probably already have half the supplies hiding in your craft drawer.
Why These Centerpieces Hit Different
Look, I’ve been to approximately one million baby showers (okay, maybe just fifteen, but who’s counting?), and here’s what I’ve noticed: the ones everyone remembers aren’t the fanciest. They’re the ones that feel warm, nostalgic, and like someone actually cared enough to make them by hand.
Winnie The Pooh centerpieces have this built-in advantage because they tap into something deeper than just “cute baby stuff.” We all grew up with Pooh Bear. We all remember the Hundred Acre Wood. When you walk into a shower and see those honey pots and sunflowers, it’s like being wrapped in the world’s coziest blanket.
Plus—and this is huge—they’re incredibly forgiving for craft newbies. No one expects perfection from a rustic woodland aesthetic. That slightly wonky bow? Totally on-brand. That flower stem is pointing the wrong way? Adds charm. You literally cannot mess this up.
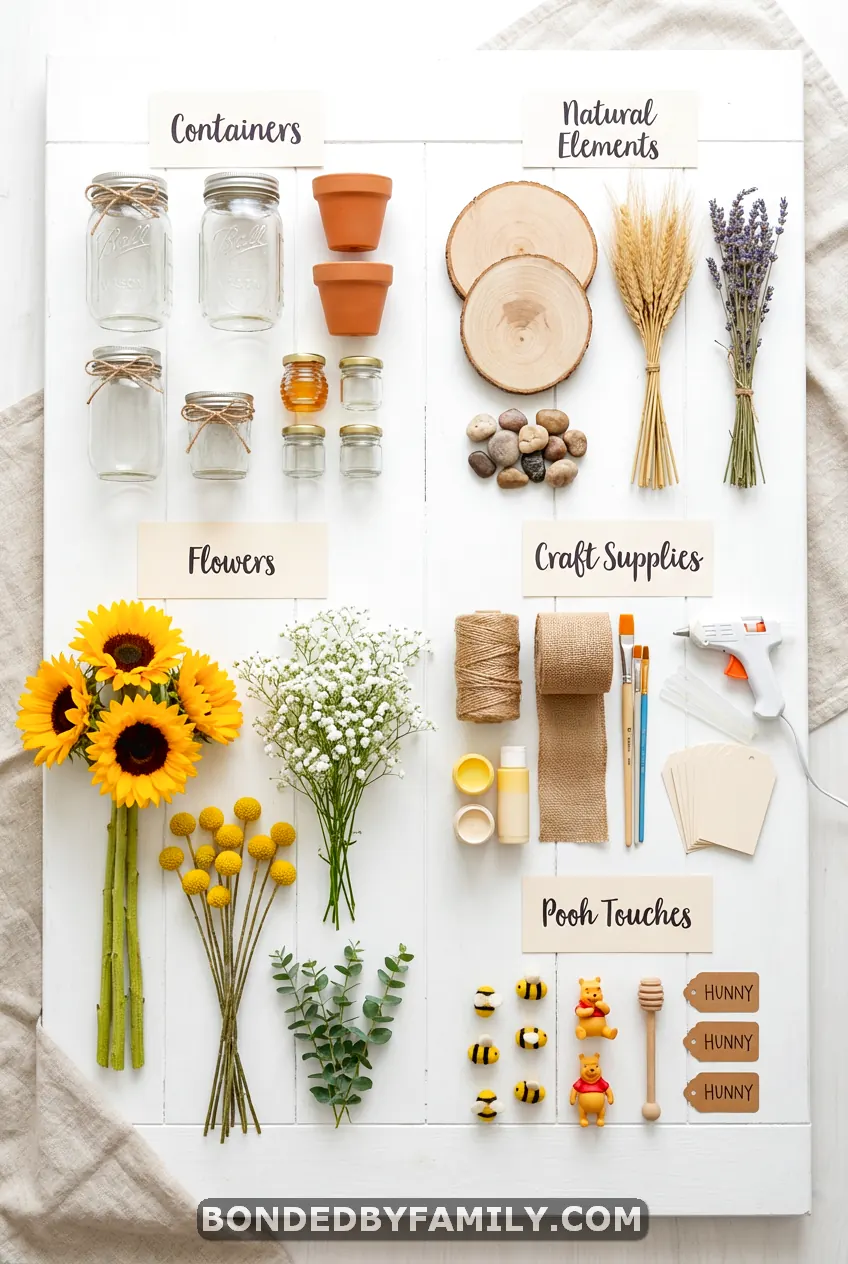
The Essential Supply List (Stock Up Once, Use Forever)
Before we dive into the specific ideas, let me save you from making seventeen trips to the craft store. Here’s your master shopping list—and yes, you can get most of this from the dollar store:
Container Basics:
- Mason jars (quart and pint sizes)
- Terracotta pots (4-6 inch diameter)
- Small wooden crates or boxes
- Glass cylinder vases
Natural Elements:
- Wood slices/tree stumps (various sizes)
- Burlap ribbon
- Twine or jute rope
- Moss (sheet moss or Spanish moss)
Flowers & Greenery:
- Sunflowers (artificial or real)
- Baby’s breath
- White daisies
- Eucalyptus sprigs
- Filler greenery
Craft Supplies:
- Acrylic paint (terracotta, cream, honey gold)
- Hot glue gun + glue sticks
- Printable labels or label maker
- Mod Podge
- Sandpaper (for distressing)
Pooh-Specific Touches:
- Red and yellow ribbon
- Miniature honey dipper sticks
- Bee decorations or stickers
- Winnie The Pooh figurines (optional)
Total investment for supplies to make 6-8 centerpieces? About $45-60. That’s $7-10 per centerpiece versus $30-50 for pre-made ones.
The Classic Honey Pot Collection
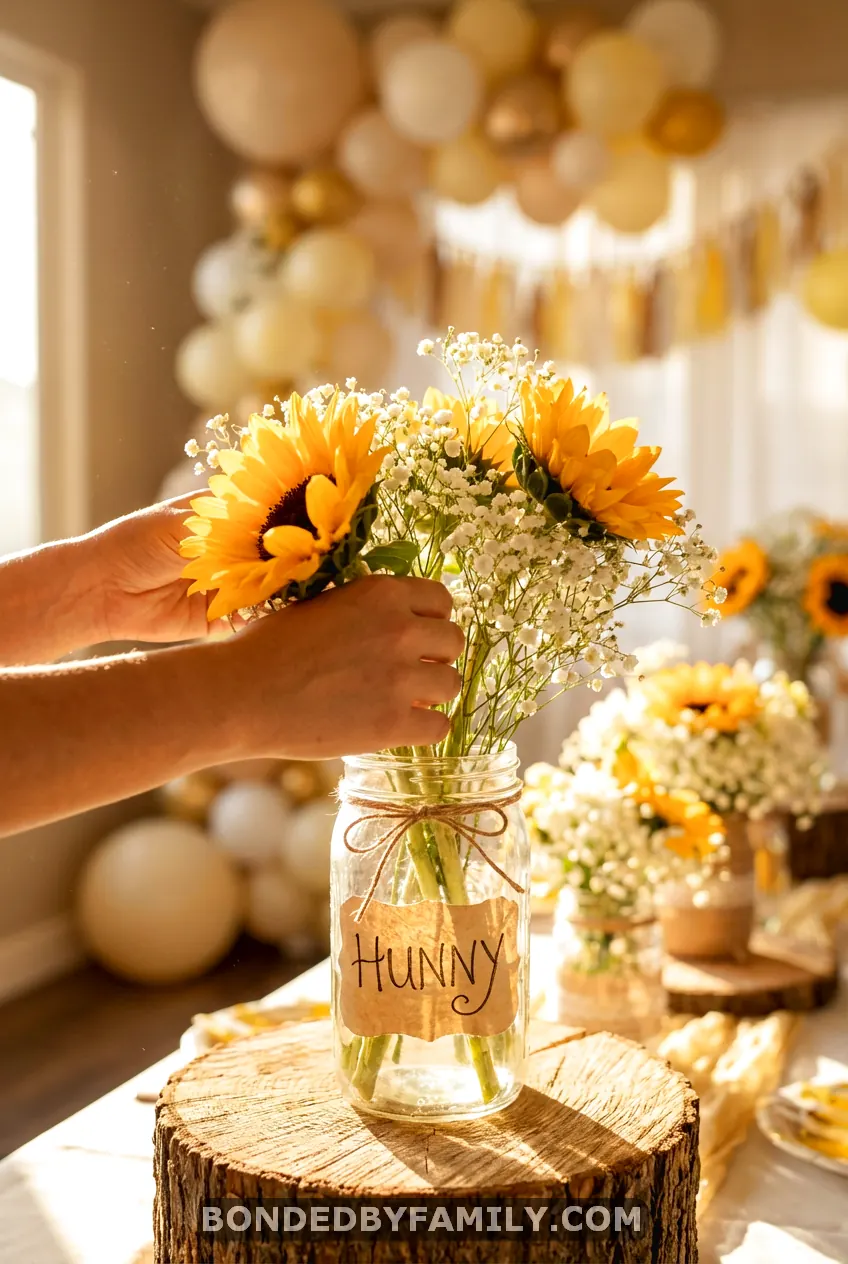
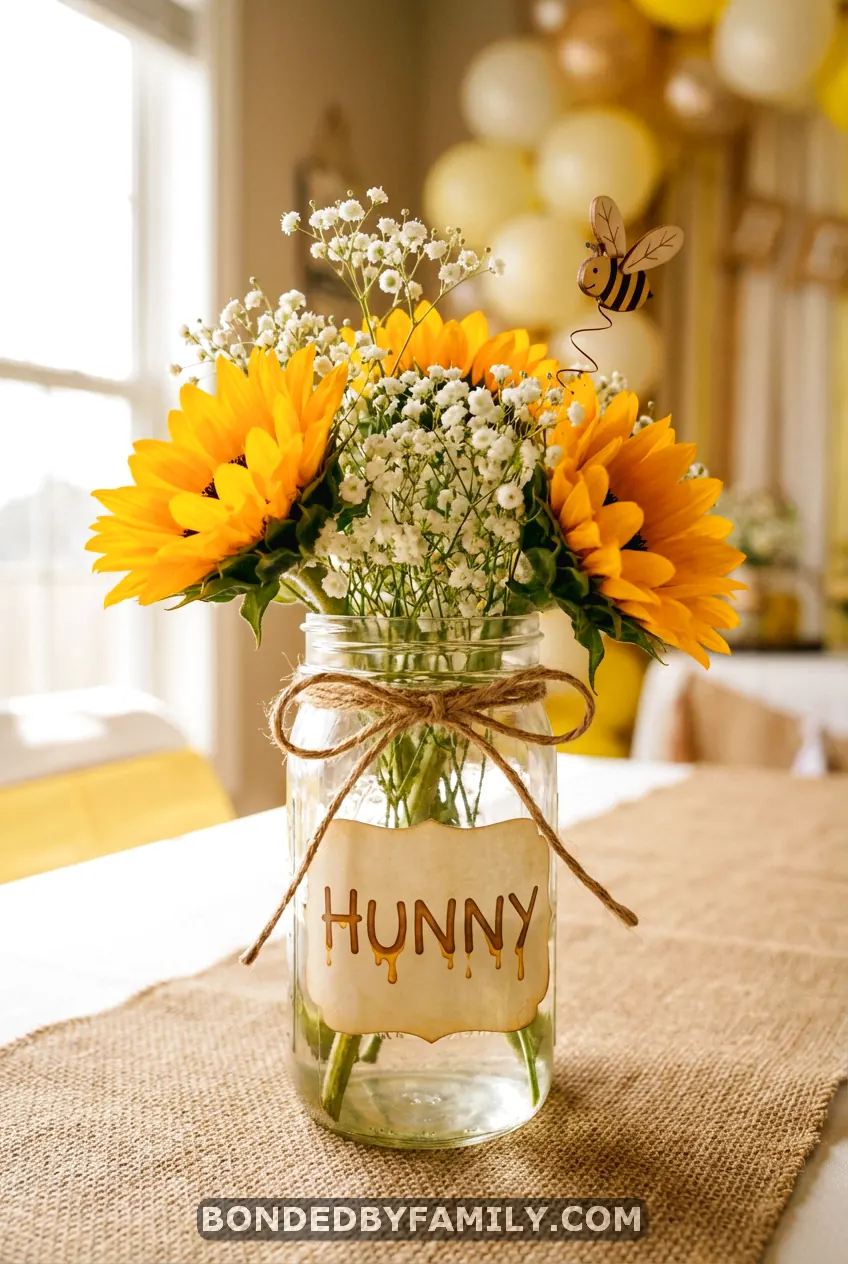
1. The OG Honey Pot Mason Jar
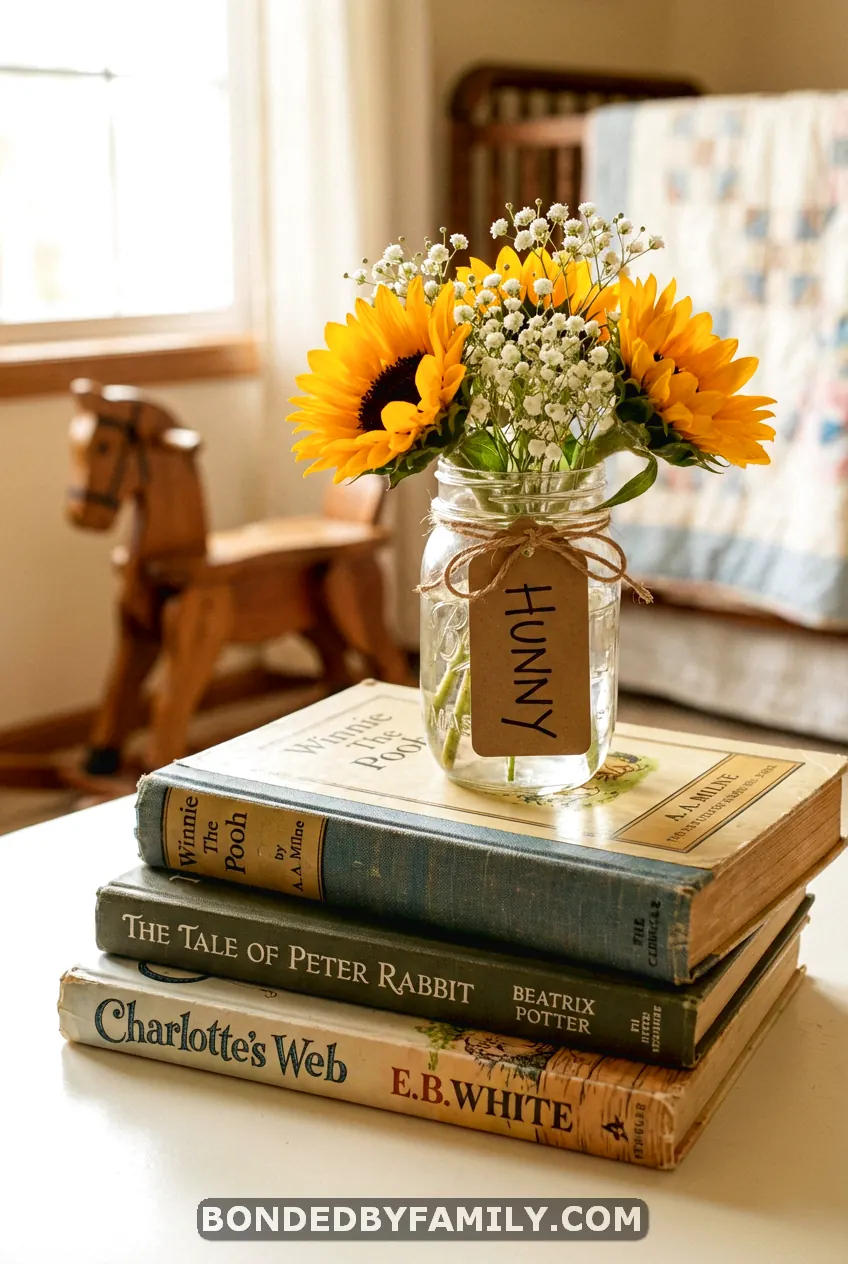
This is the one that started my whole obsession. You take a regular mason jar, slap a “HUNNY” label on it (you can print these or hand-letter them if you’re feeling fancy), fill it with sunflowers and baby’s breath, and boom—instant Hundred Acre Wood vibes.
The trick that elevates it: Wrap twine around the neck of the jar three times and tie a small bow. Add one tiny wooden bee on a wire and tuck it into the flowers. That little detail makes people go “awww” every single time.
Cost per centerpiece: $6-8
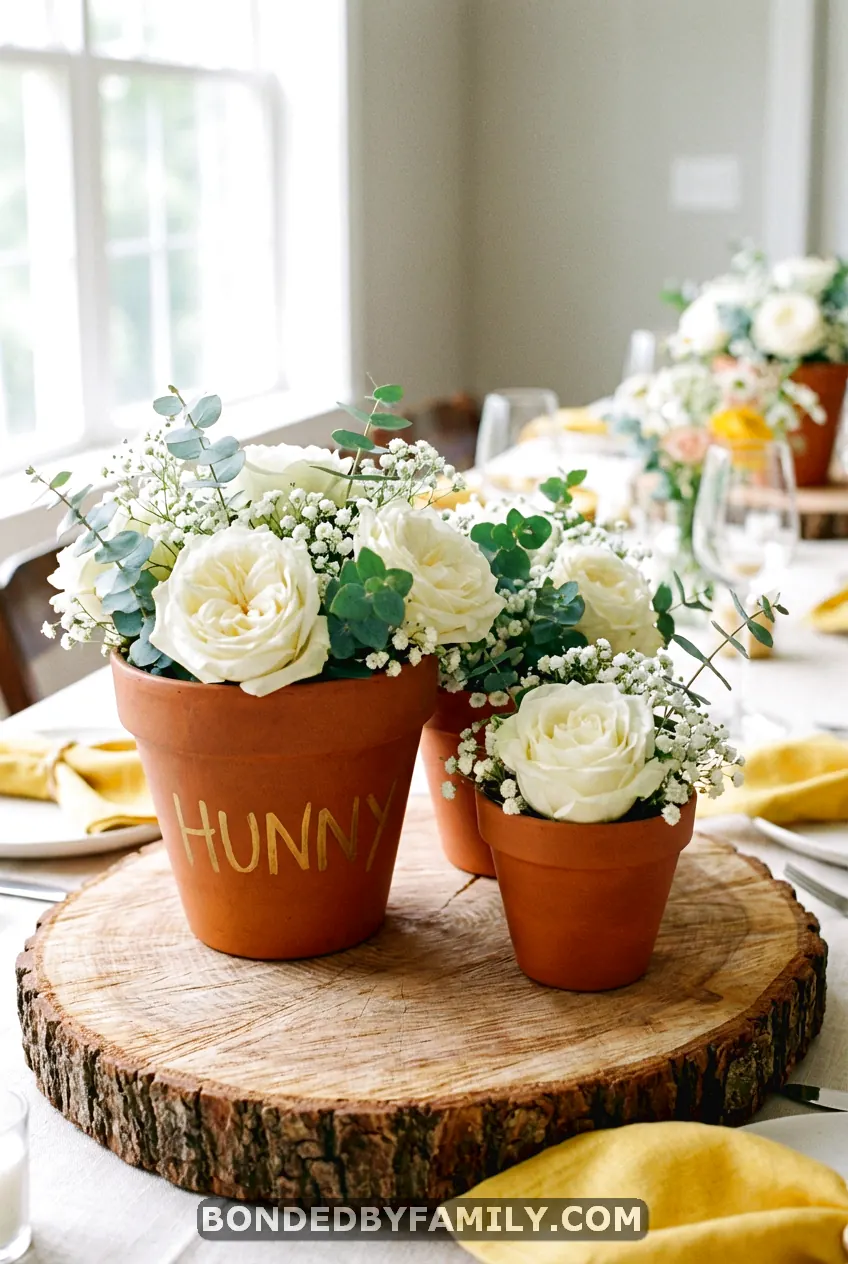
2. Terracotta Honey Pot Trio
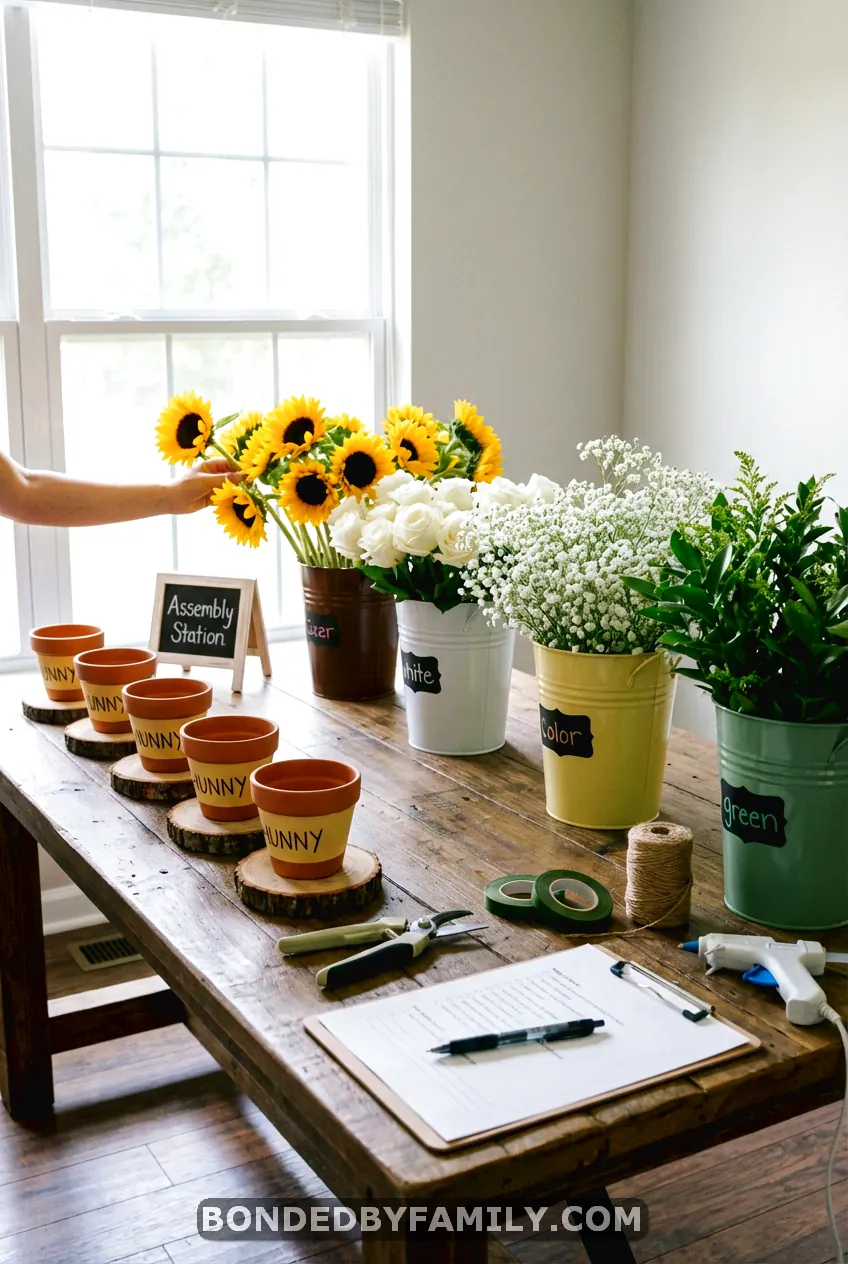
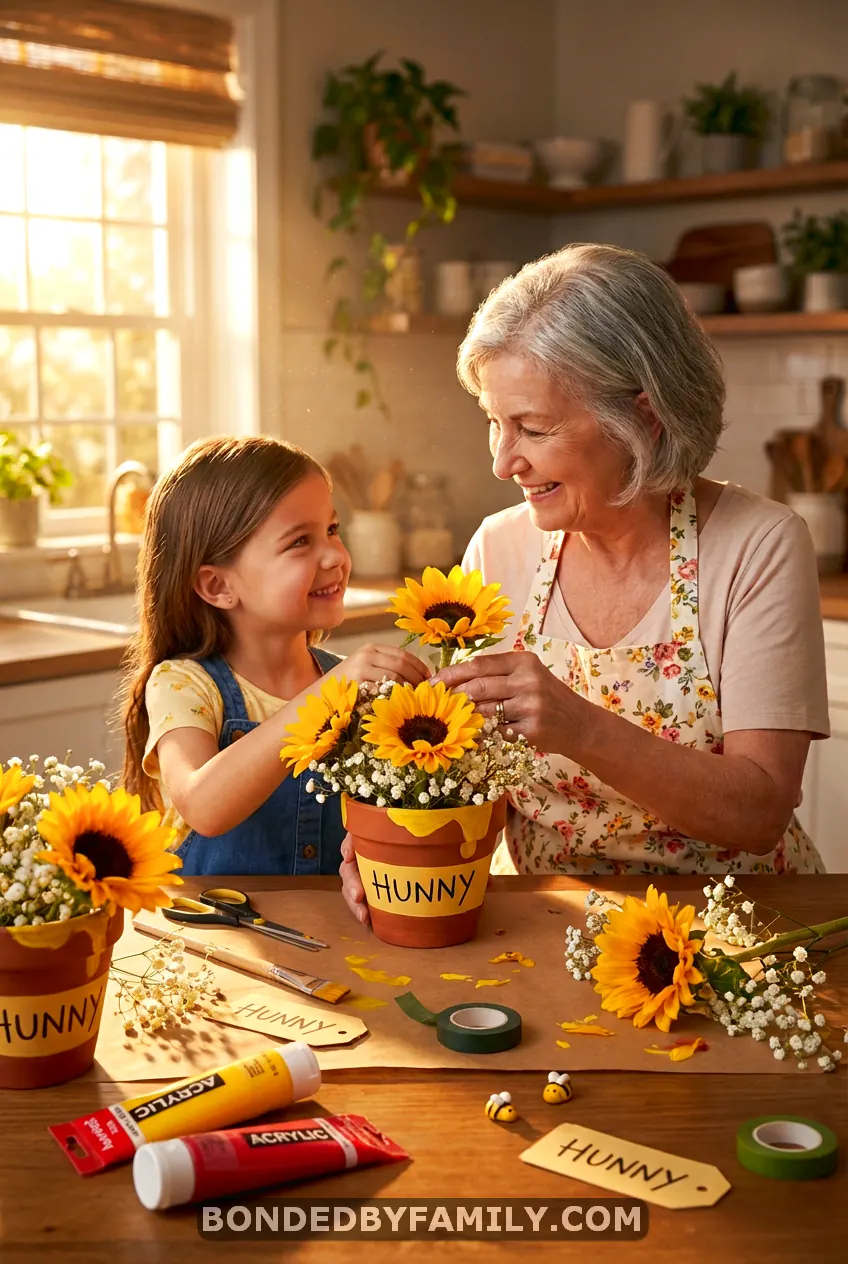
Buy three terracotta pots in different sizes (small, medium, large). Paint the word “HUNNY” on the largest one in honey-gold paint. Fill each with white flowers—I love using white roses, carnations, or ranunculus because they create this gorgeous contrast against the terracotta.
Arrange them in a cluster on a wood slice. The varying heights create visual interest without trying too hard.
Budget hack: Dollar store terracotta pots work perfectly. Just give them a light sanding first so the paint adheres better.
Cost per centerpiece: $10-12
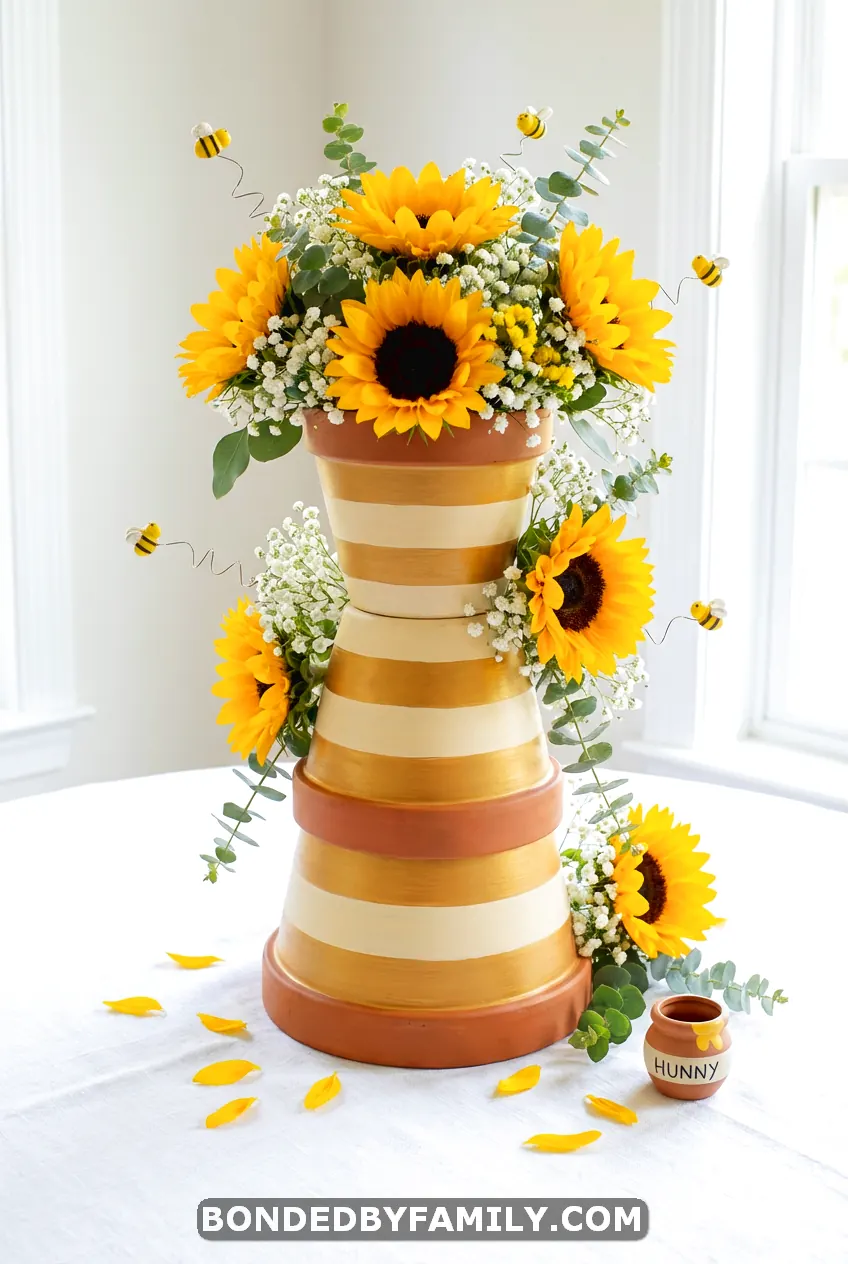
3. The Beehive Stack
Stack three small terracotta pots upside down (graduating sizes) to create a beehive shape. Paint horizontal stripes in honey-gold and cream. Top the whole thing with a gorgeous sunflower arrangement bursting from the top pot.
This one always gets gasps. It looks complicated, but it takes maybe 20 minutes once the paint dries.
Pro tip: Use a foam ball wedged in the top pot to hold your flowers instead of floral foam. It’s easier and cheaper.
Cost per centerpiece: $8-10
The Rustic Woodland Wonders
4. Tree Stump Sunflower Display
If you can get your hands on wood slices or tree stumps (check craft stores, Etsy, or literally just ask someone who chops wood), you’ve hit the jackpot. These are the foundations for the most Instagram-worthy centerpieces.
Place a mason jar or small vase in the center of a large wood slice. Fill with sunflowers. Scatter smaller wood slices around it, each holding a votive candle or a small bud vase with a single white flower.
What makes it special: The natural wood grain tells its own story. No two are alike, which means each table’s centerpiece has its own personality.
Cost per centerpiece: $12-15

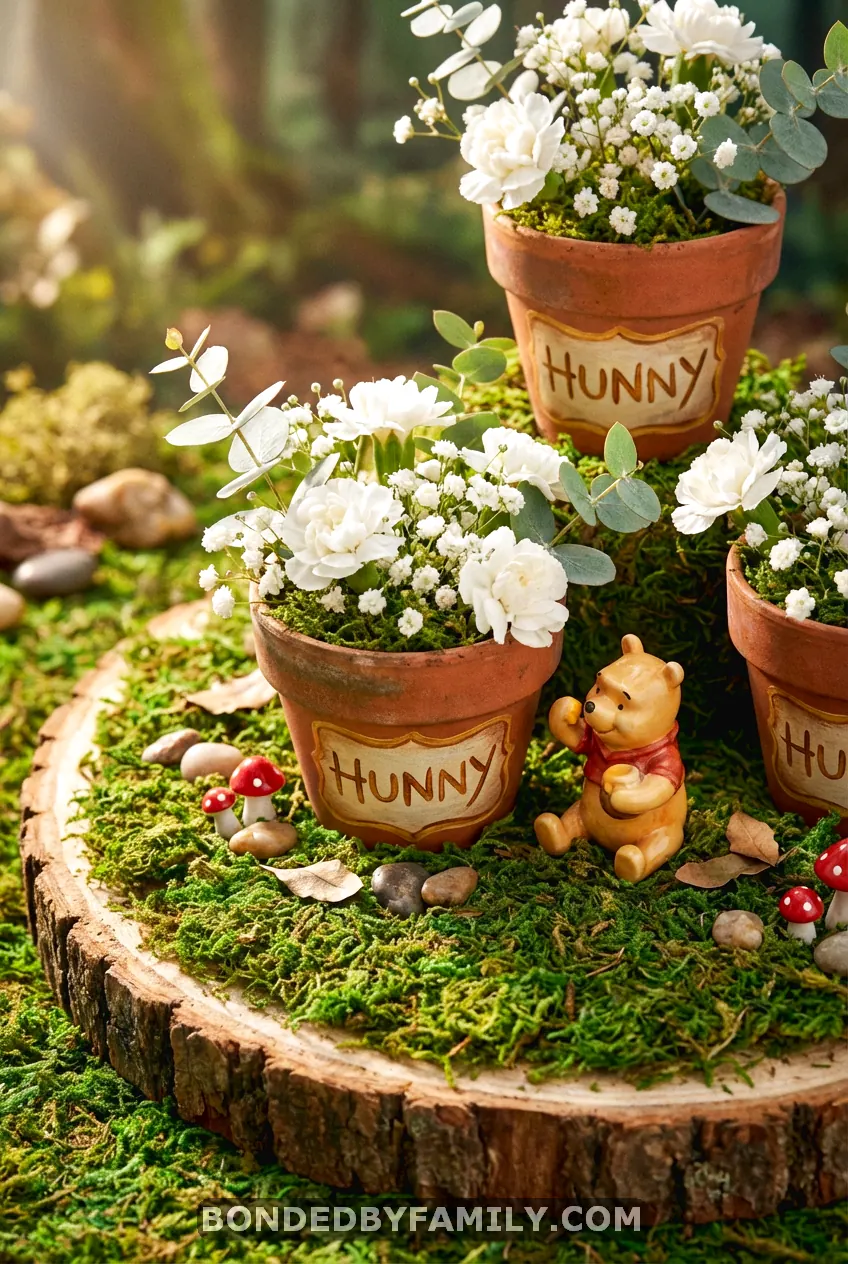
5. Moss and Honey Pot Garden
Cover a wood slice completely with sheet moss (glue it down). Nestle 2-3 small terracotta pots painted with “HUNNY” labels into the moss. Fill them with white flowers and greenery. Add miniature Pooh figurines if you’re feeling extra.
This creates a literal little Hundred Acre Wood scene on each table. Kids especially love these because they can spot Pooh hiding in the arrangement.
Cost per centerpiece: $14-17
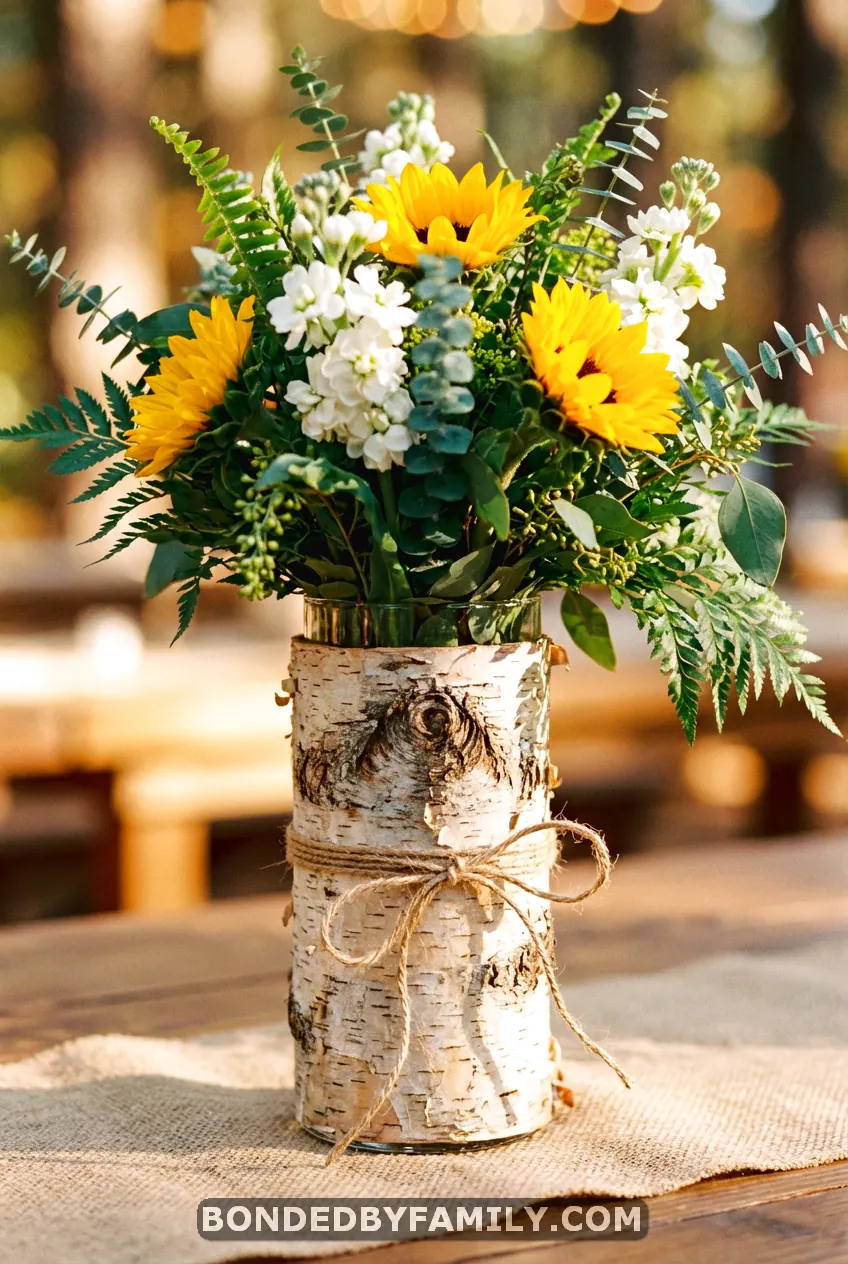
6. Birch Bark and Burlap Beauty
Wrap a cylinder vase or large mason jar in birch bark (you can buy rolls of it) and secure with twine. Fill with a wild, loose arrangement of sunflowers, white stock flowers, and lots of greenery. The birch bark gives it that Christopher Robin forest floor vibe.
Styling note: Don’t make this too perfect. The whole point is that “just picked from the woods” aesthetic. Let stems stick out at odd angles. Let it breathe.
Cost per centerpiece: $9-11
The Budget-Friendly Quick Wins
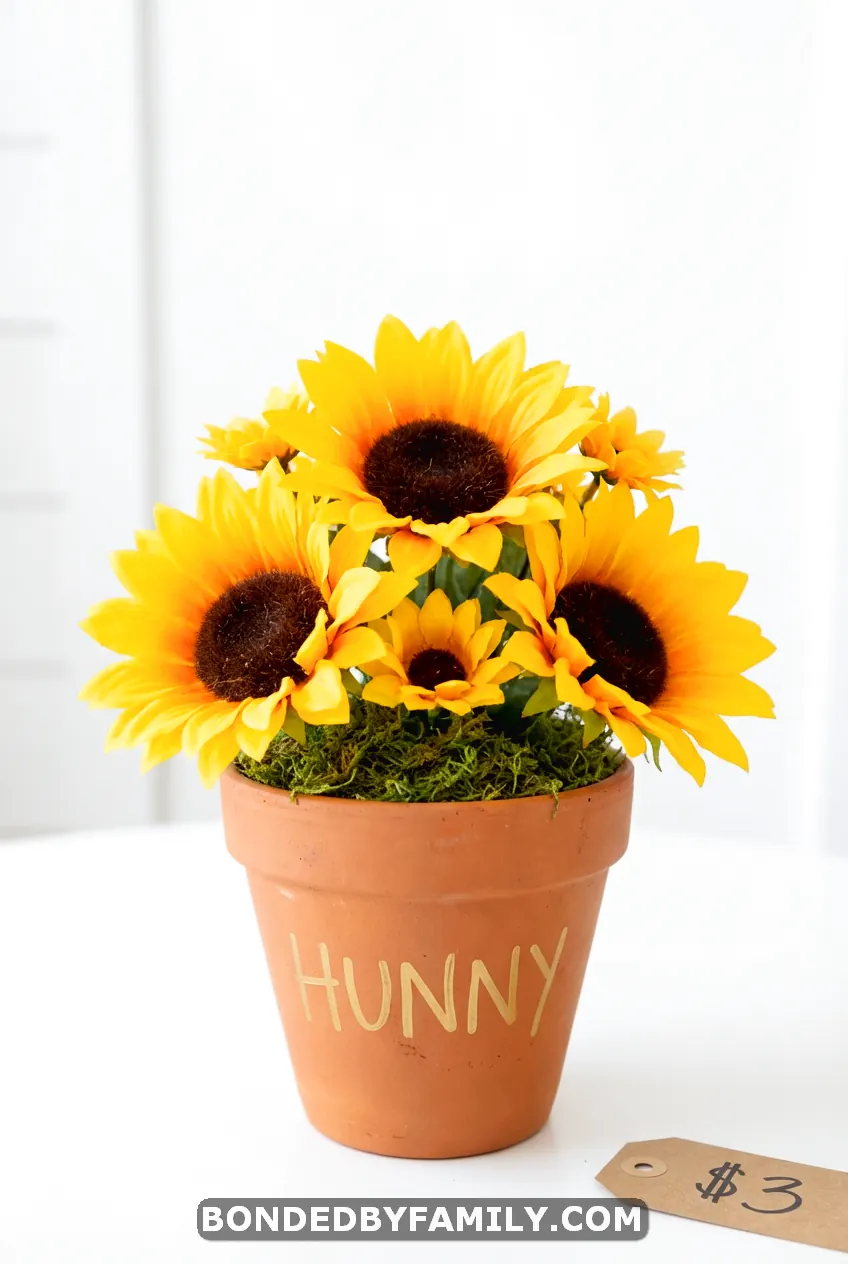
7. The Dollar Store Knockout
Three items from the dollar store: One terracotta pot, one bunch of artificial sunflowers, one bag of decorative moss. Paint “HUNNY” on the pot. Stick flowers in. Cover the base with moss. You’ve just created a $3 centerpiece that looks like it cost $30.
Real talk: I made six of these in under an hour while watching Netflix. They were crowd favorites at the shower.
Cost per centerpiece: $3-4
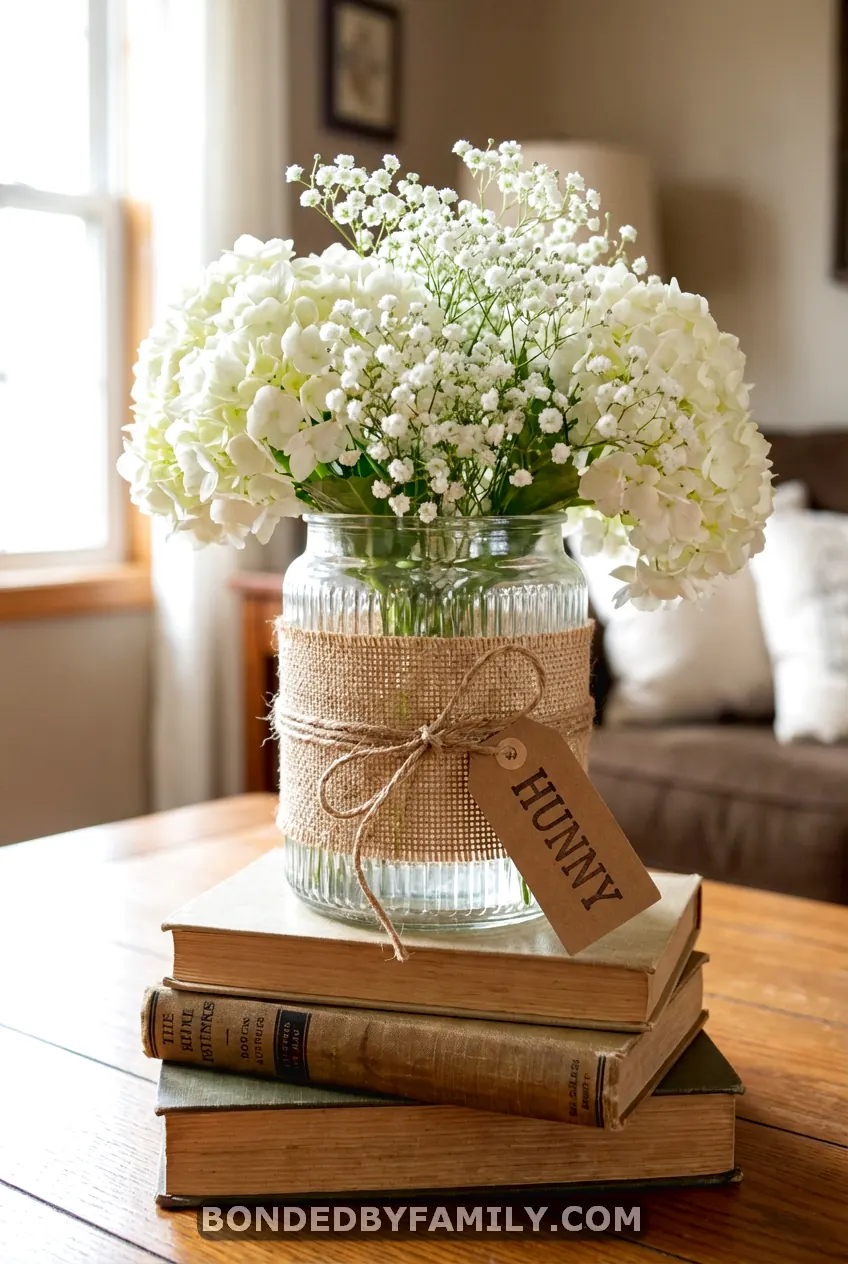
8. The Repurposed Candle Jar
You know those big candles from Bath & Body Works that you finish and feel guilty throwing away? Clean them out, remove the labels, and fill them with flowers. Wrap the outside with burlap and a “HUNNY” tag.
Instant centerpiece. Zero additional cost if you’re a candle hoarder like me.
Cost per centerpiece: $2-3 (just flowers)
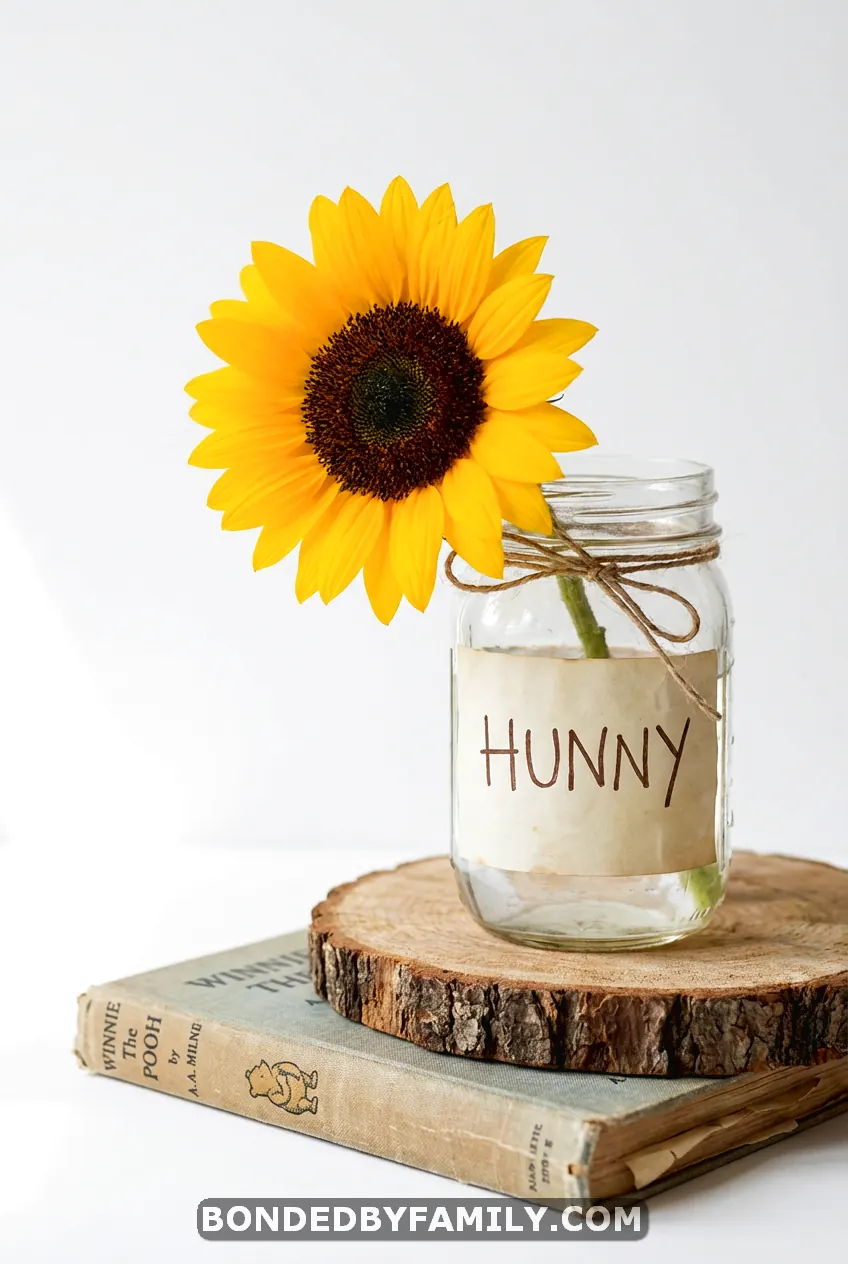
9. The Single Sunflower Statement
Sometimes less is more. One large, beautiful sunflower in a small mason jar with a “HUNNY” label. That’s it. That’s the centerpiece.
Pair it with a Winnie The Pooh book as a table runner or place it on a wood slice for extra charm. The simplicity lets the flower shine, and you can make these in bulk for pennies.
Cost per centerpiece: $2-3
The Show-Stoppers (A Little More Effort, A Lot More Impact)
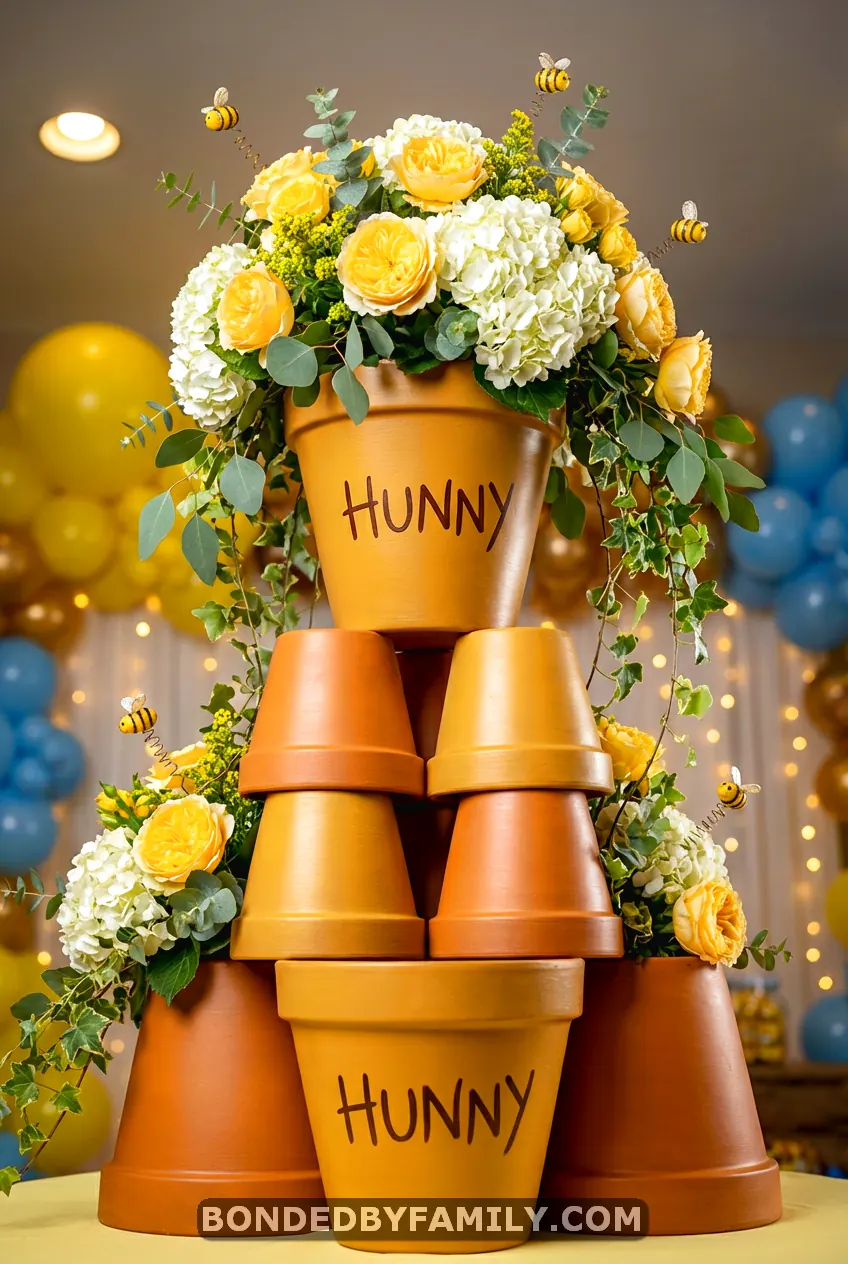
10. The Honey Pot Tower
Stack terracotta pots in a pyramid (3 on the bottom, 2 in the middle, 1 on top) and paint them to look like honey pots. Fill the top pot with a cascading arrangement of yellow and white flowers that spills down the sides.
This one takes about 45 minutes to make, but it becomes THE focal point. I made one for the head table at my sister’s shower and people literally took selfies with it.
Assembly tip: Use a strong adhesive (E6000 works great) between the pots and let it cure overnight. You don’t want a honey pot avalanche mid-party.
Cost per centerpiece: $15-18
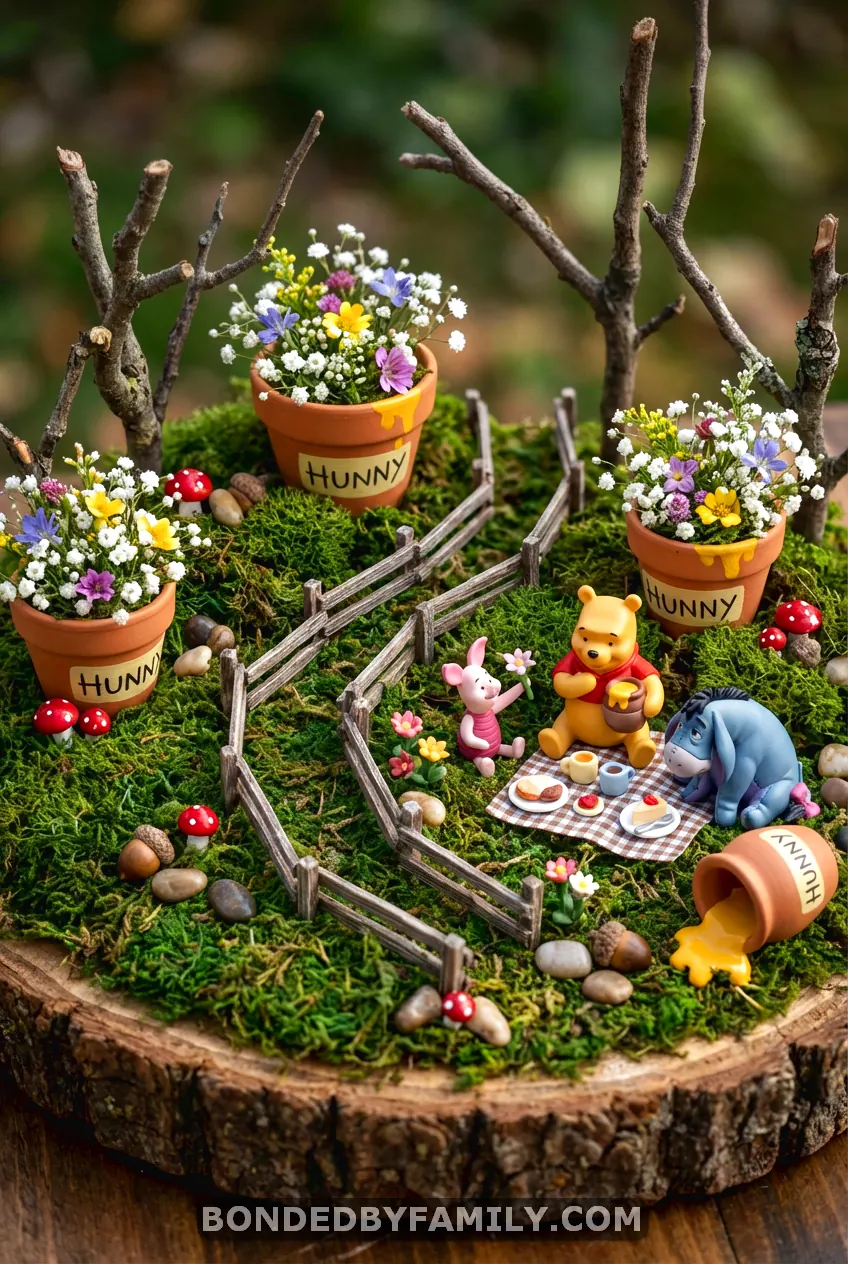
11. The Hundred Acre Wood Scene
Create a miniature landscape on a large wood slice. Use moss, small twigs, miniature fencing, and multiple small pots to build a tiny Hundred Acre Wood. Add Pooh, Piglet, and Eeyore figurines. This is the one kids will crowd around all afternoon.
Fair warning: This is the most time-intensive (about 90 minutes), but if you’re making just one or two for special tables (like the gift table or dessert table), it’s absolutely worth it.
Cost per centerpiece: $20-25
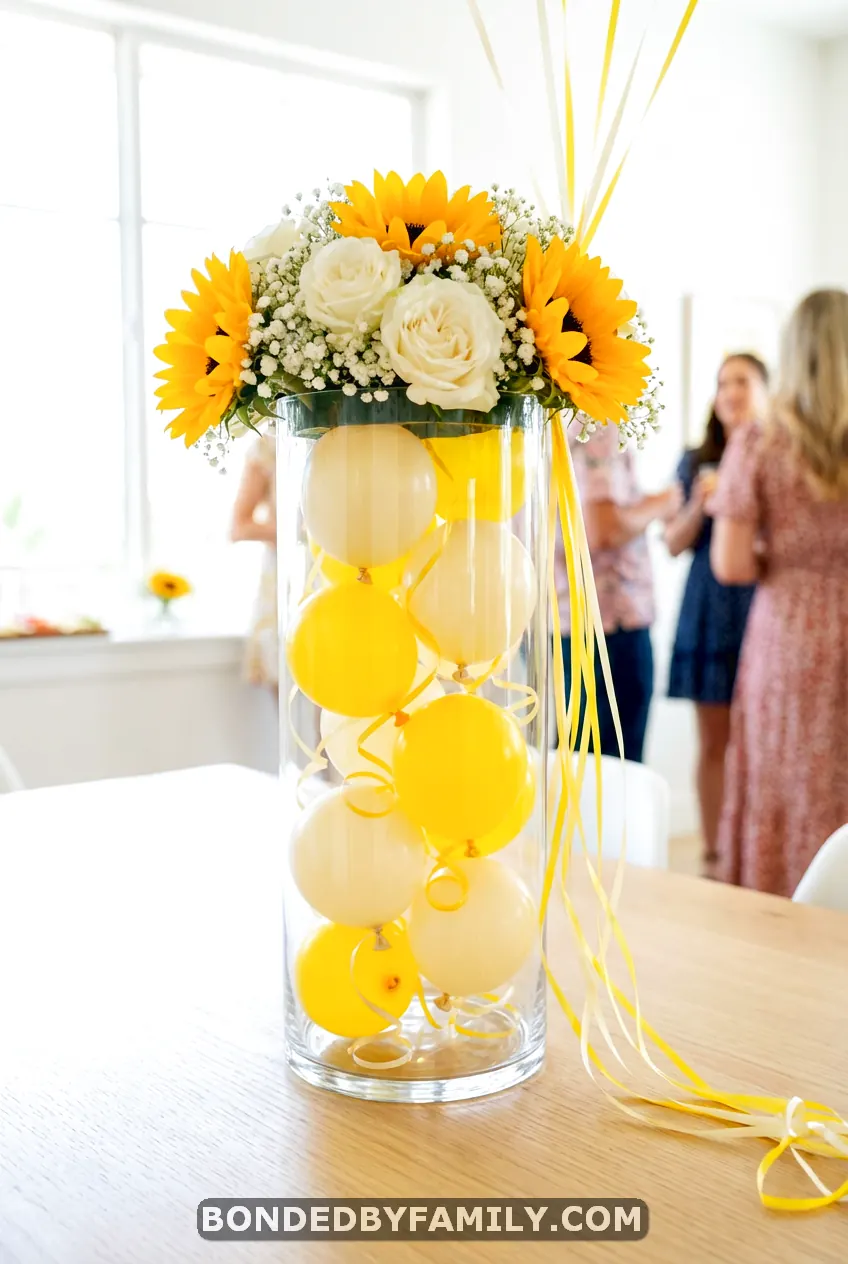
12. The Balloon and Bloom Combo
Fill a clear glass cylinder vase halfway with yellow and cream helium balloons (mini ones, 5-inch). Top the vase with a collar of sunflowers and baby’s breath that hides the balloon knots. The balloons give it height and movement without needing tall floral stems.
This one photographs INSANELY well and solves the “how do I make centerpieces visible without blocking conversation” problem.
Cost per centerpiece: $12-15
The Modern Minimalist Versions
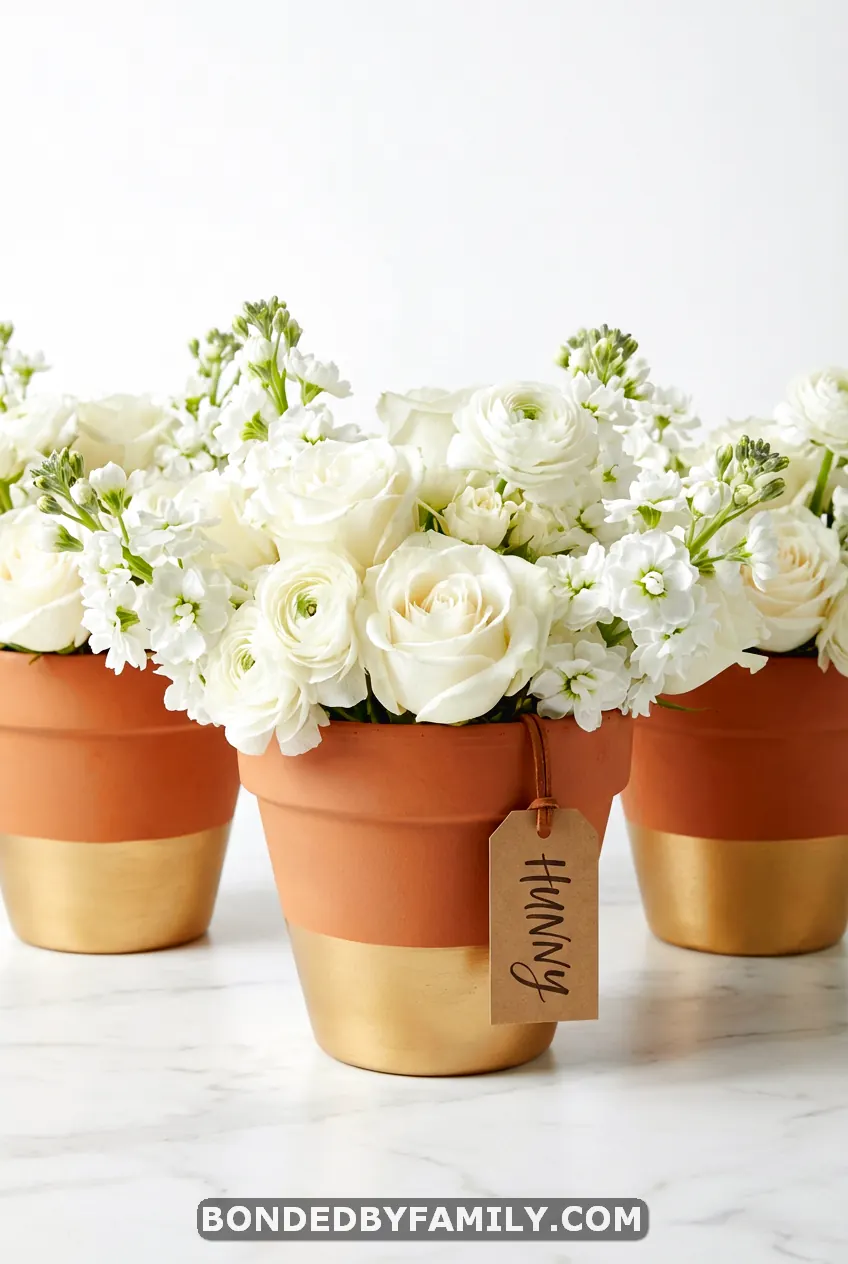
13. The Gold-Dipped Elegance
Take simple terracotta pots and dip the bottom halves in metallic gold paint. Fill with all-white flowers (roses, stock, or even cotton stems). Add a small “HUNNY” tag tied with a leather cord instead of twine.
This version works beautifully if your shower is going for a more upscale, modern interpretation of Winnie The Pooh rather than the traditional rustic vibe.
Cost per centerpiece: $11-14
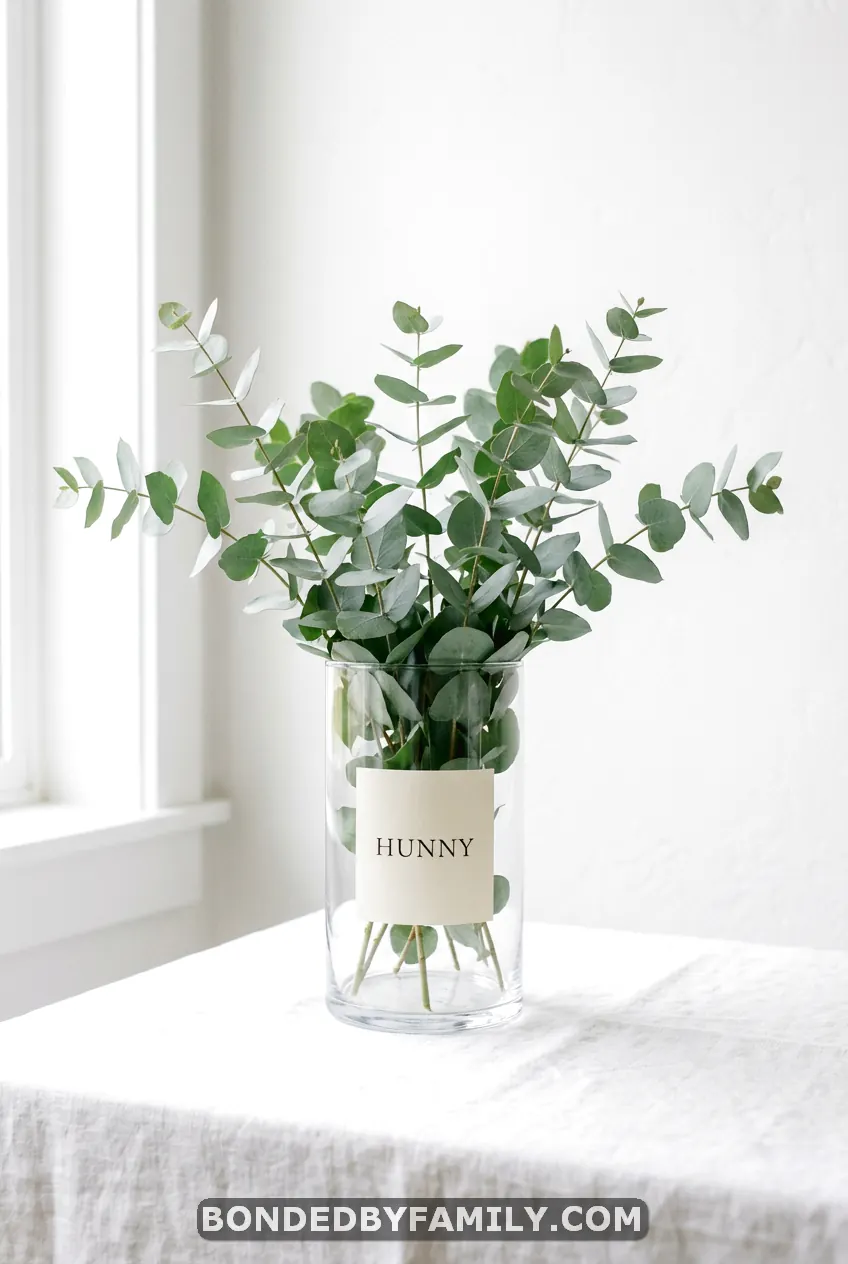
14. The Eucalyptus and Honey Minimalist
Clear glass vase. Fresh eucalyptus only (no flowers). One vintage “HUNNY” label on the vase. That’s the entire centerpiece.
The eucalyptus gives you that gorgeous silvery-green color and smells amazing. It’s incredibly simple but feels intentional and expensive. Plus, eucalyptus lasts forever—your guests can literally take these home, and they’ll stay pretty for weeks.
Cost per centerpiece: $6-8
15. The Single Pot, Maximum Impact
One gorgeous terracotta pot (8-inch diameter). Paint it in a honey-ombre effect (dark honey at the bottom fading to cream at the top). Fill it to bursting with the biggest, most beautiful sunflowers you can find, mixed with white dahlias and tons of greenery.
Because it’s a larger single pot instead of multiple small elements, you can go wild with the flower arrangement. This creates drama without requiring multiple components.
Cost per centerpiece: $16-19
The Unexpected Creative Twists
16. The Vintage Book Stack Base
Stack 3-4 vintage children’s books (ideally Winnie The Pooh books, but any classic children’s literature works) and place a small honey pot arrangement on top. The books add instant height and nostalgia.
Thrift store hack: I found old Little Golden Books for 50 cents each at a library sale. Total game-changer for adding height without buying expensive pedestal stands.
Cost per centerpiece: $8-12 (including books)
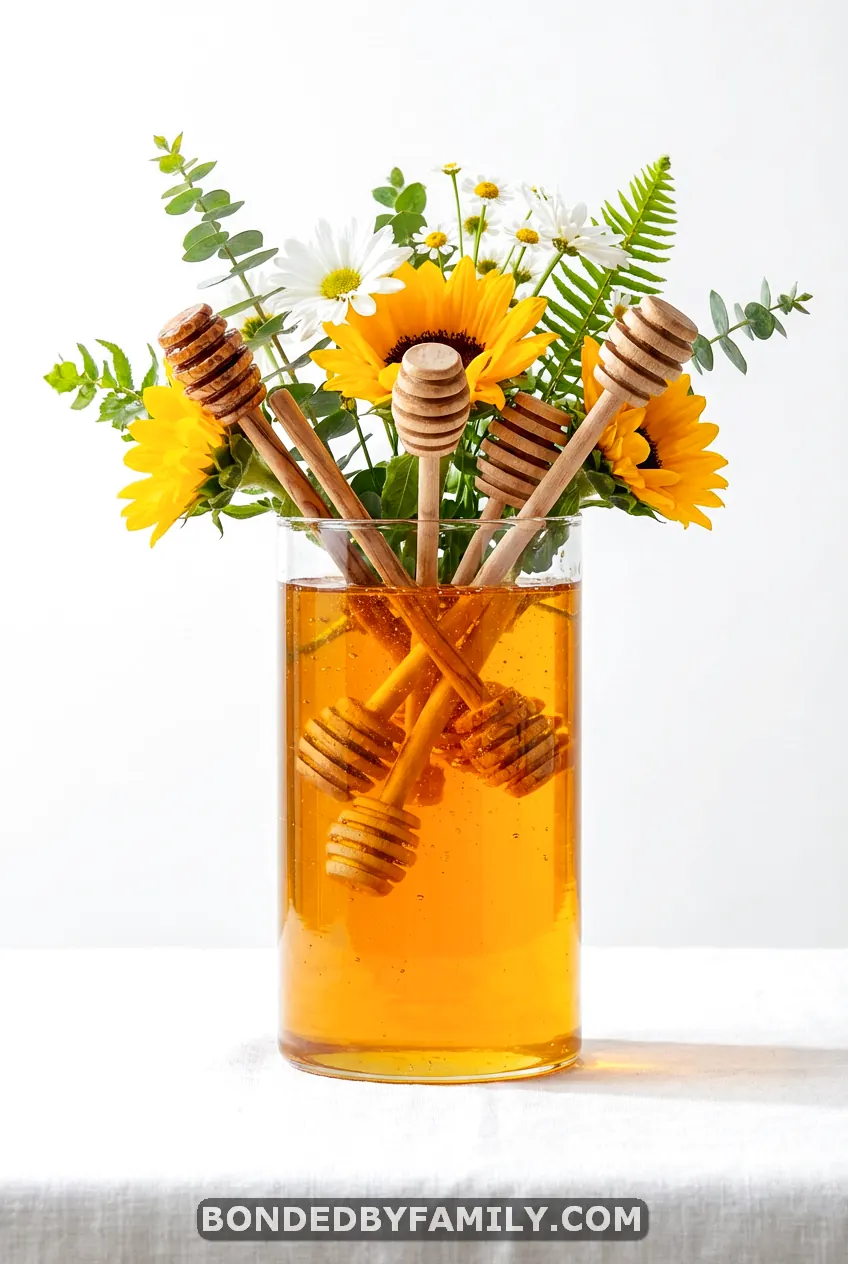
17. The Honey Dipper Display
Fill a clear glass vase with actual honey (or honey-colored liquid soap for a budget version). Stick several vintage honey dippers into the “honey” along with sunflowers and white flowers. The dippers peek out of the arrangement like little surprises.
Why this works: It’s unexpected. People expect flowers, but the honey dippers make them do a double-take and smile. Plus, you can find wooden honey dippers for about $1 each at kitchen stores.
Cost per centerpiece: $13-16
Real Talk: Centerpiece Strategy
Here’s what nobody tells you about DIY centerpieces—the actual strategy behind how many to make and where to splurge versus save.
The Tiered Approach:
- Head Table/Gift Table: Make 1-2 of your showstoppers (like the Honey Pot Tower or Hundred Acre Wood Scene). This is where photos happen.
- Guest Tables: Go for your mid-range options that look impressive but aren’t hours-intensive. I recommend the Tree Stump Sunflower Display or Classic Honey Pot Mason Jars.
- Cocktail/Welcome Table: Use your ultra-budget options (Dollar Store Knockout or Single Sunflower Statement).
Timeline Reality Check:
- 6 weeks before: Order or collect supplies
- 2 weeks before: Make anything that’s not fresh flowers (paint pots, create bases, prep containers)
- 2 days before: Assemble with fresh flowers if you’re using them
- Day before: Final touches, transport carefully
The Artificial vs. Fresh Debate:
I’ve done both, and here’s my honest take:
Fresh flowers look incredible in photos and smell amazing. But they cost more, wilt if you make them too early, and you can’t reuse them. Best for: intimate showers (15-20 guests), outdoor venues, short events.
Artificial flowers from places like Hobby Lobby or even Dollar Tree have gotten REALLY good. You can make them weeks in advance, guests can take them home and keep them forever, and you save serious money. Best for: larger showers (30+ guests), make-ahead-ers, budget-conscious hosts.
My move? Mix them. Use fresh flowers in your 1-2 showpiece centerpieces for the head table (where all the photos happen). Use high-quality artificial for everything else. Nobody will notice, and you’ll save your sanity.
The Setup and Styling Secrets
Making the centerpiece is only half the battle. How you style the table around it matters just as much.
Color Story Consistency: Stick to your Hundred Acre Wood palette: honey gold, cream, warm brown, pops of red, natural green. Your tablecloths, napkins, and other decor should echo these colors. I like using burlap table runners under centerpieces—they’re cheap, and they ground everything together.
Height Variation Matters: Not every centerpiece should be the same height. Mix tall and short. Use books, cake stands, or overturned crates to create levels. This makes the whole room more visually interesting.
The Magic Circle Rule: Keep the centerpiece “footprint” to about 12-14 inches in diameter. Any bigger and people can’t see each other across the table. Any smaller and it feels insignificant. This is why I love wood slices—they naturally create that perfect circle.
Scatter Elements: Don’t stop at just the centerpiece. Scatter small elements around it: votive candles in honey jars, tiny Pooh figurines, acorns, wood rounds. These “supporting actors” make the table feel complete without cluttering it.
The Lighting Trick: If your venue is indoors, add battery-operated LED candles (the flickering kind) around your centerpieces. They create warmth and movement without the fire hazard. Plus, they photograph beautifully.
Common Mistakes (That I Totally Made So You Don’t Have To)
Mistake #1: Making them too tall. I made these gorgeous tall arrangements for my first attempt, and everyone complained they couldn’t see each other. Centerpieces should max out at about 12-14 inches tall (unless they’re super narrow and people can see around them).
Mistake #2: Using too much hot glue. Those glue strings? They show up in photos. They’re tacky (literally). Use LESS glue than you think you need. Dab it, don’t drizzle it.
Mistake #3: Overbuying supplies. I bought enough sunflowers for an army. Start with supplies for 2-3 centerpieces, make them, then calculate what you actually need for the rest. This saved me probably $40 in wasted materials.
Mistake #4: Forgetting structural support. Flowers are heavier than they look. Make sure your pots have something supporting the stems—floral foam, a foam ball, even crumpled chicken wire. Otherwise, they’ll flop over mid-party.
Mistake #5: Ignoring the venue’s aesthetic. I made super rustic centerpieces for a shower at a country clu,b and they felt out of place. Match your centerpiece vibe to your venue. Rustic works for barns and gardens. Modern minimalist works for restaurants and event halls.
How to Make Them Last (If You’re Making Ahead)
For Fresh Flowers:
- Make them max 24 hours before the event
- Store in a cool (not cold) room away from direct sunlight
- Spritz with water every few hours
- Transport in plastic bins lined with damp paper towels
For Artificial Flowers:
- You can make these weeks in advance
- Store in a closet covered with light fabric (dust is your enemy)
- Use a hairdryer on a cool setting to remove dust before the event
- Touch up any paint or labels that got dinged
The Night-Before Assembly Method: This is my favorite hack. Prep everything except the final flower placement. Have all your containers painted, all your bases ready, all your supplies organized by station. Then the night before (or morning of), just pop the flowers in. Takes 10 minutes per centerpiece instead of 30.
Guest Takeaway Strategy: Put a small card next to each centerpiece: “Please take me home!” People LOVE taking centerpieces home, and it saves you cleanup. If they’re too shy to ask, you’ll end up hauling them all home yourself. Don’t be me. Encourage the takeaways.
Final Thoughts: It’s About the Love, Not Perfection
Look, I’m going to be real with you one more time. Your centerpieces don’t have to look like they came from a wedding magazine. They don’t have to be identical. That one pot where the paint got a little messy? Character. The sunflower that’s facing the wrong direction? Quirky charm.
What matters is that you made them. That you cared enough to spend time creating something special instead of just ordering generic decorations off Amazon.
When guests walk into that baby shower and see those honey pots and sunflowers, they’re not going to pull out a measuring tape to check if your wood slices are perfectly centered. They’re going to feel the warmth, the nostalgia, the love that went into every detail.
They’re going to think about their own childhood memories of Winnie The Pooh. They’re going to imagine the little one who’s about to arrive and all the bedtime stories that are coming. They’re going to feel like they’re part of something bigger than just a party.
And honestly? That’s worth way more than any $50 professional centerpiece could ever deliver.
So go ahead. Grab those mason jars. Paint those pots. Hot glue those sunflowers (just maybe use less glue than I did). Make something beautiful on a budget, and know that you absolutely nailed it.
Because when you make it with your own hands, it’s already perfect.
Quick Reference: Your Centerpiece Cheat Sheet
Best for Photos: Honey Pot Tower, Hundred Acre Wood Scene
Best for Budget: Dollar Store Knockout, Single Sunflower Statement
Best for Beginners: Classic Honey Pot Mason Jar, Terracotta Honey Pot Trio
Best for Modern Style: Gold-Dipped Elegance, Eucalyptus Minimalist
Best for Impact: Balloon and Bloom Combo, Single Pot Maximum Impact
Best for Quick Assembly: Terracotta Honey Pot Trio, Birch Bark, and Burlap
Average Time Investment: 20-45 minutes per centerpiece
Realistic Budget Per Centerpiece: $6-18 (most fall in the $10-12 range)
Supplies That Go Furthest: Mason jars, terracotta pots, wood slices, sunflowers
Now go make something beautiful. The Hundred Acre Wood is waiting. 🍯