Searching for gender reveal snack ideas that won’t destroy your sanity or your budget? You’ve got the ultrasound envelope, you’ve picked a date, and now you’re staring at a blank grocery list, wondering how to feed twenty people food that looks like it came off a Pinterest board.
The snacks don’t need to be complicated. They need to be visual, easy to grab with one hand, and split cleanly into that pink-and-blue color story your guests are expecting. I’ve thrown three of these parties (two for myself, one for my sister), and the food table is where people camp out. Not near the balloon arch. Not by the confetti cannons. By the snacks.
What you’ll find below are 23 gender reveal snack ideas that cover sweet, savory, budget-friendly, and yes — a few that look wildly impressive but take under 30 minutes. Some are one-sentence-and-done. Others walk you through every step, cost, and rookie mistake to dodge. Use what fits your party. Skip what doesn’t.
Sweet Snacks That Steal the Show
1. Chocolate-Dipped Pretzel Rods
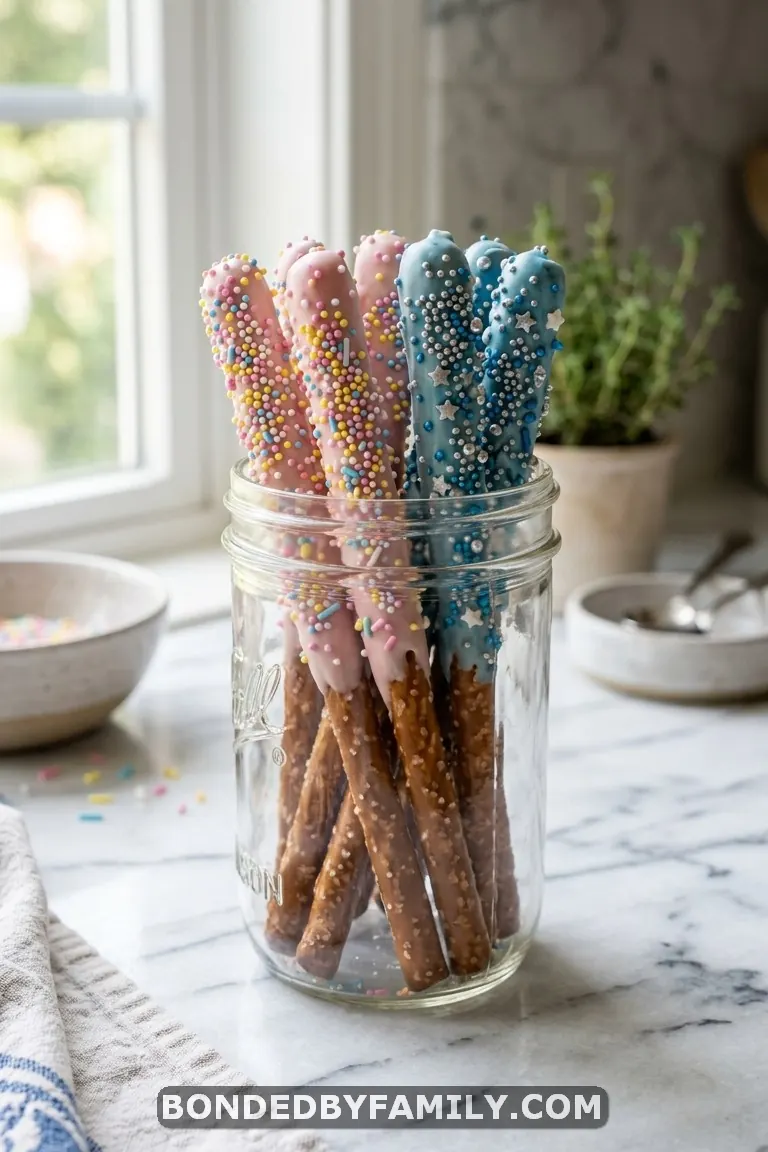
These are the workhorse of every gender reveal snack table, and for good reason. Cheap. Fast. Gorgeous.
Melt white chocolate candy melts (Ghirardelli or Wilton — skip the dollar store ones, they seize up), split into two bowls, and tint one pink and one blue with oil-based food coloring. Dip each pretzel rod about two-thirds of the way, tap off the excess, and lay flat on parchment paper. While the chocolate is still wet, roll or sprinkle with sanding sugar, nonpareils, or crushed candy.
Cost breakdown: A bag of Snyder’s pretzel rods ($3), two bags of candy melts ($8 total), sprinkles ($3). That’s roughly $14 for 40+ pretzel rods. Make them the night before — they hold up well at room temperature for 48 hours.
2. Color-Reveal Cake Pops (Full Tutorial)
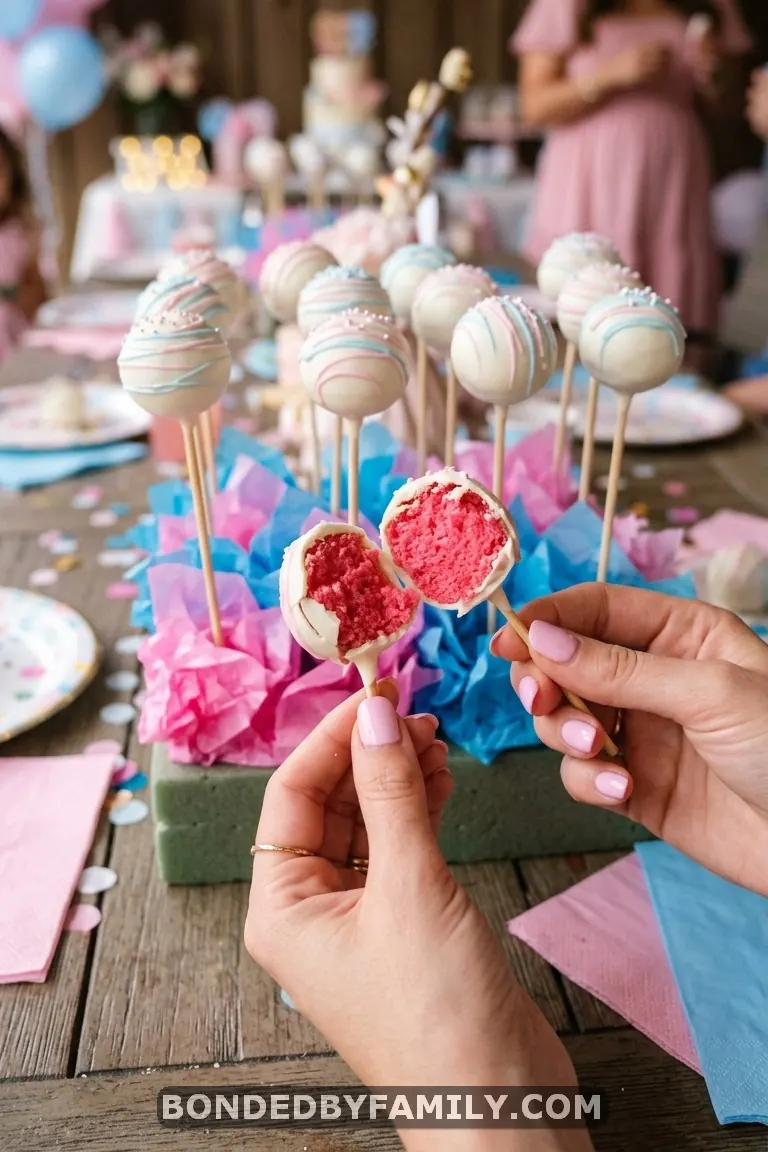
Cake pops are the snack that gets photographed more than any other item on a gender reveal table. They’re also the one that intimidates people the most. They shouldn’t. Here’s every step.
Why They Work
A cake pop looks like a neutral white or pastel orb from the outside. But the cake inside? That’s where the reveal hides. Pink cake for a girl, blue for a boy. Guests bite in and see the color. It’s interactive, it’s personal, and it photographs from every angle.
What You Need
- 1 box white or vanilla cake mix (Betty Crocker or Duncan Hines — $1.50)
- 1 can vanilla frosting ($2)
- 2 bags white candy melts ($8)
- Gel food coloring in pink OR blue ($3)
- Lollipop sticks, 6-inch ($4 for 100-pack)
- Sprinkles or sanding sugar ($3)
- Parchment paper
- A foam block or styrofoam for drying ($3 at Dollar Tree)
Total cost: roughly $24 for 40–48 cake pops.
Step-by-Step
- Bake the cake. Follow box directions. Use a 9×13 pan. Cool completely — at least 1 hour, ideally 2.
- Crumble it. Break the cooled cake into fine crumbs with your hands or a fork. You want the texture of wet sand — no big chunks.
- Add frosting. Start with half the can. Mix thoroughly. You want a dough that holds its shape when rolled. Too sticky? You added too much frosting. Too crumbly? Add a tablespoon more. This step makes or breaks texture.
- Color the dough. Here’s the secret part. Add gel food coloring (pink or blue depending on the gender) and knead until the color is even throughout. If you’re not the one who knows the gender, hand this step to your trusted helper with the sealed envelope.
- Roll into balls. Use a small cookie scoop (1 tablespoon size) for even portions. Roll between your palms until smooth. Place on a parchment-lined baking sheet. Refrigerate 30 minutes.
- Dip the sticks. Melt a small amount of candy melts. Dip the tip of each lollipop stick about ½ inch into the melted chocolate, then insert into a cake ball about halfway. This is the glue. Refrigerate another 15 minutes.
- Coat. Melt the rest of your candy melts. Dip each cake pop straight down, submerging completely, then pull straight up. Tap your wrist (not the stick) gently to let excess drip off. Immediately add sprinkles before the coating sets.
- Dry upright. Push the stick into your foam block so the cake pop dries right-side-up. Full set time: 20–30 minutes at room temperature.
Common Mistakes to Avoid
- Warm cake balls. If they’re not cold enough when you dip, they’ll slide right off the stick into your chocolate. Refrigerate them properly.
- Thin chocolate. If your candy melts are too thick, add a teaspoon of coconut oil or Paramount Crystals. Never add water — it’ll seize the chocolate.
- Heavy coating. Tap off the excess. Thick chocolate pooling at the bottom makes the pop look lumpy and top-heavy.
- Skipping the stick-dip. That initial dab of melted chocolate on the stick is what holds everything together. Don’t skip it.
Pro Move
Make them two days before the party. Store in an airtight container in the fridge. Pull them out 30 minutes before guests arrive so they come to room temperature — the flavors open up and the coating gets that satisfying snap.
3. Cotton Candy in Clear Jars
Stuff pink and blue cotton candy into mason jars or clear plastic cups. Set them in rows on the table. Done.
This is a five-minute setup that looks like you spent an hour. Bags of pre-made cotton candy run about $1 each at Walmart. Buy six.
4. Chocolate-Covered Strawberries
Tint white chocolate pink and blue. Dip strawberries. That’s the whole thing.
Two pounds of strawberries ($6), two bags of candy melts ($8), sprinkles ($3). Budget: $17 for roughly 30–35 berries. Refrigerate after dipping but pull them out 20 minutes before the party — condensation makes them sweat if they go straight from cold to a warm room.
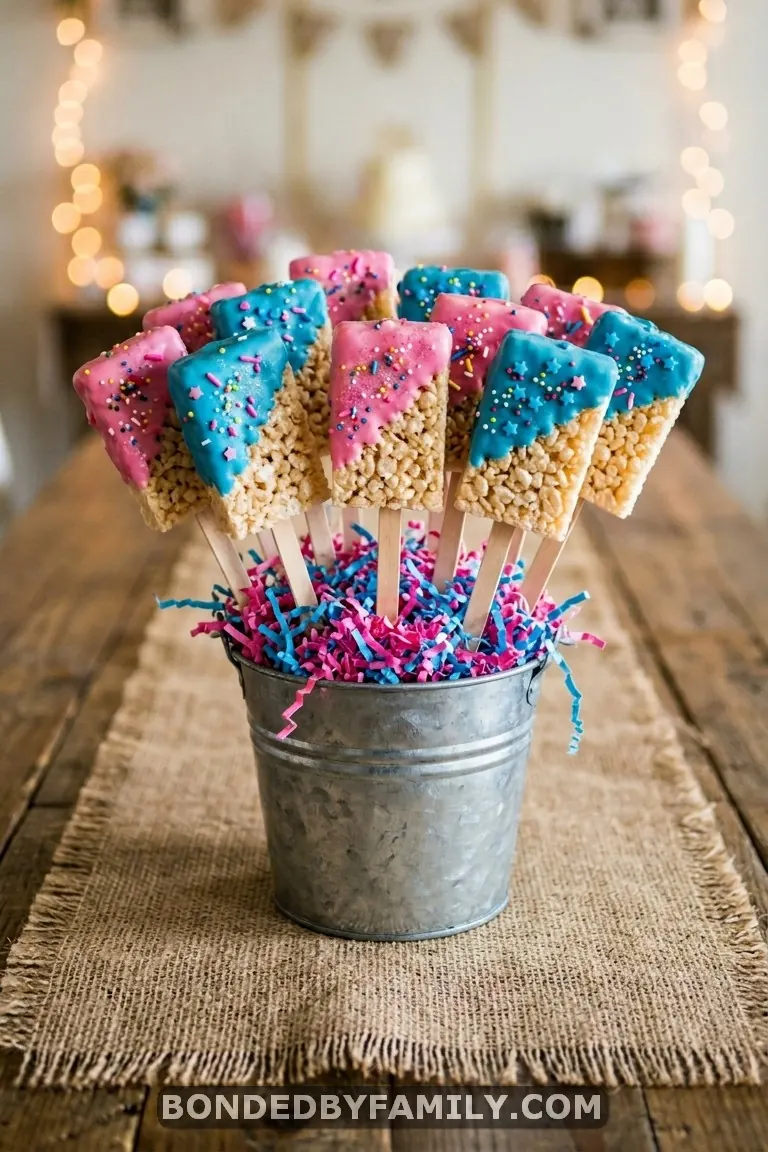
5. Rice Krispie Treat Pops
Make your standard Rice Krispie treat recipe. Press into a 9×13 pan, cool, and cut into rectangles. Push a lollipop stick into one end of each piece. Dip the top half in pink or blue candy melts. Add sprinkles. Stand upright to dry.
These are crowd magnets with kids. They’re sturdy, sweet without being too rich, and they cost almost nothing — a single batch makes 24 pops for under $10. The key is pressing the treats firmly into the pan. Loose, airy bars crumble the second you add a stick.
If you want to get fancy, drizzle contrasting colored chocolate in thin lines over the top after the base coat sets. Takes an extra three minutes and makes them look professional.
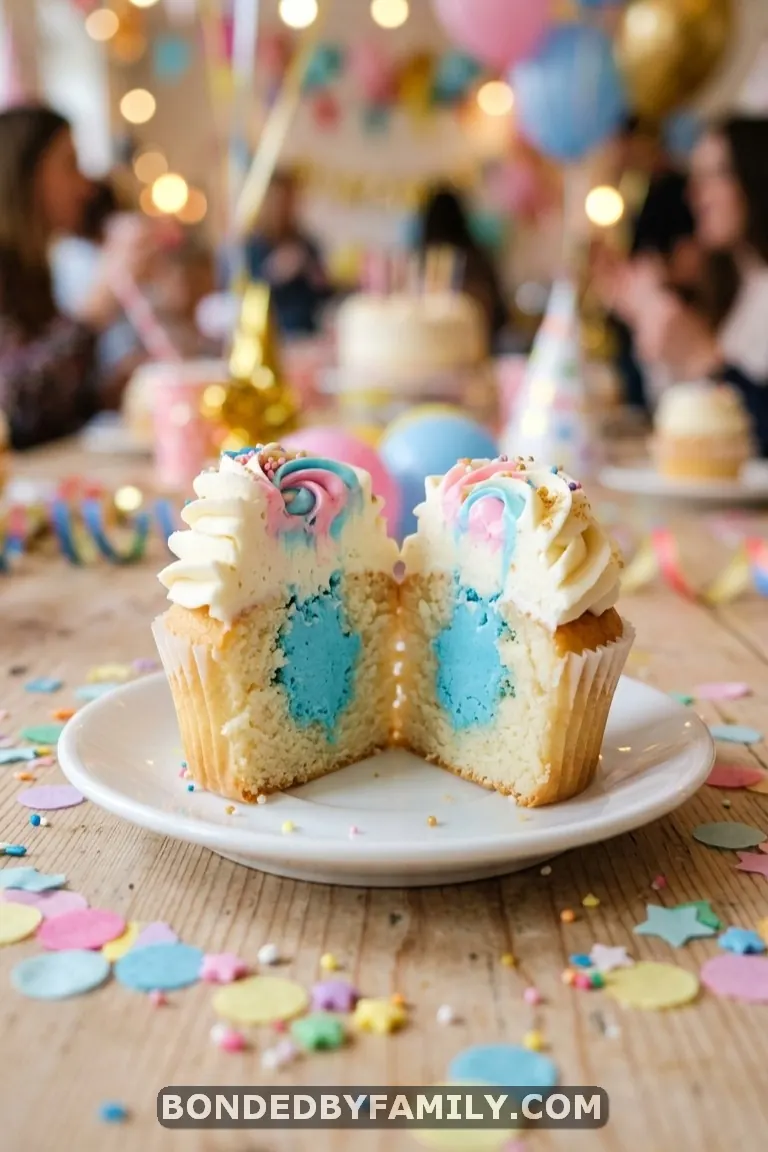
6. Gender Reveal Cupcakes With Hidden Filling
Bake vanilla cupcakes. Once cooled, use an apple corer or knife to scoop out the center of each one. Fill the hole with pink or blue frosting (or colored sprinkles, or M&Ms in the reveal color). Replace the cake plug and cover with a neutral-colored buttercream swirl on top.
The reveal happens at the bite. Every single guest gets their own personal moment of surprise.
The biggest rookie mistake? Overfilling the cavity. You only need about a tablespoon of filling. Too much and it oozes out the bottom. Use a piping bag or a zip-lock with the corner snipped for clean filling. Bake 24 cupcakes from a single box mix and a can of frosting — total materials cost under $12.
7. Color-Sorted M&M Display
Separate a party-size bag of M&Ms into pink/red and blue. Pour them into two matching glass jars or clear vases. Label one “Girl?” and one “Boy?” with kraft paper tags.
Three minutes of work. Four dollars in candy. Guests grab handfuls all night.
8. Candy-Dipped Oreos
Buy a package of regular Oreos. Melt pink and blue candy melts. Dip each Oreo fully, tap off excess, lay on parchment, and add sprinkles before the coating sets. That’s it — 20 minutes for two dozen.
Savory Bites That Balance the Table
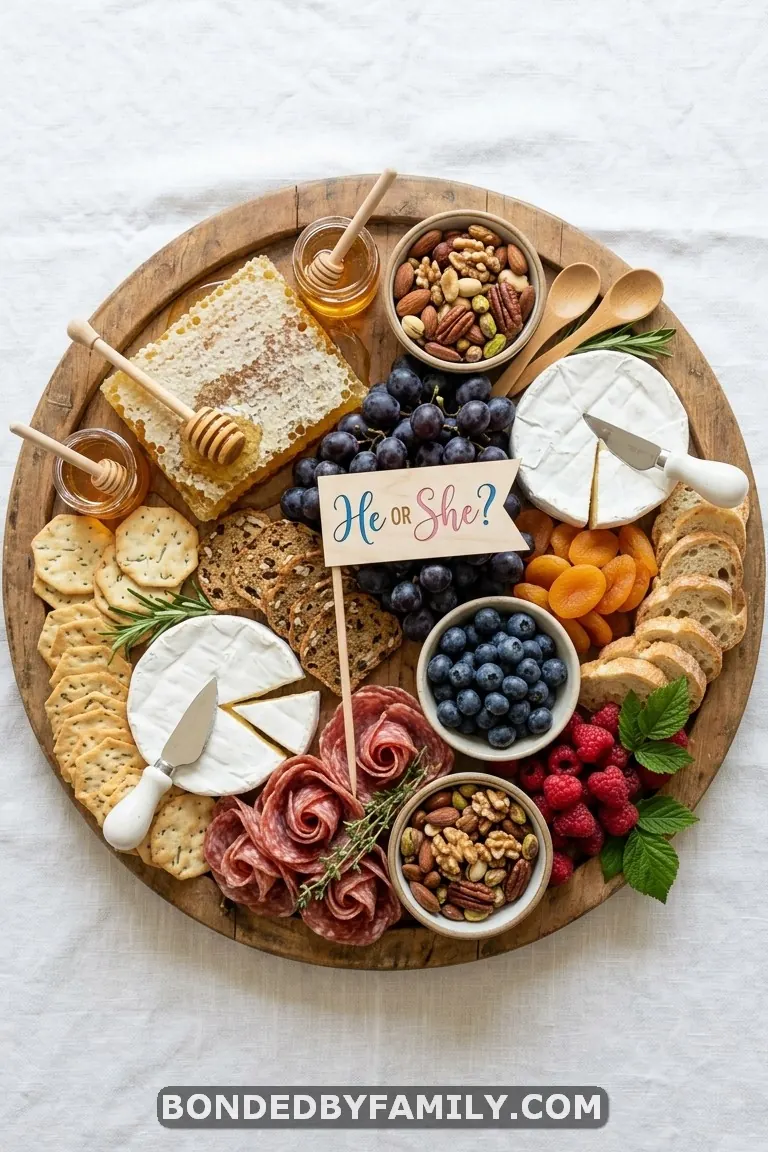
9. “He or She? What Will It Bee?” Honey Snack Board
The bee theme is one of the most-pinned gender reveal party motifs for a reason — it works across colors, it’s gender-neutral in its base design, and the food naturally fits.
Build this on a large round wooden board (12–16 inches). Start with your anchors: a wedge of brie, a small bowl of honey with a dipper, and a stack of crackers. Fan outward with salami rosettes, grapes, blueberries, raspberries, mixed nuts, and honeycomb pieces. Tuck in small picks with “He or She?” or “What Will It Bee?” flags.
The color story builds itself — blueberries and raspberries handle the pink-and-blue angle without you forcing it. Brie and honey keep it feeling upscale. Budget for a full board feeds 15–20 guests runs about $25–$35, depending on whether you spring for honeycomb (around $8 for a small block at Trader Joe’s) or skip it.
Two boards is smarter than one huge board if you’re feeding 20+ people. Spread them across opposite ends of the table so there’s no bottleneck.
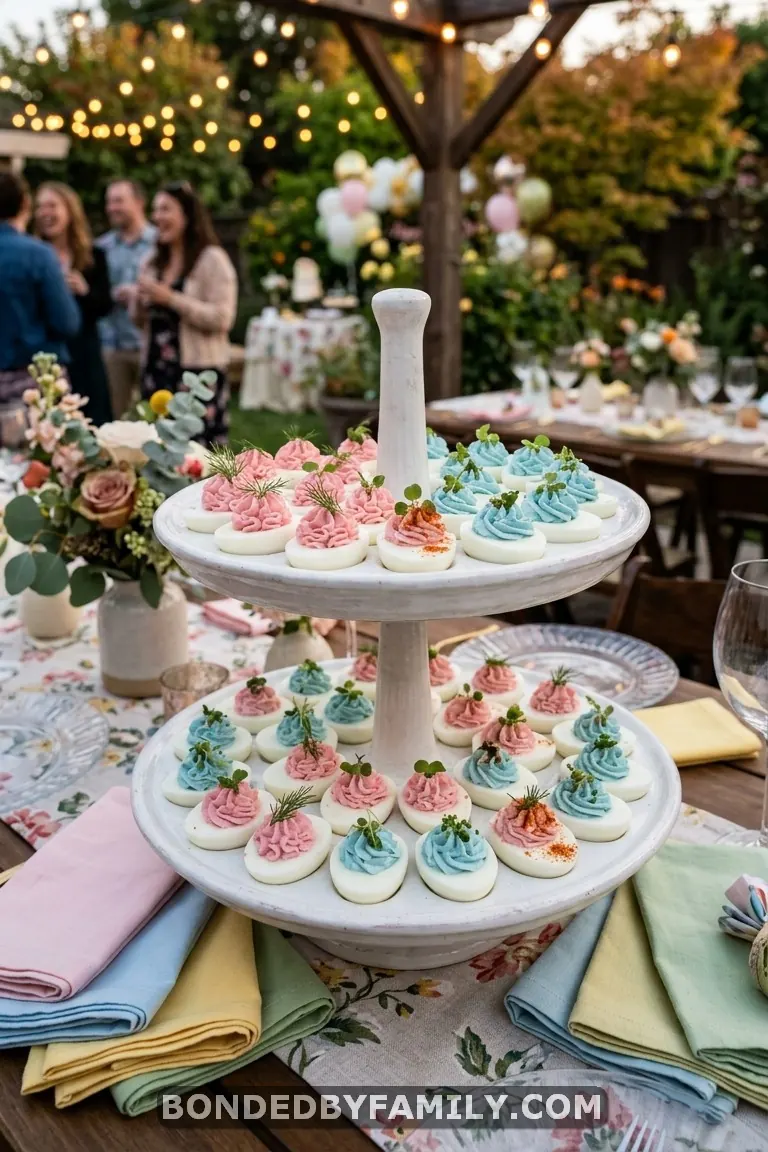
10. Pink & Blue Deviled Eggs
Boil your eggs, peel, halve, and make your usual deviled egg filling (yolks + mayo + mustard + salt + pepper). Split the filling into two bowls. Tint one pink, one blue with gel food coloring. Pipe back into the whites.
Fair warning: go easy on the food coloring. A tiny drop of gel is enough. Too much and the filling looks neon instead of pastel. You can also skip the filling and dye the whole egg white instead — soak peeled eggs in water with food coloring for 2–3 hours before halving. The whites take on a gorgeous pastel hue, and you fill with regular yellow filling for contrast.
A dozen eggs makes 24 halves. Total cost: under $5. This is your protein anchor on a table that’s likely heavy on sugar.
11. “Nuts or No Nuts” Snack Station
This one gets laughs every time. Set up two bowls — one labeled “Nuts” (mixed nuts, cashews, honey-roasted peanuts) and one labeled “No Nuts” (pretzels, Goldfish crackers, cheese puffs). Guests pick based on their gender guess.
It’s a snack and a game rolled into one. Printable labels are all over Etsy for $2–3, or make your own with cardstock and a Sharpie.
Allergy note: If anyone in your guest list has a nut allergy, skip this one entirely or swap “Nuts” for a different pairing — “Touchdowns or Tutus” with football-shaped pretzels versus tutu-shaped cookies, for example.
12. Mini Grilled Cheese Dippers
Cut grilled cheese sandwiches into strips. Serve them standing upright in small cups with a tiny dish of tomato soup for dipping on the side.
Savory, warm, nostalgic. Everyone reaches for these.
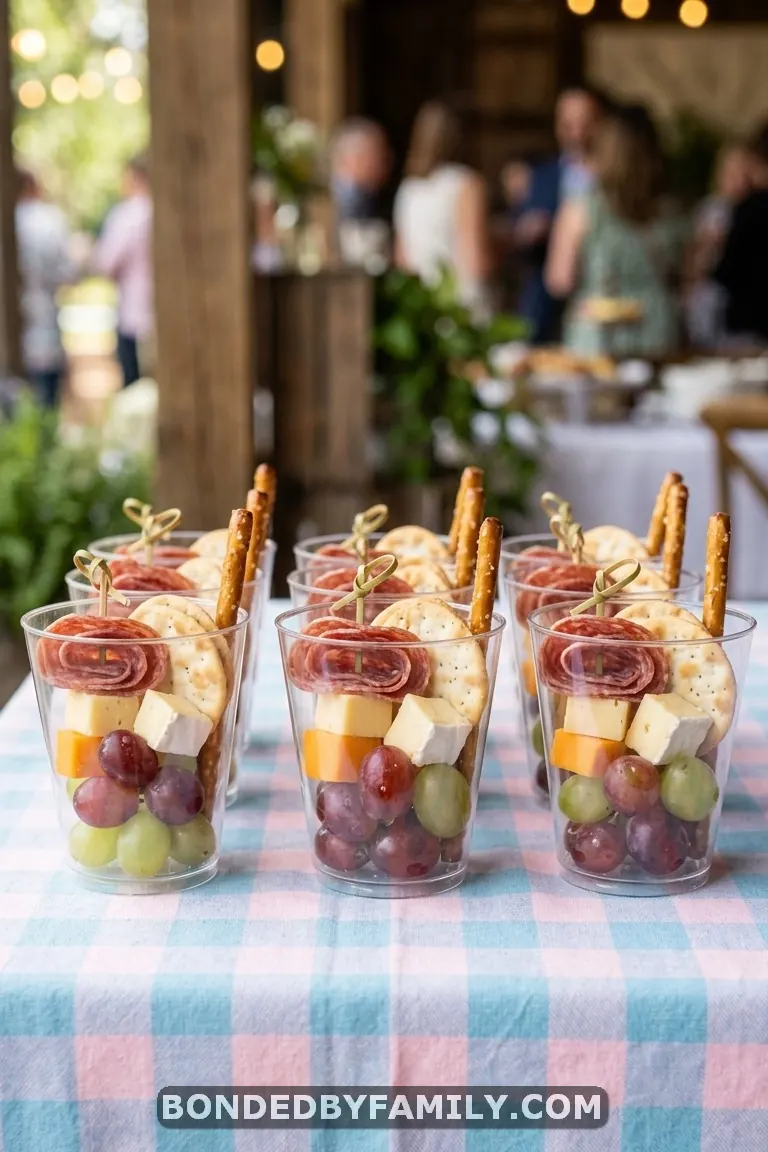
13. Charcuterie Cups
Individual cups solve the biggest problem with a charcuterie board at a party — everyone’s hands are in it. Fill clear plastic tumblers with a rolled slice of salami, a few cheese cubes, crackers, a couple grapes, and a pretzel stick. Each guest grabs their own cup.
Pre-assemble the morning of the party. Cover with plastic wrap and refrigerate. Pull out 30 minutes before serving. Feeds 20 guests for about $30–$40 depending on your cheese choices.
Drinks & Stations
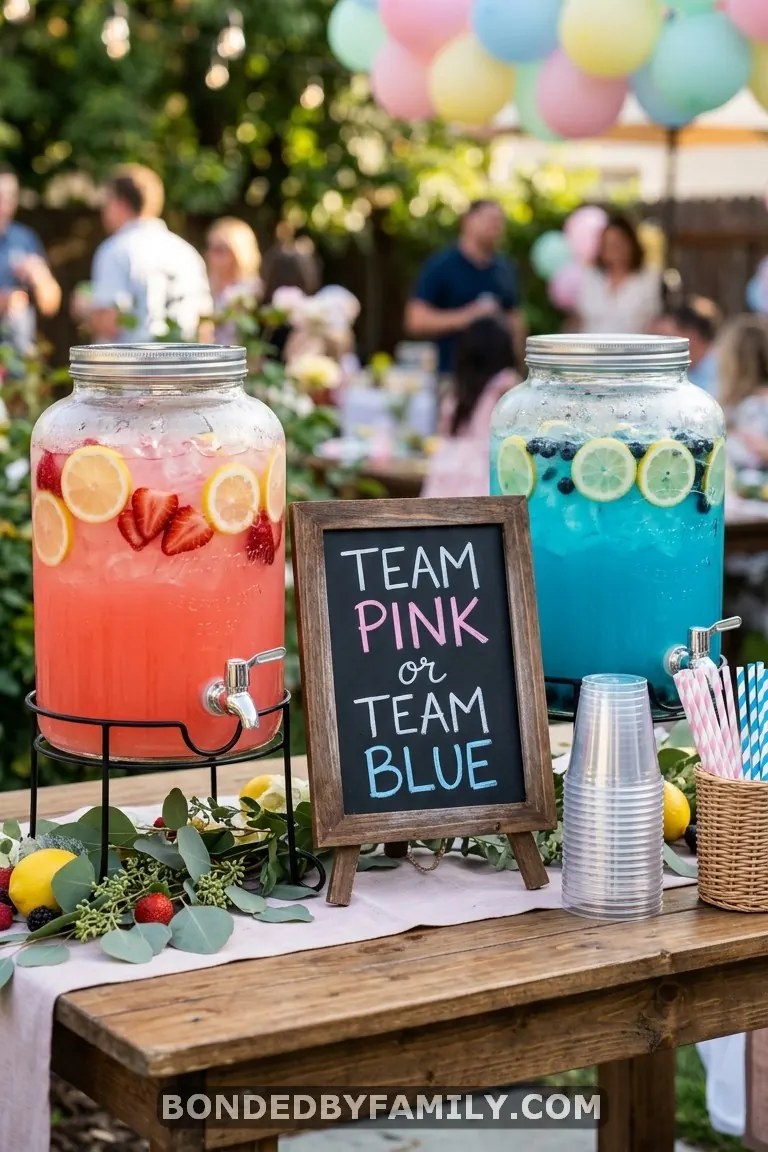
14. Pink Lemonade & Blue Raspberry Drink Station
Two glass beverage dispensers. One with strawberry lemonade (pink). One with blue raspberry lemonade (use blue curaçao syrup in regular lemonade, or Country Time Blue Raspberry mix — about $3).
Float lemon slices and fresh berries in each. Set out clear cups and a sign: “Team Pink or Team Blue? Cast Your Vote With Your Cup.” Now your drink station is a game, a photo op, and refreshment rolled into one.
Glass dispensers run $12–$15 each at Target, or rent from a party supply store. The lemonade itself costs under $10 total. This station feeds 30+ guests easily and you can refill throughout the party.
15. Baby Bottle Candy Favors
Fill small plastic baby bottles (available in bulk on Amazon — 24 for $10) with pink and blue Sixlets, jelly beans, or M&Ms. Set them on a tray near the door so guests grab one on their way out.
They double as table decor before they become favors. Line them up in a row, alternating pink-filled and blue-filled.
Budget-Friendly Crowd Pleasers
16. Pink & Blue Popcorn Bags
Pop a big batch of plain popcorn. Melt white candy melts separately into pink and blue. Drizzle over the popcorn. Toss. Bag it in clear cellophane bags tied with ribbon.
Cost for 20 bags: under $8 total. This is your highest-impact-per-dollar snack.
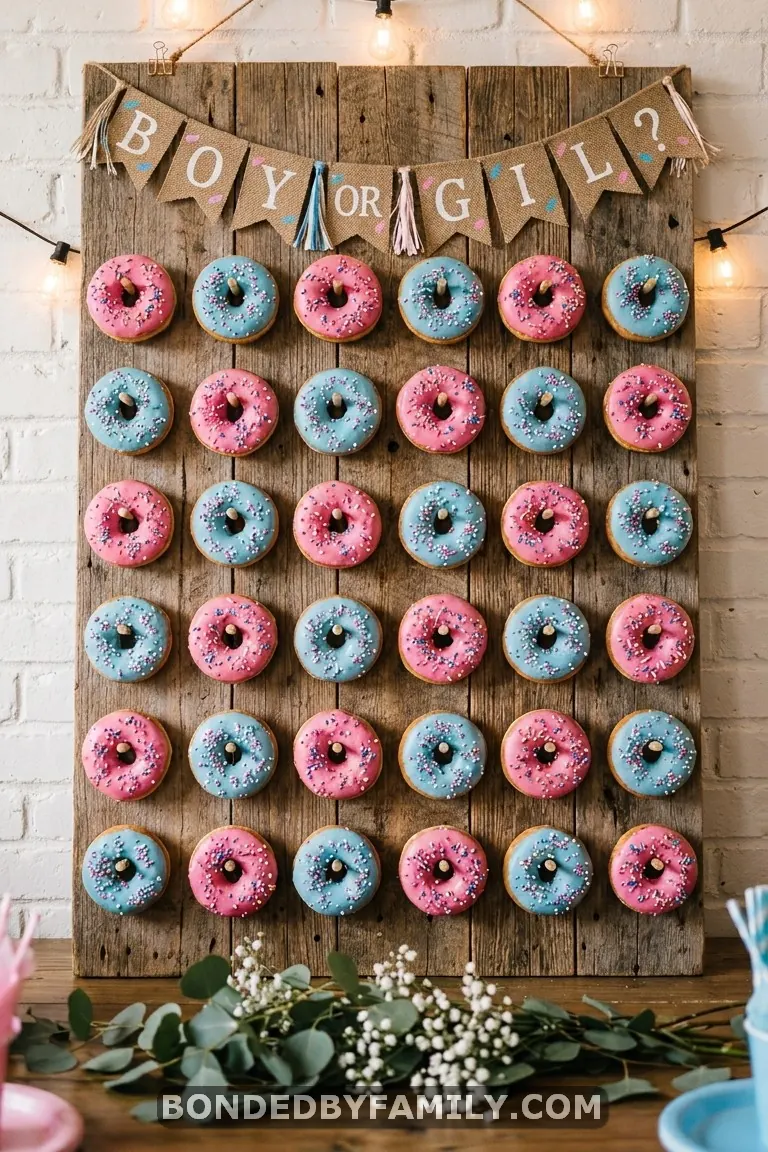
17. Donut Display Wall
Buy two dozen donuts from your local bakery — one dozen with pink frosting, one dozen with blue. Hang them on a pegboard donut wall (DIY one with a $5 pegboard from Home Depot and some wooden dowels) or just pile them on a tiered serving stand.
Donuts photograph well. They’re universally loved. And at $6–$12 per dozen from most grocery bakeries, they’re one of the cheapest snack table centerpieces you can pull together. No baking, no prep, no stress. Just pick them up the morning of.
The one mistake: don’t get donuts with intricate decorations that compete with your party colors. Clean pink glaze. Clean blue glaze. White sprinkles on both. Keep it cohesive.
18. Fruit Skewers With Yogurt Dip
Thread strawberries, raspberries, and watermelon balls on skewers for “pink.” Thread blueberries, blackberries, and green grapes on skewers for “blue.” Serve standing upright in a vase or mason jar with a bowl of vanilla yogurt dip on the side.
Fresh, light, and it offsets the sugar bomb of every other item on the table. The mom-to-be will thank you.
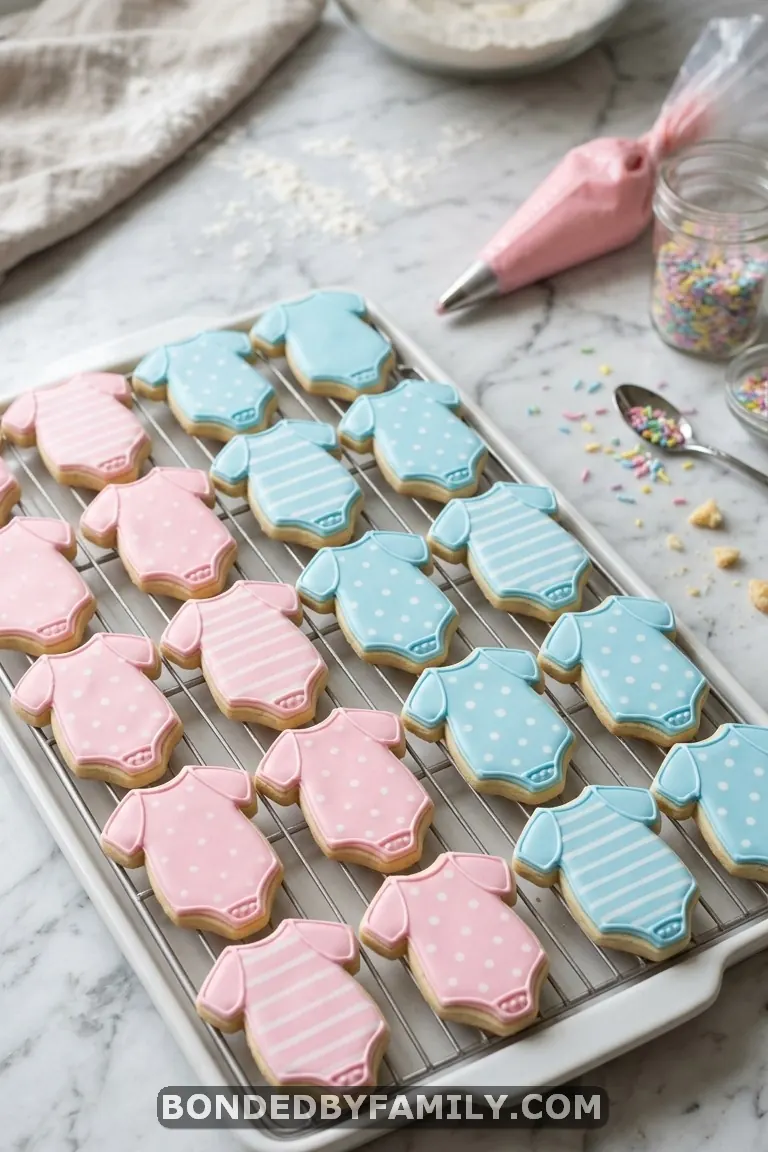
19. Sugar Cookie Onesies
Use a onesie-shaped cookie cutter (Amazon, $5 for a set) with your go-to sugar cookie recipe. Decorate with pink and blue royal icing. Pipe details like tiny hearts, stars, or polka dots once the base layer dries.
These take more time than most items on this list — budget 2–3 hours including baking, cooling, and decorating. But they’re the most “wow” item on any table. A batch of 24 cookies costs about $8 in ingredients (flour, sugar, butter, eggs, vanilla, powdered sugar for icing).
If icing feels overwhelming, skip the decorating and just dip half of each cookie in pink or blue candy melts. Same visual impact, a third of the effort.
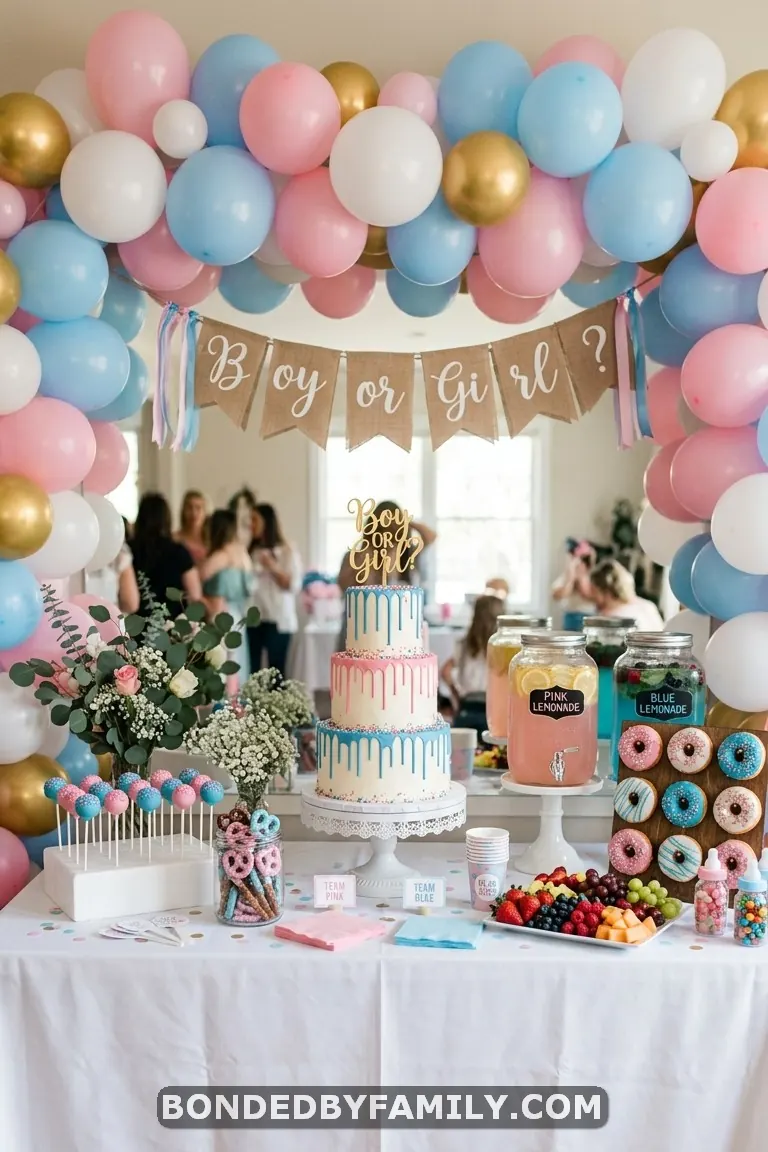
The Showstopper: Building Your Full Snack Table
20. The Complete Pink & Blue Dessert Table (Everything You Need to Know)
This is where everything comes together. If you want a full dessert and snack table that looks cohesive, feeds 25–30 guests, and doesn’t require a second mortgage, here’s exactly how to build it.
The Layout Rules
Your table should have three visual zones: tall items in the back, medium in the middle, short in the front. This creates depth. Every item should be visible when guests approach from the front.
- Back row (tall): Lemonade dispensers, donut wall or tiered stand, a balloon garland arching overhead
- Middle row (medium): Cake pops in a foam block, pretzel rods standing in jars, a tiered serving plate with cupcakes
- Front row (short): Candy bowls, fruit skewers laid flat, Oreos on a platter, baby bottle favors
Shopping List for 25–30 Guests
| Item | Quantity | Estimated Cost |
|---|---|---|
| Chocolate-dipped pretzel rods | 40 pieces | $14 |
| Cake pops | 30 pieces | $20 |
| Cupcakes (box mix + frosting) | 24 pieces | $12 |
| Chocolate-covered strawberries | 30 pieces | $17 |
| Rice Krispie treat pops | 24 pieces | $10 |
| Cotton candy jars | 6 jars | $6 |
| Donuts (2 dozen, bakery) | 24 pieces | $18 |
| M&M jars (pink + blue) | 2 jars | $8 |
| Fruit skewers | 20 skewers | $12 |
| Lemonade (pink + blue) | 2 dispensers | $10 |
| Baby bottle favors | 24 bottles | $14 |
| TOTAL | ~$141 |
That’s a full, impressive table for under $150. Cut it to $80–$90 by skipping the strawberries and bakery donuts (make your own or substitute cookies).
Timeline (Work Backwards From Party Time)
- 3 days before: Bake cake for cake pops. Let cool. Crumble and mix with frosting. Roll and refrigerate.
- 2 days before: Dip cake pops. Make pretzel rods. Store both in airtight containers at room temperature.
- 1 day before: Bake cupcakes. Make Rice Krispie pops. Fill baby bottle favors. Prep lemonade concentrate.
- Morning of: Dip strawberries. Assemble fruit skewers. Pick up donuts. Fill lemonade dispensers. Sort M&Ms.
- 1 hour before guests: Set up the table using the three-zone layout. Place everything. Step back. Adjust spacing. Add the balloon garland.
The Mistake Most People Make
They spread everything out evenly. Don’t. Group items in clusters of 3–5 so the table looks full and intentional, not like a buffet line. Leave some negative space between clusters — it reads as styled, not chaotic.
The Cautionary Tale
21. What NOT to Do With Your Gender Reveal Snack Table
I need to tell you about my sister’s first gender reveal. She’s a planner. Color-coded spreadsheets for everything. But the snack table? She winged it.
She bought seven different things — all sweet. Cake pops, cupcakes, cookies, brownies, candy, chocolate pretzels, and chocolate strawberries. By 4 p.m., her table looked like a candy store exploded. The frosting was melting (outdoor party in July). The cake pops were sliding off their sticks. Guests ate one thing and said they were “sugared out.” Half the food went home untouched.
The lesson: balance sweet and savory. For every three sweet items, add one savory. Deviled eggs, charcuterie cups, a cheese board, mini sandwiches — anything that isn’t coated in sugar. Your guests will eat more overall because they can alternate between salty and sweet. And your table will look more sophisticated with a variety of textures, heights, and colors.
Her second gender reveal? She used half the budget on a snack board and deviled eggs alongside her sweets. Clean plates across the board.
Fun Extras & Interactive Snacks
22. “Staches or Lashes” Cupcake Decorating Station
Set out unfrosted cupcakes, bowls of pink and blue frosting, and piped fondant mustaches and eyelashes. Guests frost their own cupcake based on their gender guess. It’s a snack, a game, and a party activity wrapped into one moment.
Pre-make the fondant toppers the night before (or buy them on Etsy — a 24-pack runs about $8). Provide butter knives, spoons, or small offset spatulas for the frosting. Lay down a cheap plastic tablecloth under the station. There will be mess. It’ll be worth it.
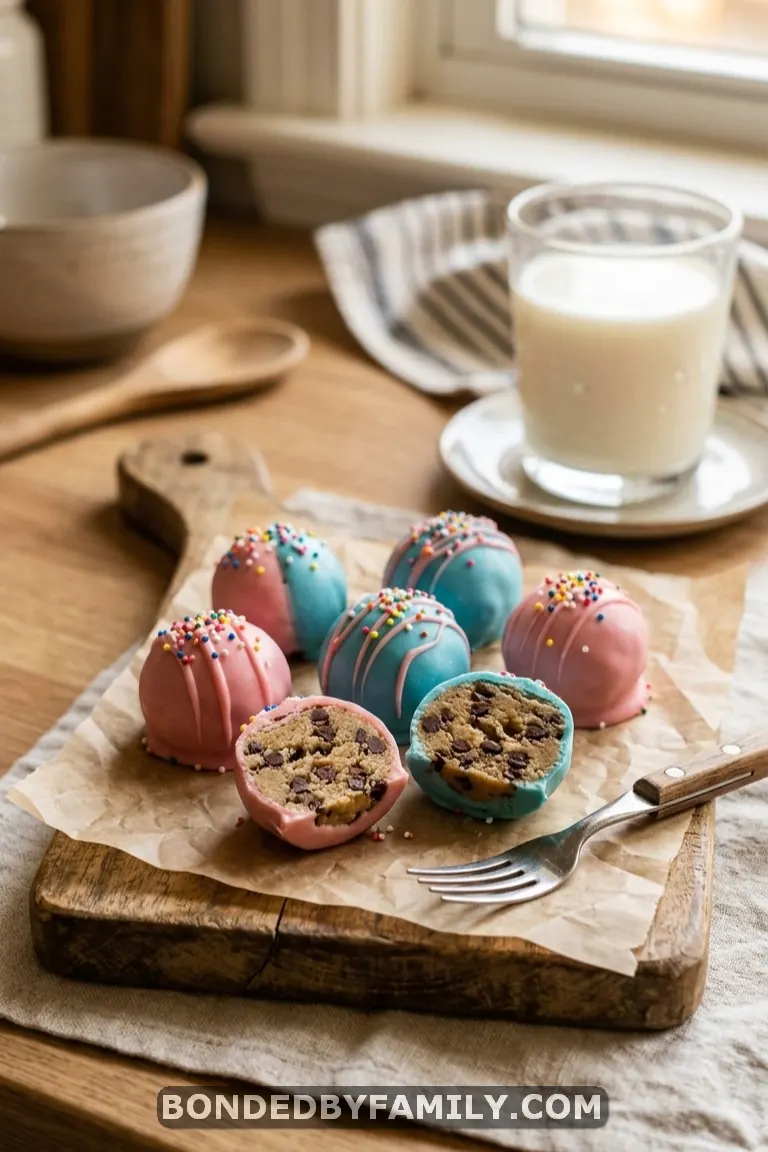
23. Gender Reveal Cookie Dough Truffles
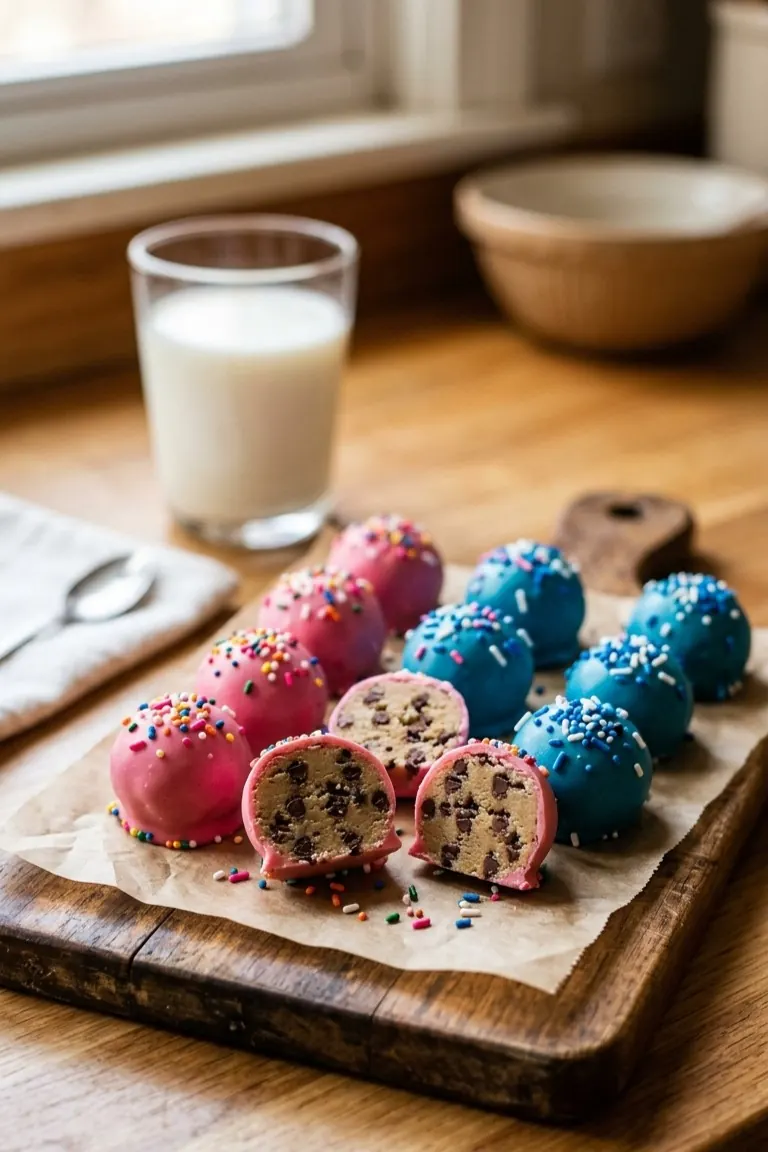
Make edible (egg-free) cookie dough. Roll into small balls. Dip in pink or blue candy melts. Chill until set.
These vanish faster than cake pops at every party I’ve brought them to. The texture contrast — creamy dough center with a candy shell snap — hits different than another frosted item.
For edible cookie dough: 1 cup butter, ¾ cup brown sugar, ¼ cup white sugar, 2 tablespoons milk, 1 teaspoon vanilla, 2 cups heat-treated flour (bake at 350°F for 5 minutes to kill bacteria), ½ cup mini chocolate chips. Mix, roll, chill, dip.
A batch makes about 36 truffles. Materials cost: roughly $10 if you have butter and sugar on hand.
FAQ
How far in advance can I make gender reveal snacks?
Most dipped and coated items — pretzels, cake pops, Oreos, cookie dough truffles — hold well for 2–3 days at room temperature in airtight containers. Chocolate-covered strawberries should be made the morning of and refrigerated until 20 minutes before serving. Cupcakes can be baked a day ahead; frost them the morning of the party for the freshest look.
How much food do I need per guest at a gender reveal?
Plan for 6–8 bite-sized items per guest if snacks are the main food. If you’re serving a meal alongside snacks, 3–4 pieces per person is plenty. For a party of 25 people with snacks only, aim for 150–200 total pieces spread across 6–8 different items.
What gender reveal snacks can I make on a tight budget?
Popcorn bags, cotton candy jars, M&M displays, and candy-dipped Oreos are your best budget options — all under $10 per batch for 20+ servings. A complete snack table for 20 guests can come together for $60–$80 if you skip bakery-bought items and make everything from box mixes and candy melts.
Do I need savory food at a gender reveal?
Yes. A table that’s entirely sweet leads to sugar fatigue, and guests stop eating after 2–3 items. Add at least one savory anchor — deviled eggs, a snack board, charcuterie cups, or mini grilled cheese dippers. Your guests will eat more variety, stay longer, and leave happier.
What’s the most Instagrammable gender reveal snack?
Cake pops and chocolate-covered strawberries get photographed the most, based on Pinterest save data. But the real secret weapon is a well-styled full dessert table — a spread with height variation, color coordination, and at least one “centerpiece” item (like a donut wall or tiered cake pop display) will earn you more saves and shares than any individual snack.