You said yes to a Paw Patrol birthday. Now the group chat is blowing up with cake photos from Pinterest, and none of them come with a price tag or a difficulty warning. Some of those gorgeous cakes took a professional baker eight hours. A few of them would survive a five-minute car ride — others, absolutely not.
This guide covers 19 paw patrol party cake ideas your kid will go wild for, sorted by real costs, how long they take, and whether a person who burned toast last Tuesday can pull them off. No sugarcoating. Just the real picture so you can pick the right one before the party.
1. The 10-Minute Store-Bought Cake Hack
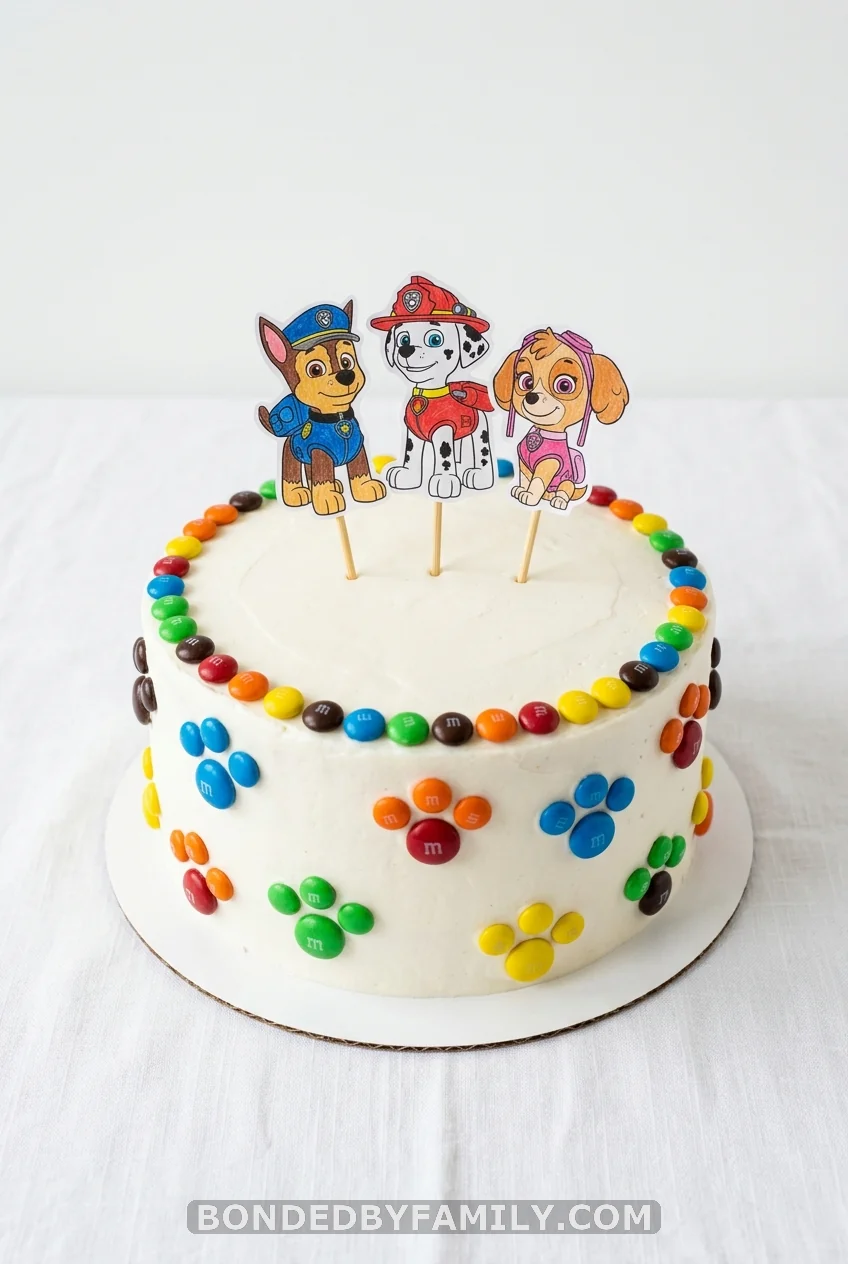
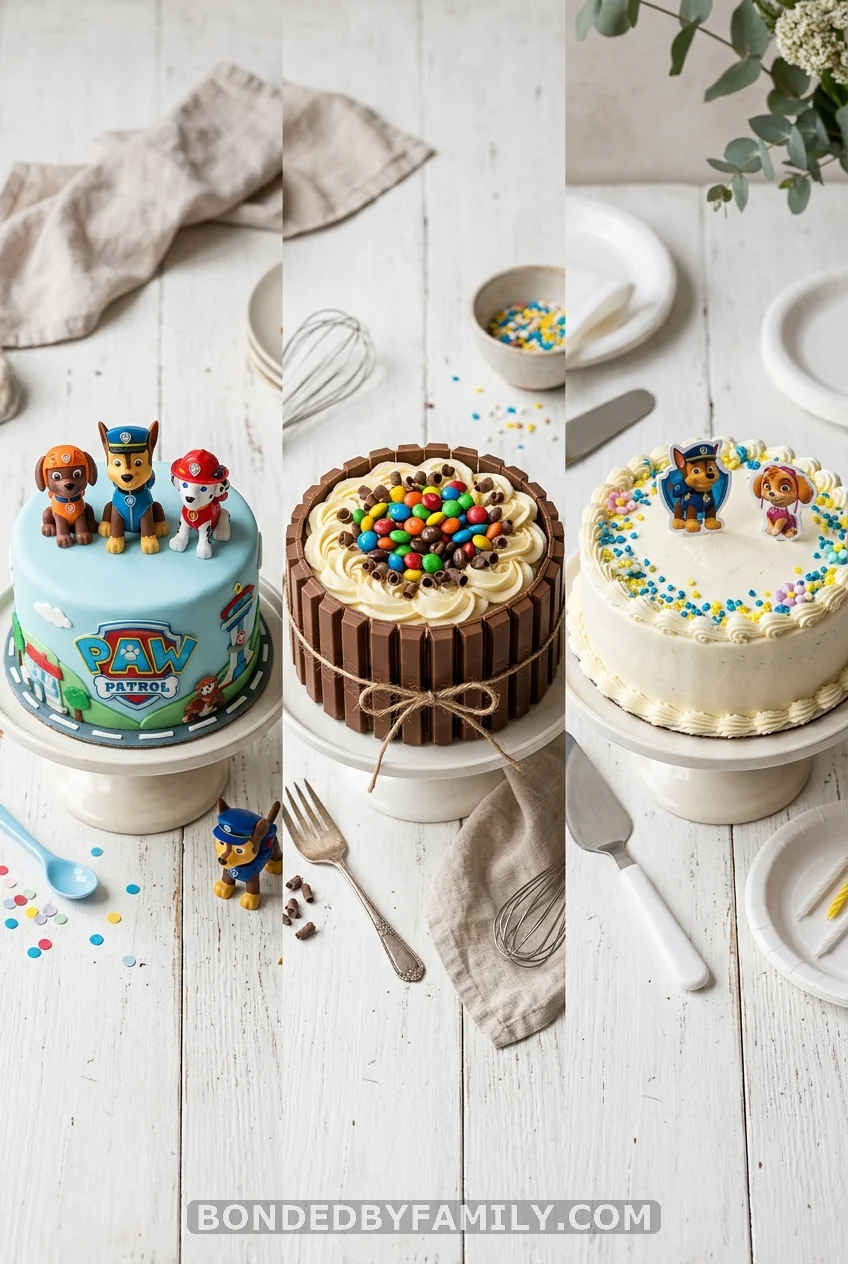
Call your grocery store bakery today. Order a double-layer 9-inch white cake, no decorations. Budget: roughly $12–$18. When you get home, press M&M paw prints into the sides (one large M&M plus three minis per paw print). Stick a $6 Paw Patrol Swirl Party Décor pack onto bamboo skewers and push them into the top. Total assembly: under 10 minutes. Total cost: under $25. No one at the party will know — or care.
2. The Dog-Bone Shaped Paw Patrol Cake (The One That Goes Viral)
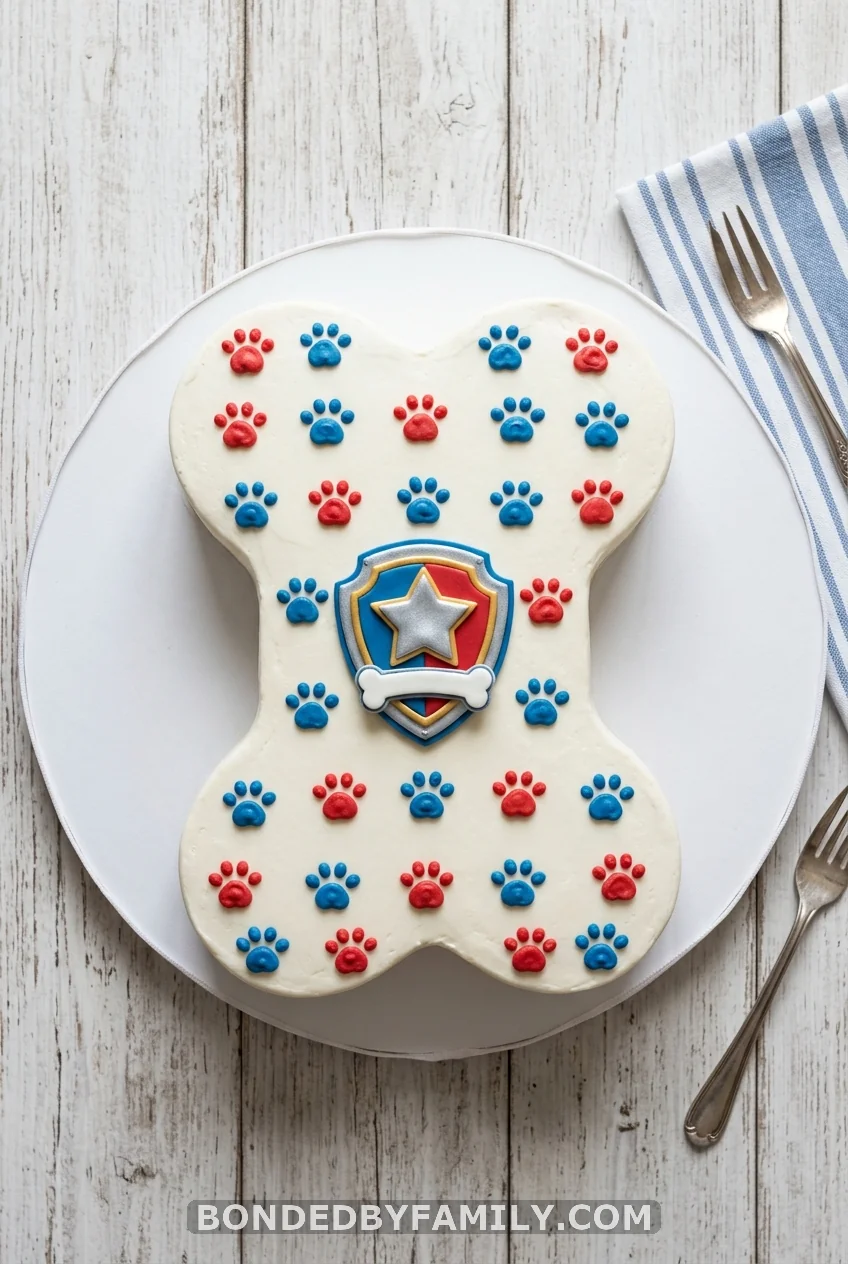
This is the cake. The one with 4,700+ Pinterest saves. It looks like it belongs in a bakery display case — because without the right roadmap, it takes about as long to make as a bakery project would.
Here’s the full picture, no shortcuts omitted.
Why It Works
The bone shape reads as Paw Patrol before anyone even sees the logo. It’s visually distinct, which is why it performs so well on Pinterest. Kids go absolutely nuts for it because it looks exactly like something Chase would eat. Parents save it because it feels achievable. It isn’t fast, but it is doable.
Skill level: Intermediate | Time: 6–8 hours total (spread across 2 days) | Cost: $35–$55
What You’ll Need
- 3 batches of vanilla buttermilk cake (one for two 6-inch rounds, one for a 9×13 pan)
- 1 batch chocolate frosting
- 1 batch vanilla Swiss meringue buttercream
- White fondant (for the logo base)
- Wilton sugar sheets in white, red, blue, yellow, and silver (~$6–$8 per sheet)
- Silver pearl dust + vodka (for metallic paint effect)
- Fresh Xacto knife blade — this part is non-negotiable
- Small food-safe paintbrush
- Paw Patrol logo printed on paper (trace from the show’s official website)
- Cake board, sheet-cake sized
Step-by-Step Assembly
Step 1 — Bake and cool. Bake two 6-inch rounds and one 9×13 sheet cake. Cool fully (minimum 2 hours, overnight is better). Warm cakes crumble. Do not rush this.
Step 2 — Cut the bone shape. Slice the 6-inch rounds in half horizontally. Take one half and quarter it. From the 9×13, cut a 2-inch strip from the long (width) side — you’ll end up with two 7×13 layers. Center one 7×13 layer on your cake board.
Step 3 — Build the bone. The two quartered 6-inch pieces become the knobs at each end. Arrange: full half-circles at both ends of the 7×13 backbone. Press gently. Crumb coat the entire shape with chocolate frosting and refrigerate for 30 minutes to set.
Step 4 — Final frosting. Cover with white Swiss meringue buttercream. This is where clean edges matter. Work in sections. A bench scraper helps more than an offset spatula for the curved knob sections. Expect imperfection the first pass — that’s normal. Chill again for 20 minutes, then do a second pass.
Step 5 — Make the logo. Roll white fondant to ¼-inch thickness. Lay your outer shield stencil on top. Cut with a fresh Xacto blade (a dull blade drags and tears). Repeat with the silver sugar sheet for the metallic border. Stack layers using a tiny brush dipped in water as edible glue. Mix silver pearl dust with a few drops of vodka to paint the border — the alcohol evaporates, leaving a clean metallic finish.
Step 6 — Paw prints. Each paw print has 4 parts: one large round and three small rounds. Cut these from colored fondant or sugar sheets. Budget 30–45 minutes for this step alone. The cake in photos? About 50 paw prints total.
Pro Move
Make the fondant logo pieces two days ahead. Let them dry flat. Dry fondant handles and transports without warping. Wet fondant is a liability.
Common Mistakes to Avoid
- Using a dull Xacto blade. The logo will look printed if your cuts are crisp. They will look handmade (not in a good way) if your blade has done more than one project.
- Frosting a warm cake. Swiss meringue will slide off. You need a cold, firm crumb coat underneath.
- Transporting without refrigerating first. The original thebusyspatula.com tutorial was born from a disaster when a fondant cake melted in a hot car. Chill the assembled cake for at least an hour before moving it. On hot days: keep the car AC running for 15 minutes before loading.
- Estimating one batch of frosting is enough. It isn’t. You need enough to crumb coat, re-coat, and fix any patches. Make extra.
Cost Reality
- Cake ingredients: ~$15
- Fondant and sugar sheets: ~$20–$25
- Silver pearl dust: ~$6
- Misc tools (if buying fresh): ~$10 This puts you at $35–$50 for a first-time make. A professional bakery would charge $80–$150 for this same cake.
3. Kit Kat Construction Site / Rubble Cake
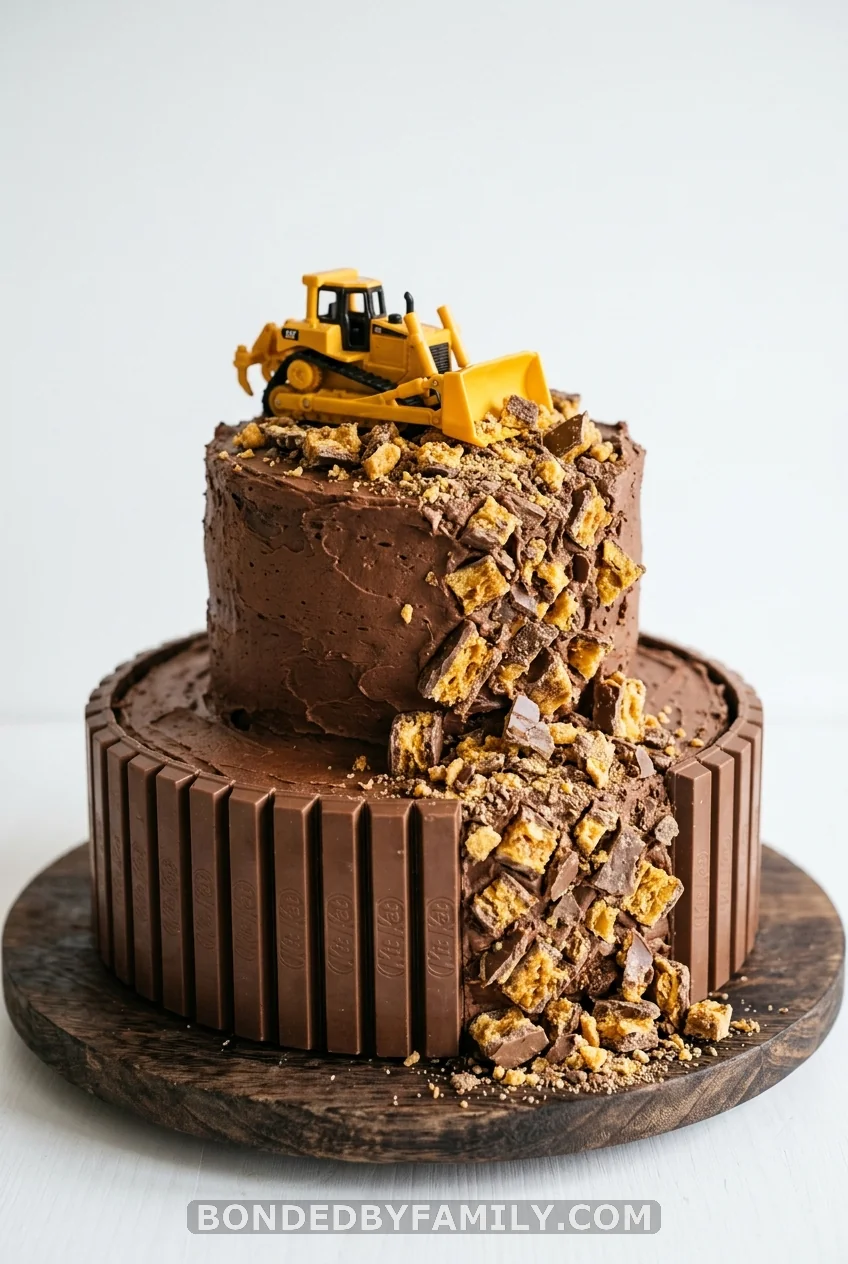
Rubble is everyone’s favorite now that “Rubble & Crew” is its own spin-off. This cake leans hard into that construction site energy.
Bake one 24cm round and one 20cm round. Stack the larger two layers first, then place the 20cm cake off-center toward one edge on top — that offset creates the uneven terrain of a construction site. Ice the whole thing in chocolate buttercream (add cocoa, not brown dye — cocoa gives a richer color and better flavor). Press Kit Kat bars vertically around the base tier to create the fence. Crush chocolate-covered honeycomb with a rolling pin and cascade it down the upper tier as a “rock slide.” Nestle a clean Rubble toy (wash it the night before) on top. Add cookie crumb “dirt” around the base board.
Skill level: Beginner-Intermediate | Time: 3–4 hours | Cost: $25–$40
The toy goes home with the birthday kid. Two wins in one.
4. Chase Police Car Cake
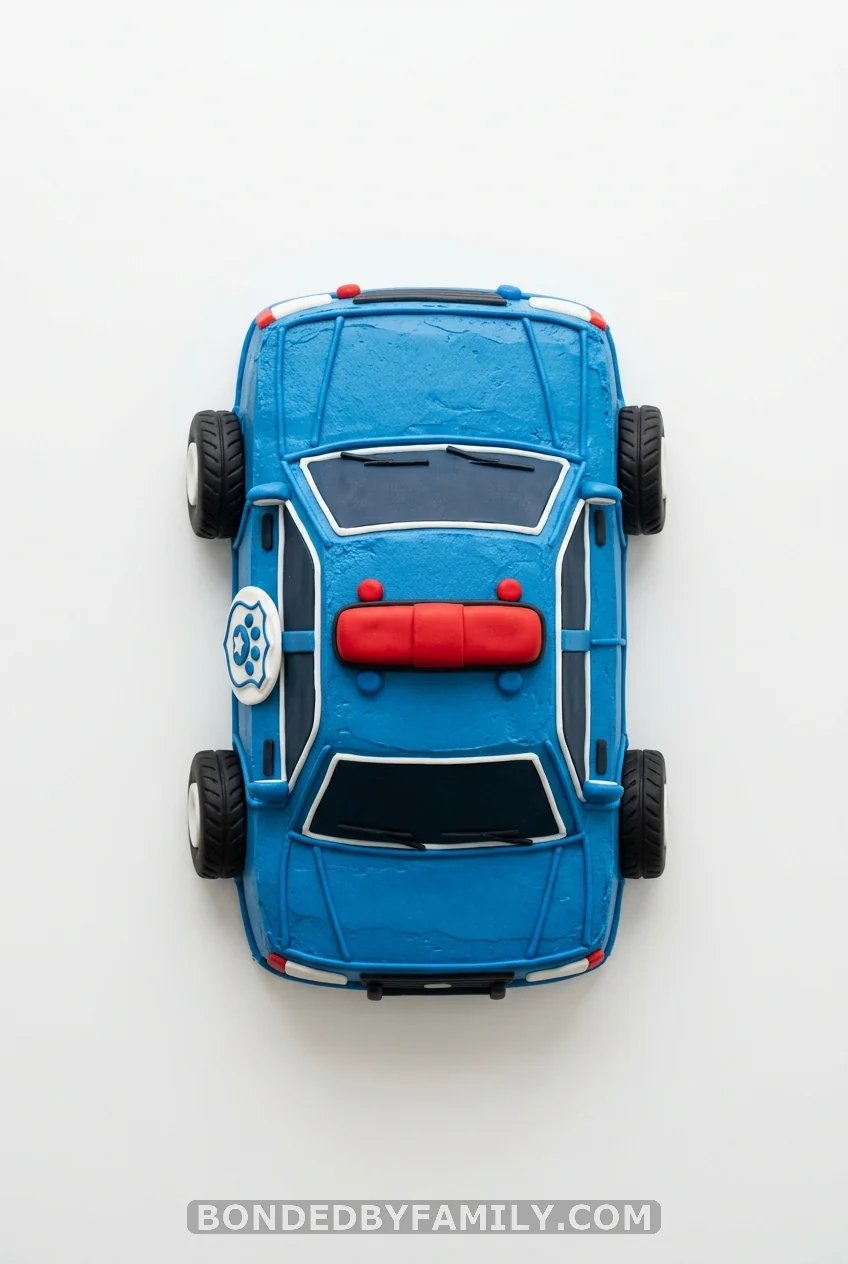
Chase is still the most requested character for boys aged 2–5. A rectangular 9×13 base becomes the car body when you cut a windshield slope at one end. Cover in blue buttercream. Add fondant wheels, a red candy light bar, and a white fondant badge on the side. No specialty pans needed — just a serrated knife and a little nerve.
Skill level: Intermediate | Time: 4–5 hours | Cost: $30–$45
Tip: Wilton’s royal blue gel color (not liquid) gives you that deep Chase-blue without making the frosting taste like dye.
5. Skye Pink & Purple Birthday Cake
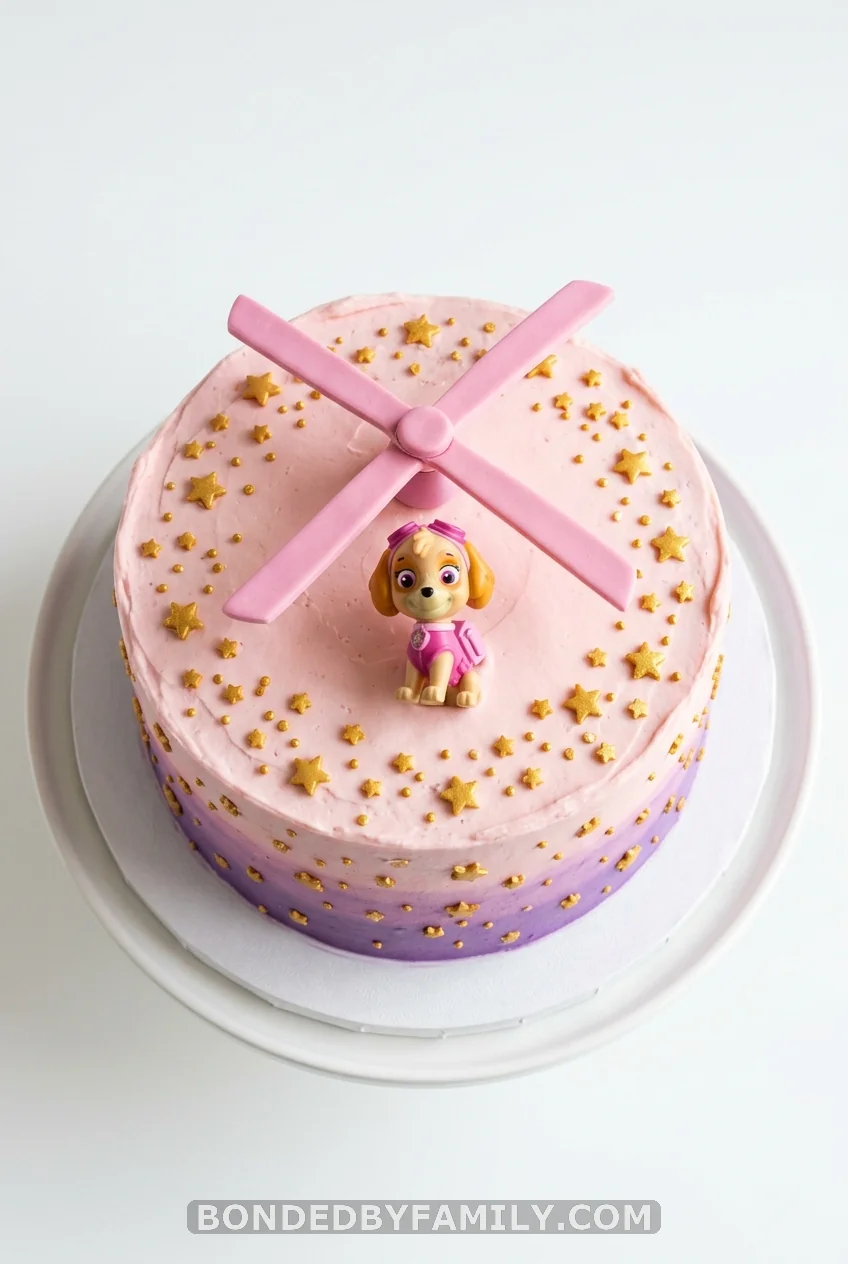
Skye remains the top choice for girls and gender-neutral celebrations because the pink-purple palette is versatile. A two-layer 8-inch round with ombre pink-to-purple buttercream (split one batch, tint separately, layer with a comb) reads instantly as Skye without any fondant work. Add a toy Skye on top, a few fondant helicopter blades in pink, and gold star sprinkles. Done.
Skill level: Beginner | Time: 2.5 hours | Cost: $20–$30
The ombre effect is easier than it looks: use a cake comb or even a fork dragged around the sides. Intentional texture beats a frustrating attempt at smooth.
6. Marshall Fire Truck Sheet Cake
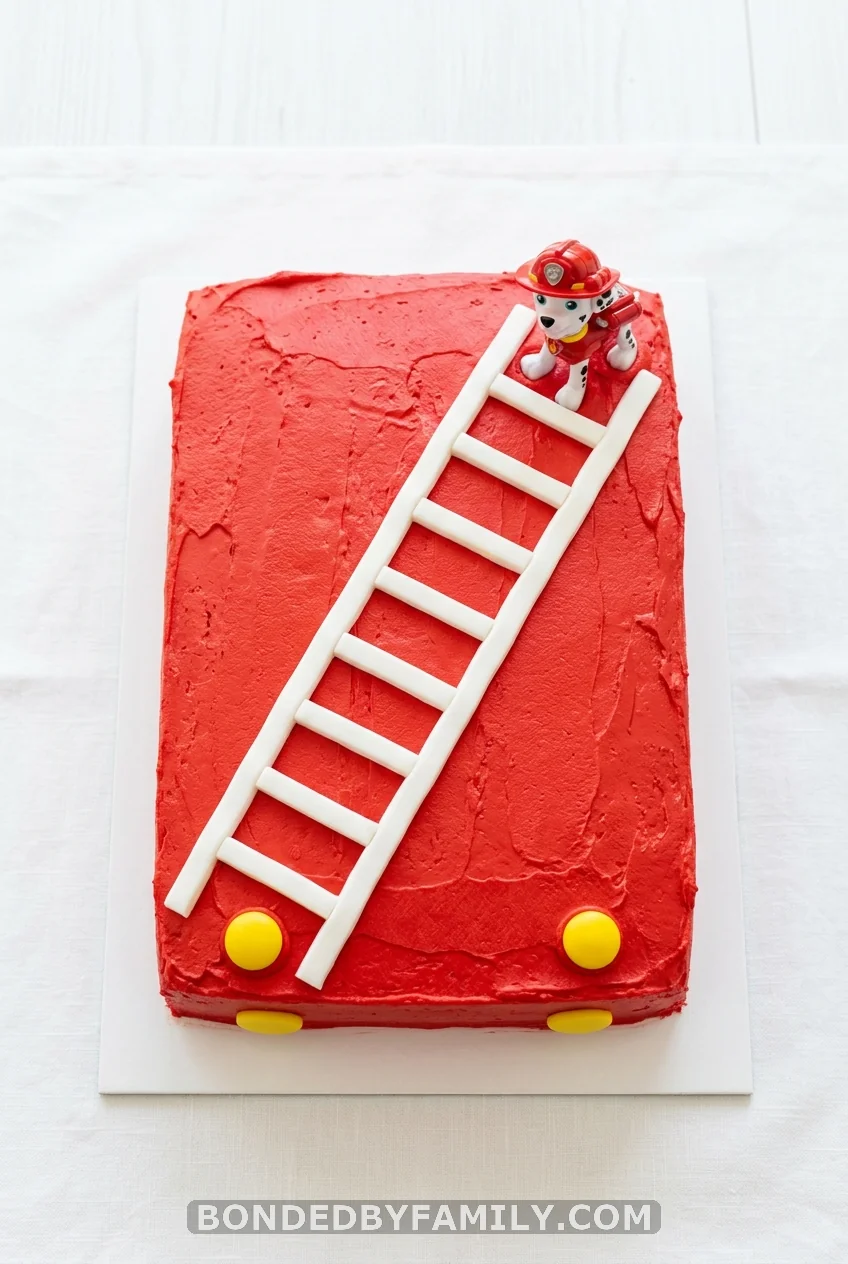
Sheet cakes are underrated at children’s parties. Flat surface means fast slicing for a crowd, no structural risk, and a full canvas for decorating. Cover your 9×13 in bright red buttercream (use Wilton “Christmas Red” — regular red gel turns mouths pink, this one goes deep). Lay fondant ladder details across the top. Add yellow candy headlights at the front edge. Drop Marshall at the wheel.
Skill level: Beginner | Time: 2 hours | Cost: $18–$28
7. Paw Patrol Rainbow Drip Cake
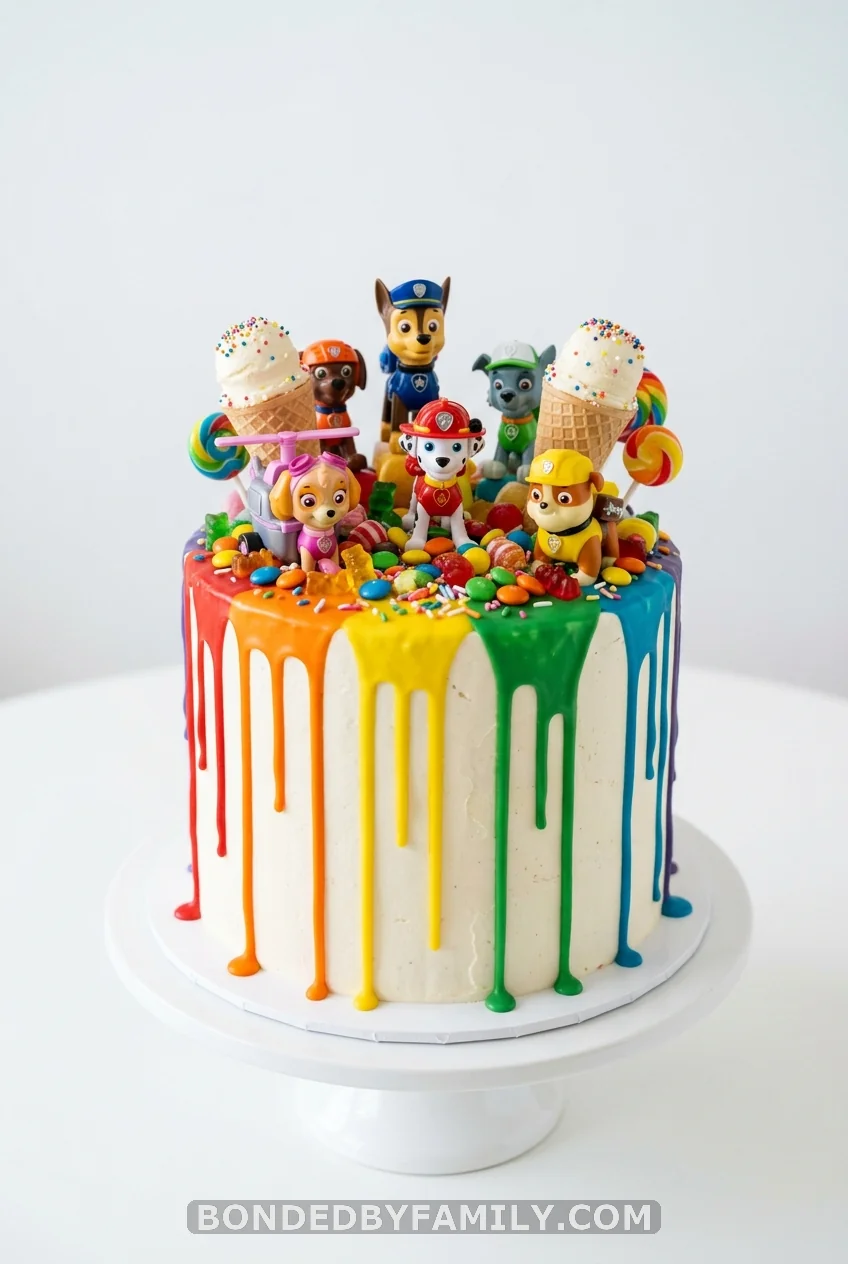
Drip cakes look custom-bakery expensive. They are not. Melt white candy melts in small batches, tint each with oil-based food coloring (not water-based — water seizes chocolate), and drizzle from the top edge with a squeeze bottle or spoon. Let each color set for 2 minutes before adding the next. Top with the full pup gang (the Spin Master 6-figure mini set is $12–$15 on Amazon) and a couple of mini ice cream cones stuffed with candy.
Skill level: Intermediate | Time: 3 hours | Cost: $35–$50
Watch one 3-minute drip cake tutorial before you start. The technique is 80% confidence and 20% temperature control.
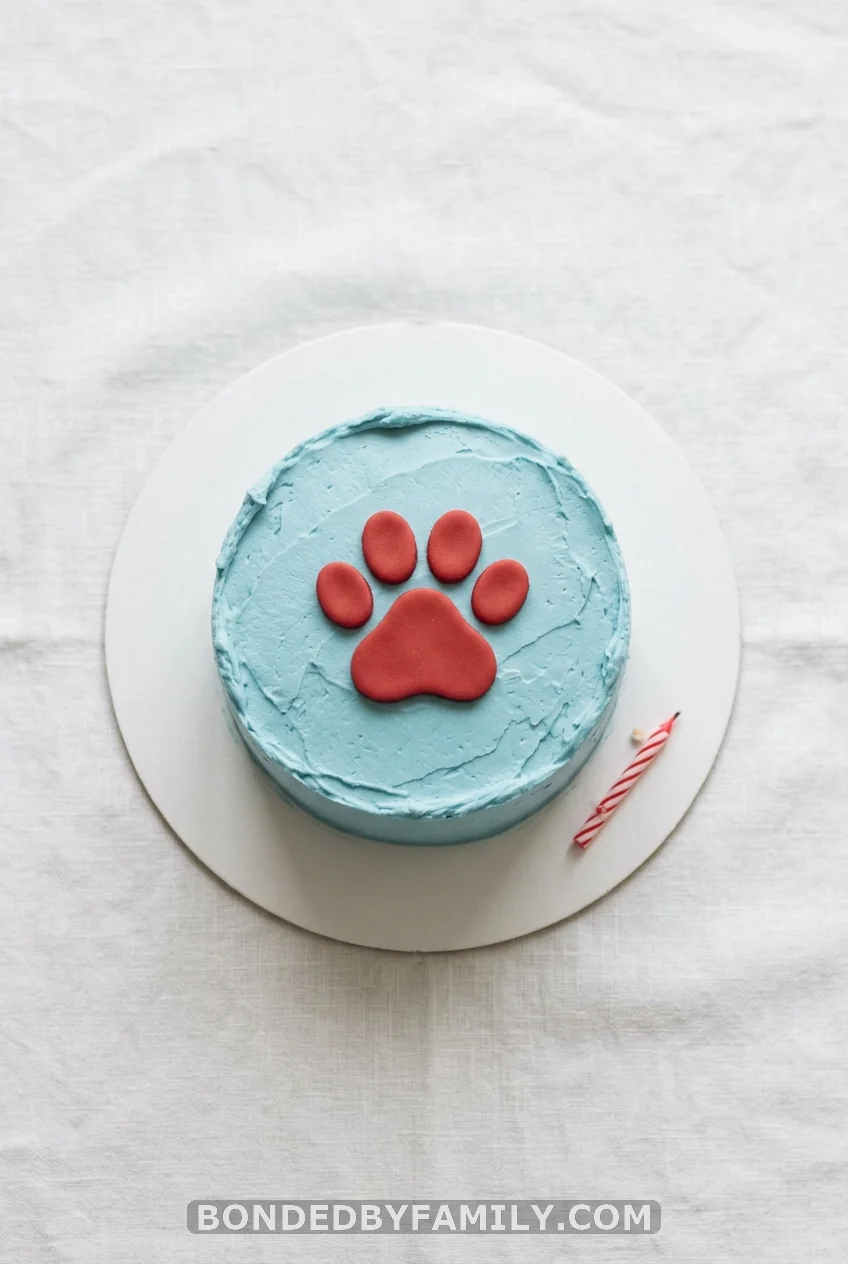
8. Dog Bowl Cake with Cocoa Puffs “Dog Food”
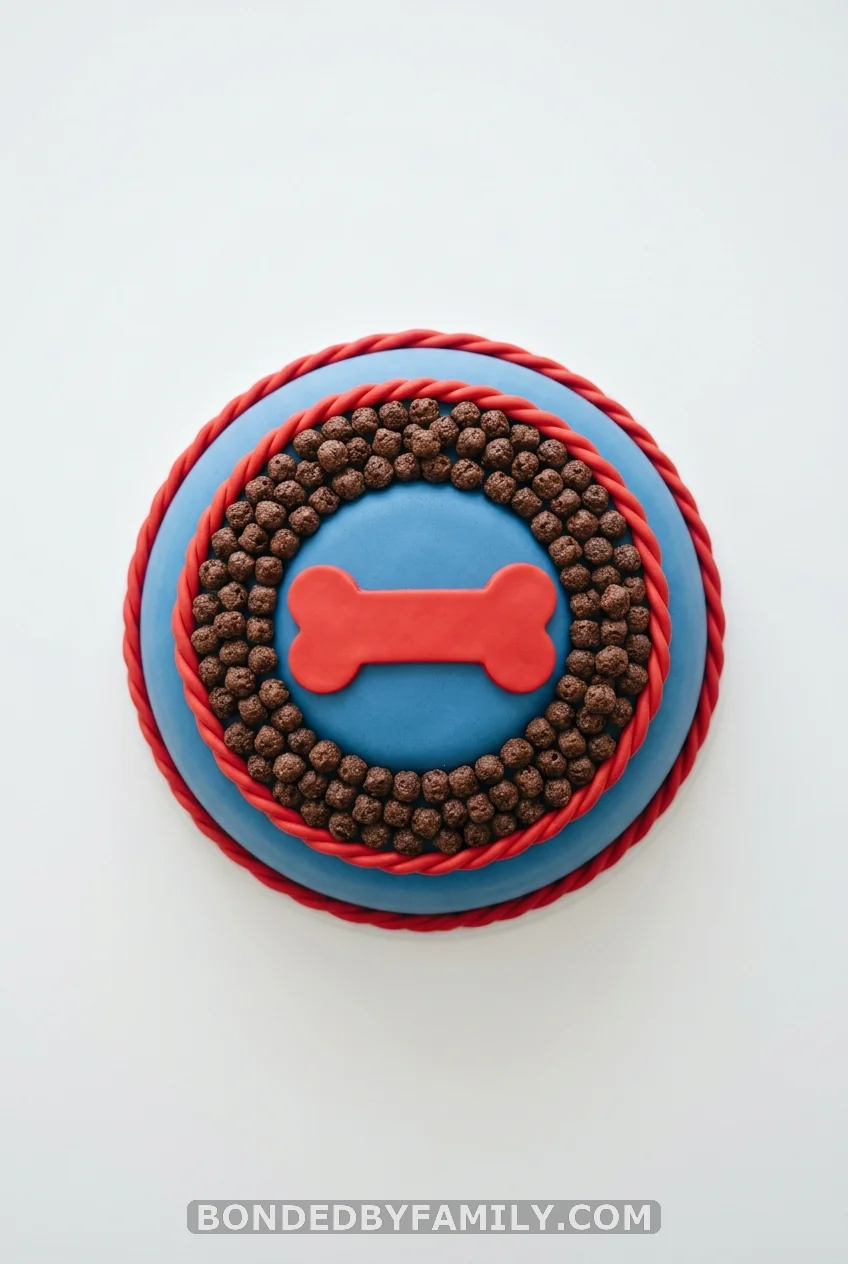
This one is a conversation starter. It’s a round cake carved to a slight dome, covered in blue fondant with a red fondant border around the rim. The “dog food” filling is Cocoa Puffs cereal piled on top. Kids absolutely lose their minds. Adults immediately try to figure out if it’s edible (it is — the cereal sits on top of the frosting).
The Paw Patrol bone logo goes in the center front of the bowl, cut from red fondant. The effect is that of Chase’s actual food bowl.
Skill level: Intermediate | Time: 4–5 hours | Cost: $30–$45
9. Two-Tier Lookout Tower Cake
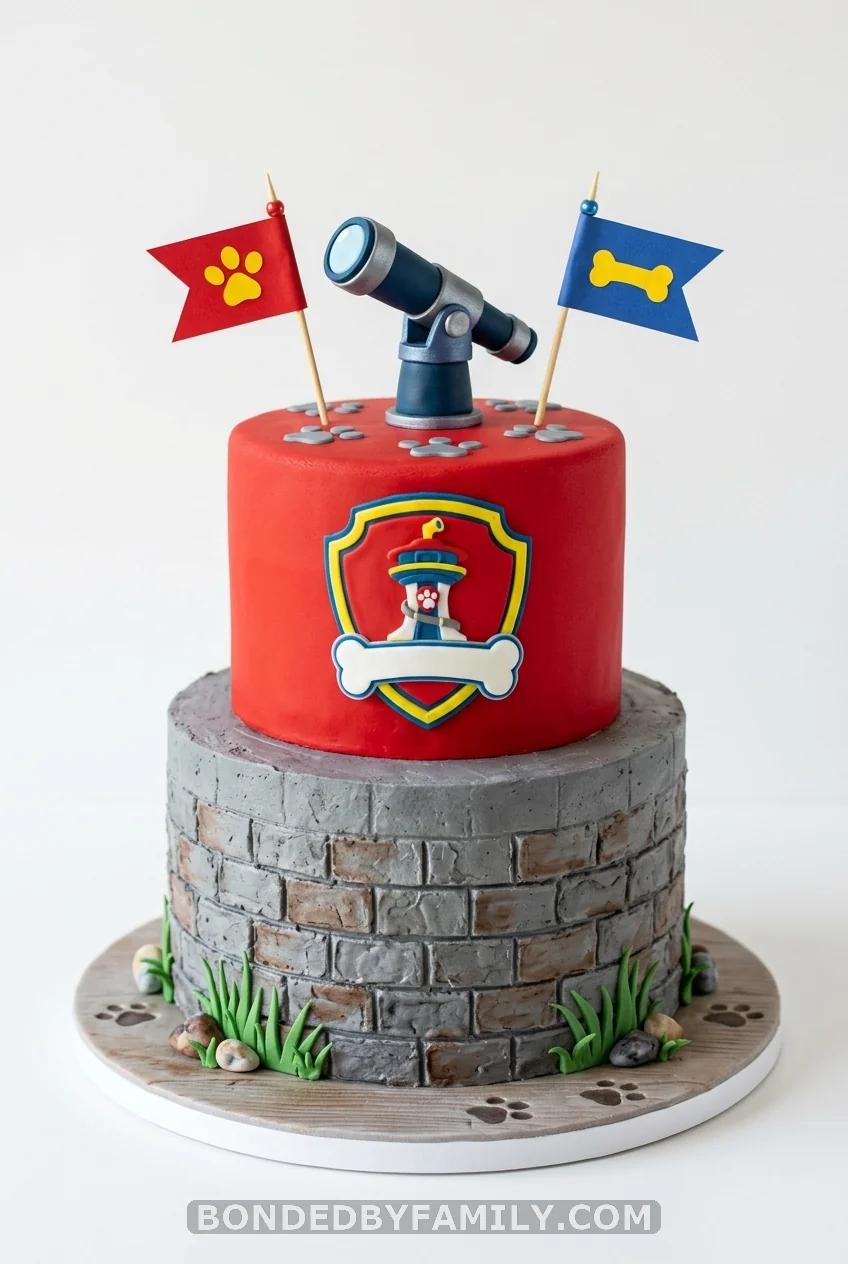
The Lookout Tower from the show has three tiers in reality, but two tiers is a manageable version. Bottom tier in grey buttercream with a textured “stone” effect (dab with a paper towel while frosting is fresh). Top tier in red. Fondant Paw Patrol badge centered on the top tier. Add red and blue flags on toothpick sticks around the top.
Requires a dowel support structure for stability. Use plastic bubble tea straws cut to height — food-safe, rigid enough for a two-tier cake, and easier to source than wooden dowels.
Skill level: Advanced | Time: 6–7 hours | Cost: $45–$65
10. Pull-Apart Cupcake Tower Cake
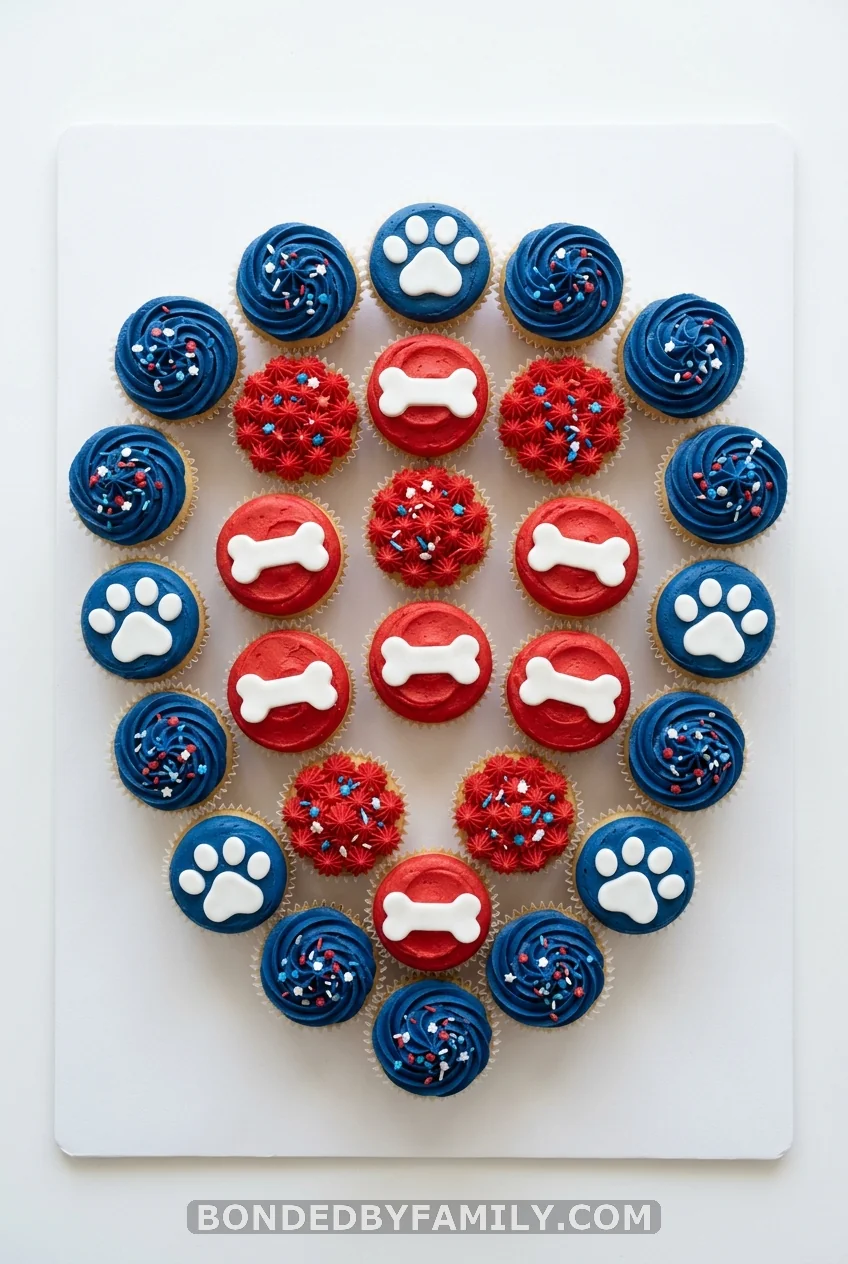
Arrange 20–24 cupcakes in the shape of the Paw Patrol shield on a cake board. Top half in red buttercream, bottom half in blue, with fondant paw prints on select cupcakes. From above, the badge shape is clear. Up close, every kid gets their own cupcake. No slicing. No mess. No crying because someone got a corner piece.
Skill level: Beginner | Time: 2 hours | Cost: $20–$30
This is the correct answer for parties with more than 20 kids. Write that down.
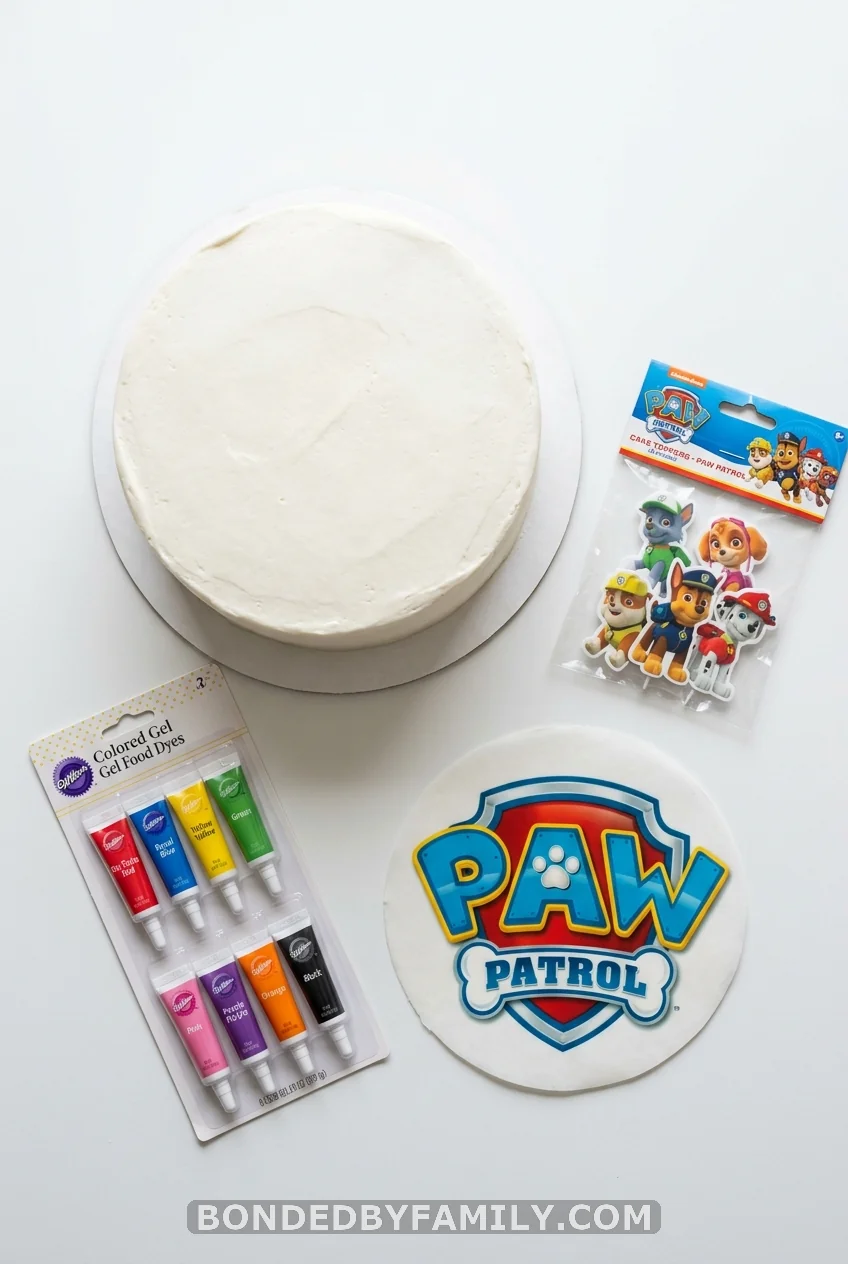
11. Paw Print Sheet Cake
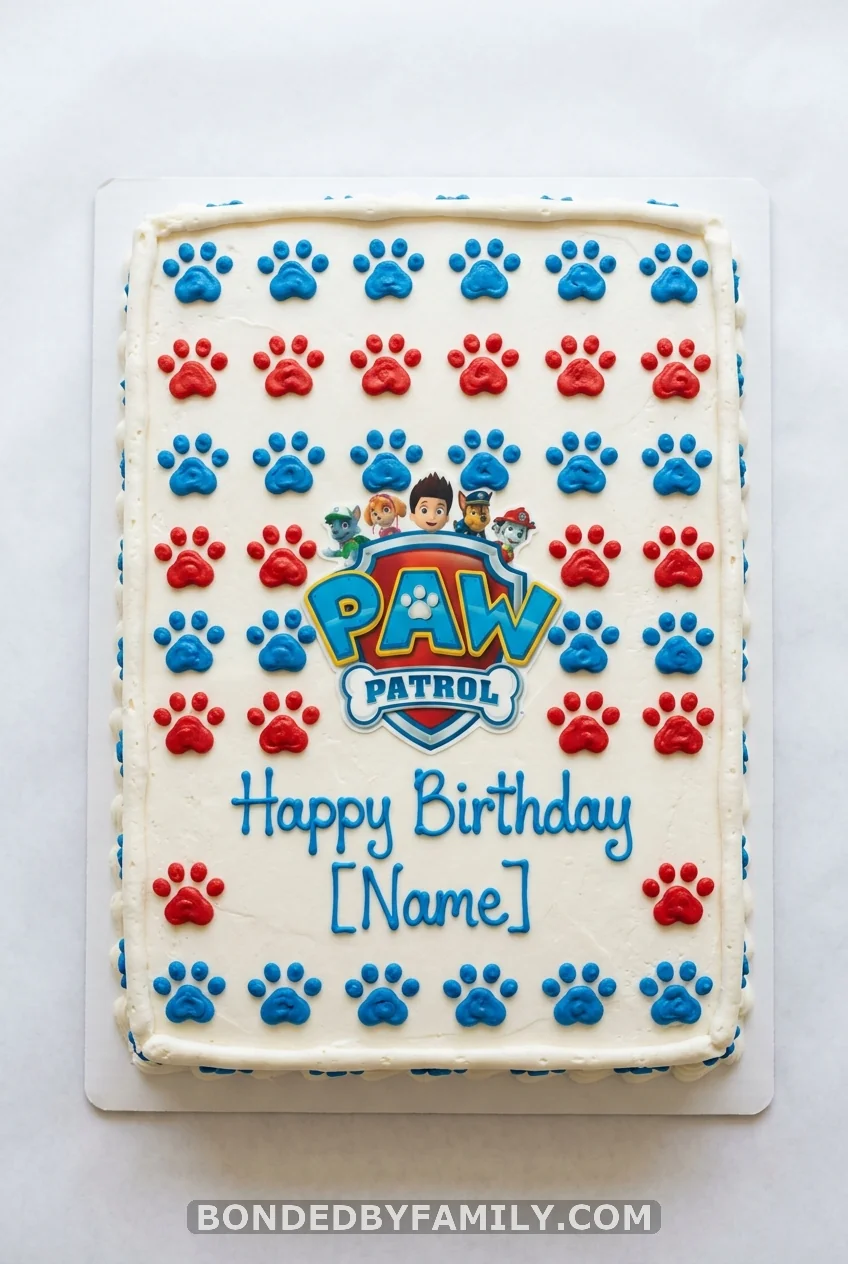
White buttercream base. Blue and red paw prints piped across the top using a round tip. Edible Paw Patrol logo sticker in the center (a $3–$5 purchase from any cake supply aisle). First name in gel icing. Serves 24. Takes 90 minutes. Costs $15–$20. This is the cake for the person who panicked three days before the party.
12. Number Birthday Cake with Paw Patrol Theme
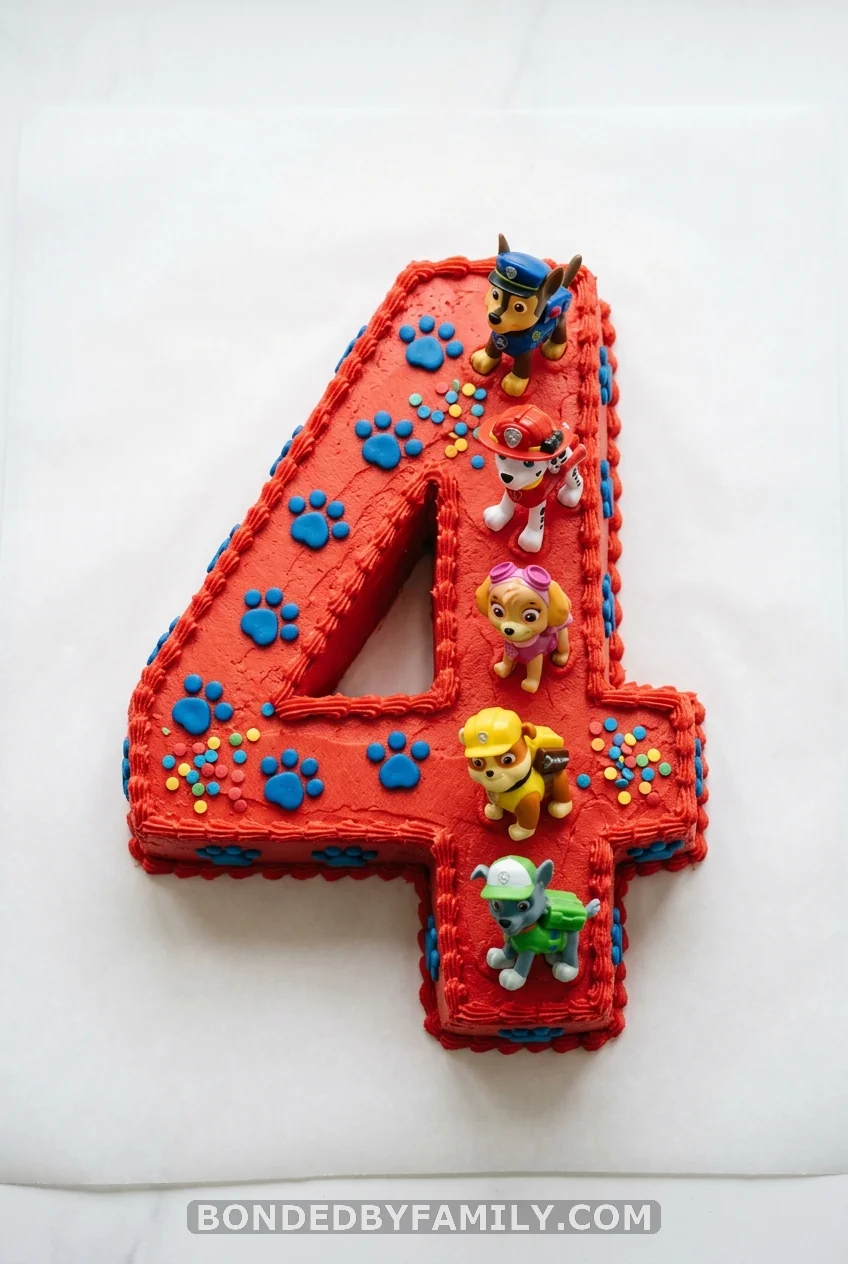
Number cakes are fast to assemble and they tell the story without trying. Order number-shaped cake pans from Amazon (roughly $12–$15 a set) or ask your bakery to cut the shape. Red or blue buttercream. Paw Patrol toy pups arranged along the top. Zero fondant work. The number does all the heavy lifting visually.
Skill level: Beginner | Time: 2 hours | Cost: $22–$35
13. Smash Cake for Paw Patrol First Birthdays
One year olds do not understand what Paw Patrol is. They understand smashing cake with both fists and rubbing it on their faces. The smash cake is not a canvas for your best fondant work. It’s a 4-inch round, one layer, covered in buttercream, with a single paw print on top. That’s it. Save your effort for the display cake that shows up in every photo.
Buy a separate 6-inch display cake (just for photos and guests) — decorate that one with pups and the whole theme. The smash cake: small, soft, and sacrificial.
14. Skye Drip Cake with Meringue Pops
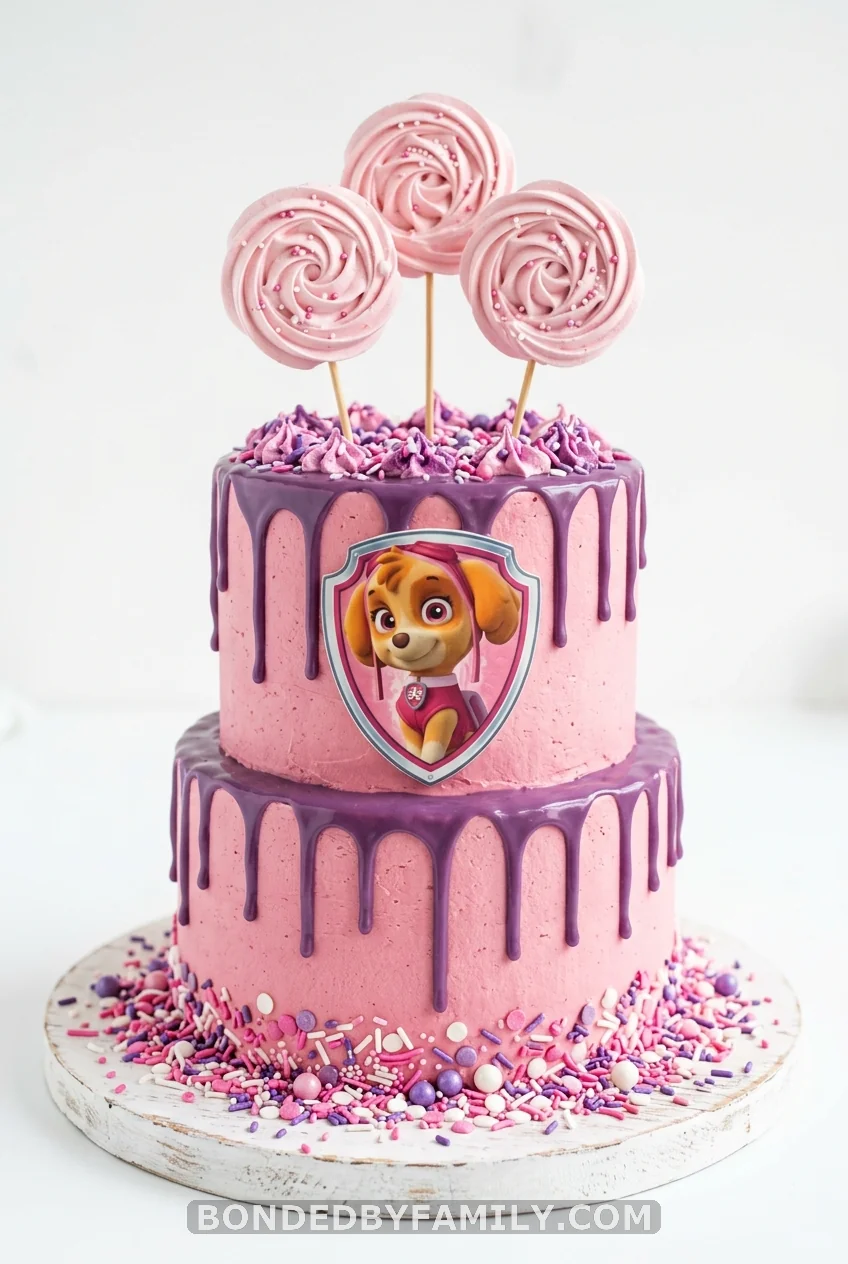
This is the girl-party version of the drip cake. Pink buttercream base. Purple candy melt drip. Meringue pops in pastel pink and white (store-bought at specialty baking shops, or make them from aquafaba three days ahead). Skye’s logo or a Skye toy topper on top.
Skill level: Intermediate | Time: 3.5–4 hours | Cost: $35–$50
Meringue pops are delicate. Make extras. At least two will crack.
15. Paw Patrol Fondant Character Cake
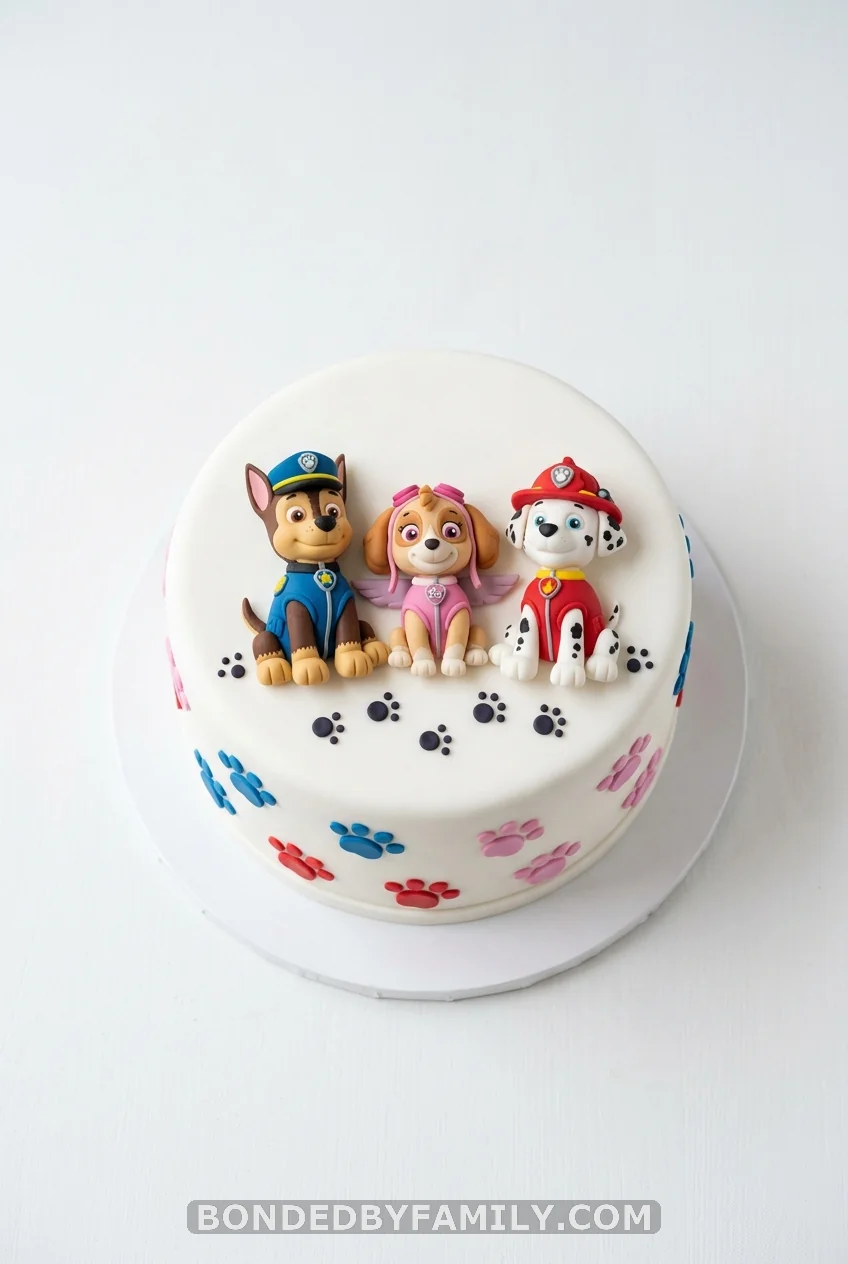
This is the one you save to your Pinterest board and then never end up making. Here is the real breakdown. Sculpting three Paw Patrol characters from fondant takes 4–6 hours on its own — before you touch the base cake. The characters need to dry for 24–48 hours to hold their shape. Marshall’s red is notoriously difficult to achieve without a large amount of red gel, which makes the fondant taste bitter.
If you want this cake: order it. A skilled home baker charges $60–$120 for something at this level. A professional bakery: $150–$250. Both are worth it for what you’re getting. If you’re set on DIY, start the fondant figures on a Thursday for a Saturday party.
Skill level: Advanced | Time: 10–14 hours total | Cost: $50–$70 DIY / $150–$250 ordered
16. The Customization Mistake Most Parents Make
Here’s something nobody warns you about: personalization is not the same as customization.
A parent in a Facebook cake group described ordering a “Paw Patrol cake” from a grocery store bakery. She got a generic blue cake with a Paw Patrol logo sticker on top, and her son’s name piped in white. Cost: $45. It looked like every other Paw Patrol cake at every party that month. Her son wanted Chase specifically — his favorite — and Chase was nowhere.
The mistake? She said, “Paw Patrol cake.” The bakery heard “Paw Patrol logo.”
When you’re ordering from a bakery, be specific: – Which character? “Chase, the blue police pup — not Skye, not Marshall.” – Which colors? “Blue and grey for the base. Red badge detail.” – What size? “Serves 20 — I need a 10-inch two-layer round.” – What decorations? “I want paw prints in grey fondant around the sides and Chase’s police badge on top.” – Any dietary notes? “Nut-free please — we have an allergy.”
Bring a printed photo. Bakers work from photos. A photo is worth 400 words of description every time.
This also applies to grocery store custom cakes. The decorator has 20 minutes per cake and zero mind-reading ability. The more specific your reference image and written notes, the better the result.
17. What to Know Before You Order: Bakery vs. Homemade vs. Store-Bought
Nobody frames this as a real comparison, so here it is.
| Option | Avg. Cost | Skill Needed | Lead Time | Best For |
|---|---|---|---|---|
| Grocery store bakery | $18–$55 | None | 48–72 hrs notice | Panic planning, big groups |
| Custom bakery (local) | $80–$250 | None (you pay for theirs) | 1–3 weeks | Important milestone birthdays |
| Home baker (hire) | $60–$120 | None | 5–10 days | Budget-friendly custom look |
| DIY beginner | $15–$30 | Low | Day-of | Confidence + time available |
| DIY intermediate | $30–$55 | Medium | 1–2 days | Parents who bake regularly |
| DIY advanced | $45–$70 | High | 2–3 days | Experienced home bakers |
The grocery store cake is not the inferior option. At a party with 20 kids under the age of five, nobody is critiquing the fondant work. They are smashing cake into their faces and crying because someone touched their party hat. The grocery store cake that looks good in photos and feeds everyone without a structural collapse? That is a success.
18. No-Bake Paw Patrol Ice Cream Cake
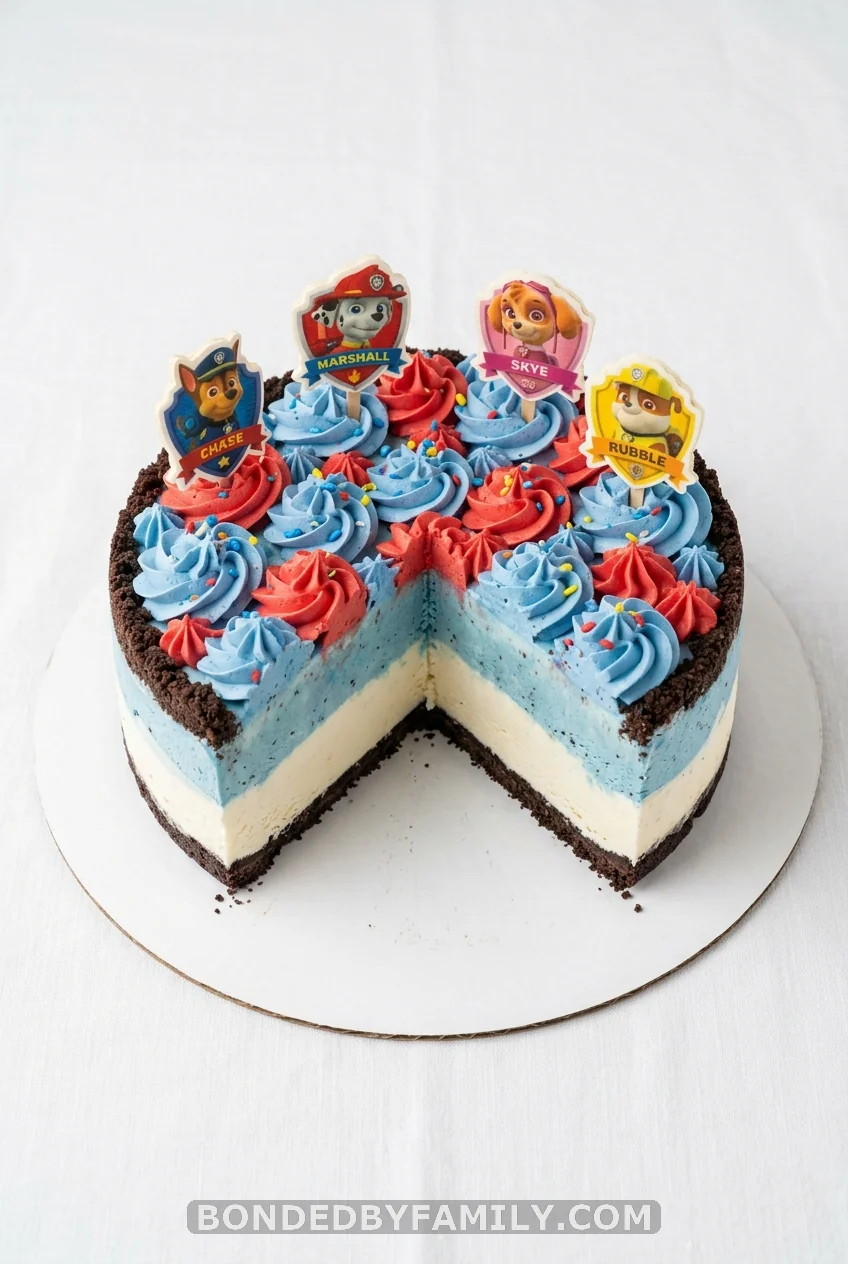
Summer party? Hot venue? Outdoor setup? Do not bring a buttercream cake. It will slide. It will melt. You will cry in a parking lot.
Line a springform pan with plastic wrap. Press crushed Oreos (one sleeve, about 36 cookies) mixed with 3 tablespoons melted butter into the base — refrigerate 30 minutes to set. Layer in softened vanilla ice cream (one 1.5-quart container). Press flat. Freeze for 1 hour. Add a second layer of strawberry or blue-raspberry sorbet (tint vanilla ice cream with blue gel food coloring if you want the Paw Patrol blue). Freeze overnight.
Release from the pan 10 minutes before decorating. Pipe whipped cream rosettes in red and blue around the top. Add Paw Patrol character wafer picks. Keep frozen until 10 minutes before serving.
Skill level: Beginner | Time: 20 minutes active, overnight freeze | Cost: $18–$28
This is the smartest cake on this list for summer parties. The kids don’t care that it’s ice cream instead of cake. They care that it’s cold.
19. The Paw Patrol Sprinkle Cake
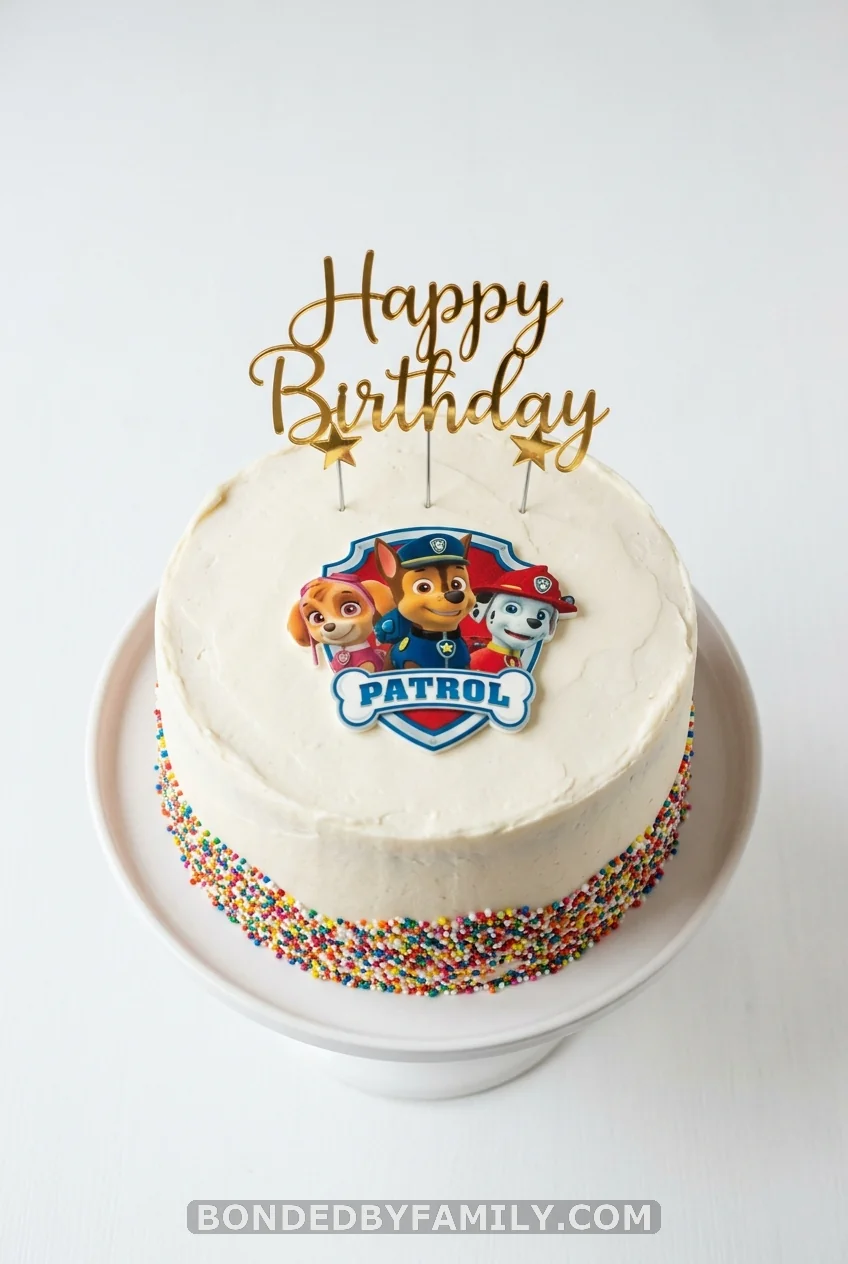
Put this one in your back pocket. Smooth white buttercream. Rainbow sprinkles pressed into the lower third of the sides while frosting is still fresh. Paw Patrol logo fondant topper in the center (available pre-made on Etsy, $4–$8 shipped). Name pick topper in gold.
It looks put-together. It requires zero artistic ability. It takes 90 minutes. It photographs beautifully because the white base and colorful sprinkles pop against any background. This is the “I’m not a baker, but I want it to look like I tried” cake, and there is absolutely nothing wrong with that.
Skill level: Beginner | Time: 90 minutes | Cost: $18–$25
Wrapping Up
There is no wrong paw patrol party cake — only one that doesn’t match your actual skill level and timeline. The 10-minute store-bought hack is just as valid as the six-hour bone-shaped showpiece. What matters is that you picked the right one for your situation and your kid walks in and loses their mind when they see it.
Chase, Marshall, Skye, Rubble — they all show up differently on a cake. Pick the character your kid talks about most, match the format to your time and budget, and go from there. You’ve got everything you need right here.
FAQ
How far in advance can I make a Paw Patrol cake? Most buttercream cakes stay fresh for 2–3 days at room temperature or up to a week refrigerated. If you’re making fondant decorations, make those 2–3 days ahead so they can dry and harden. Bake the actual cake layers one day before the party. Assemble and decorate the day of, or the evening before, for morning parties.
What size cake do I need for a Paw Patrol birthday party? A two-layer 9-inch round cake serves 20–24 people. A full 9×13 sheet cake serves 24–30. For parties of over 30 guests, bake two 9×13 sheets or use the pull-apart cupcake format. Smash cakes (for the birthday child) are typically 4 inches and serve the birthday kid only.
Is it cheaper to order a Paw Patrol cake or make one yourself? DIY is cheaper upfront — $15–$55, depending on complexity, versus $45–$250 from a bakery. However, factor in your time. A six-hour DIY project has a real cost. For milestone birthdays or elaborate fondant designs, a home baker charging $60–$120 often makes more sense than spending an entire Saturday in the kitchen.
What are the most popular Paw Patrol characters for birthday cakes? Chase (blue police pup) leads for boys aged 2–5. Skye (pink helicopter pup) is the top pick for girls. Marshall (red fire pup) is a strong second for boys. Rubble (yellow bulldog/construction pup) has surged in popularity with the spin-off. For a general Paw Patrol cake — no specific character — use the full team logo or all-paws design to keep everyone happy.
Can I use real Paw Patrol toys as cake toppers? Yes. Wash them with soap and water, dry fully, and place on the cake just before serving. This approach works well with the Kit Kat construction cake and the pull-apart cupcake designs. The toys then go home with the birthday child — a practical second win. Avoid small pieces that could be a choking hazard for children under three.