School’s out, and the “I’m bored” chorus starts by 9 a.m. If you’ve searched for summer crafts for kids and found nothing but projects that need a craft-store run and a roll of paper towels, this sponge-painted ice cream cone is your fix.
You stamp paint “scoops” onto paper with a cut sponge. That’s the trick. The texture comes out looking like real soft-serve, and a two-year-old can do it next to a nine-year-old without either one getting bored. By the end of this guide, you’ll know the exact supplies (under $6), the six steps, and the one tip that stops every scoop from turning a sad shade of brown.
Why Kids Keep Coming Back to This One
Most summer crafts for kids fall into two camps. Either they need fifteen supplies, or they’re so short that the kids finish in ninety seconds and want more. This one lands in the middle.
The sponge does the heavy lifting. Kids press, lift, and a fluffy scoop appears like magic. There’s no “right” way to do it, so there’s no frustration. A toddler stamps the same spot ten times. A second-grader builds a ten-scoop tower and argues about flavors. Same craft, same table, zero tears.
It also sneaks in real learning. Color mixing. Counting scoops. Talking about textures. You don’t have to call it a lesson. They won’t notice.
What You’ll Need (Total Cost: Under $6)
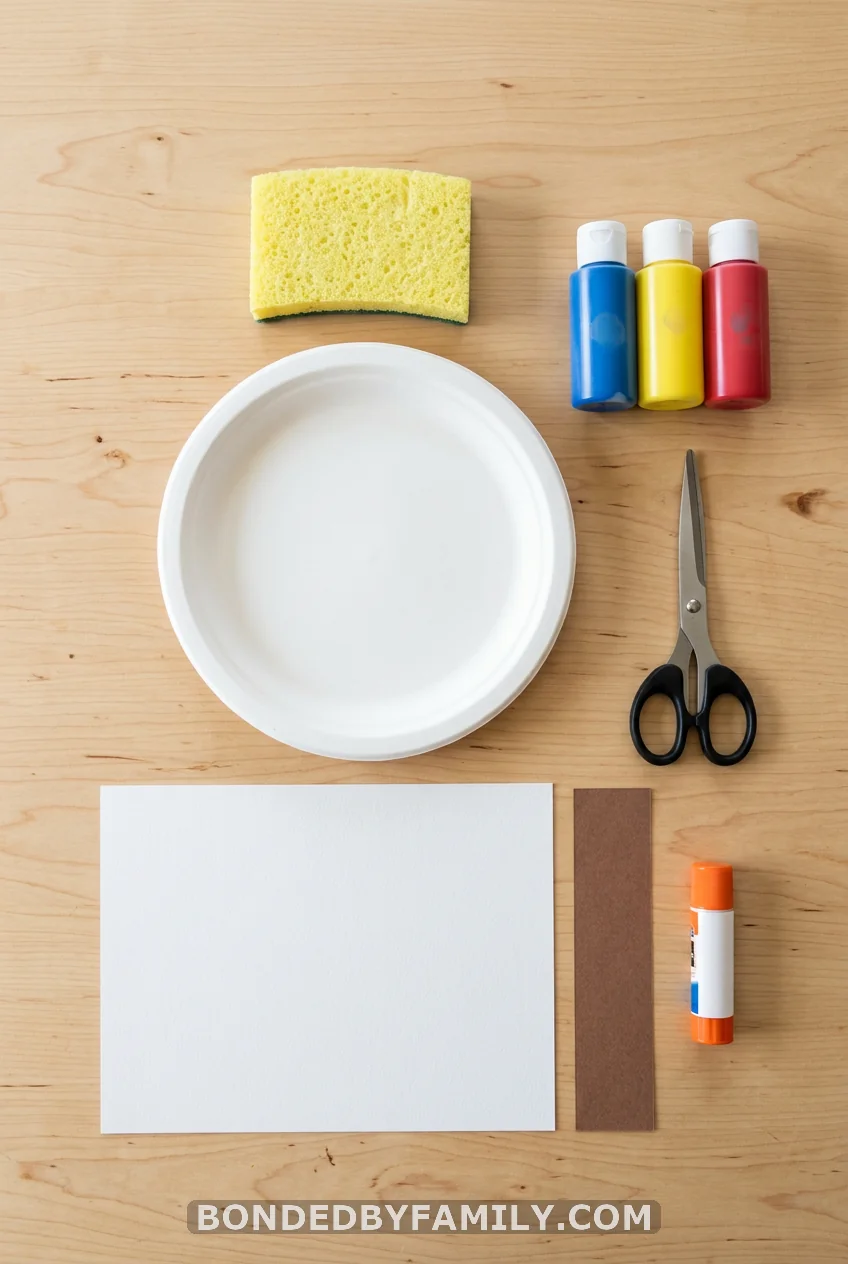
Raid the kitchen drawer first. You probably own most of this.
- Cellulose kitchen sponges (2 to 3). The yellow ones hold paint better than thin foam. About $1 for a multi-pack.
- Washable tempera paint. Crayola Washable is the safe pick — it lifts off skin and most fabrics with water. Roughly $1 to $2 a bottle. Grab two or three colors.
- White cardstock. Heavier than printer paper, so it won’t curl when the paint gets wet. A sheet costs pennies.
- Brown construction paper for the cone.
- A white paper plate as your paint palette.
- Scissors, a glue stick, and a small cup for tracing circles.
Skip the printer paper if you can. It buckles the second it’s wet, and the scoops smear. Cardstock holds its shape.
How to Make Sponge-Painted Ice Cream Cones, Step by Step
Set up first. Lay down a tray or an old towel. Roll sleeves. Tape the cardstock to the table so it can’t slide. Two minutes of prep saves ten minutes of cleanup.
Step 1: Cut and Texture the Cone
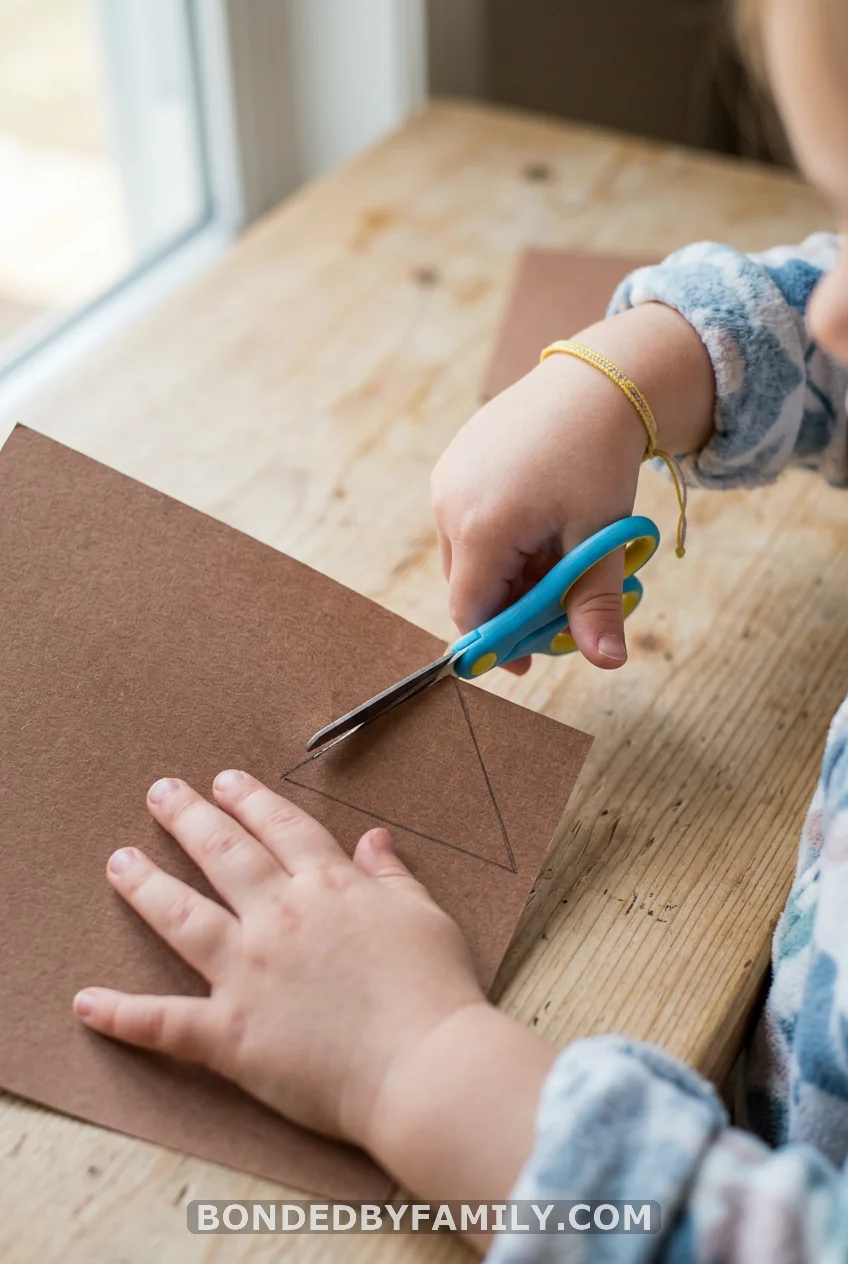
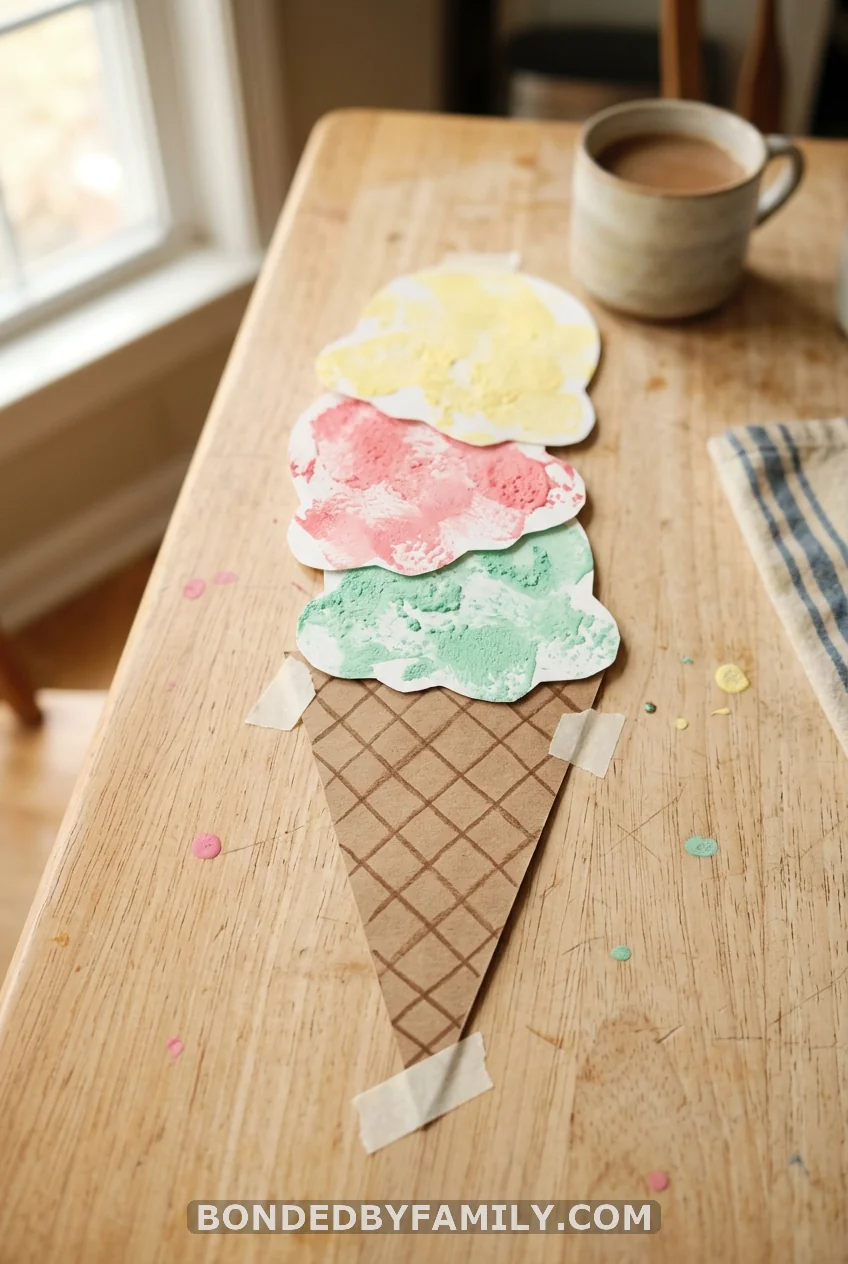
Cut a tall triangle from the brown paper. Point down, like a cone. To fake the waffle texture, dip the edge of a small piece of cardboard in a little brown paint and stamp criss-cross lines across the cone. A fork works too — drag the tines for quick grid marks.
Step 2: Glue the Cone Down
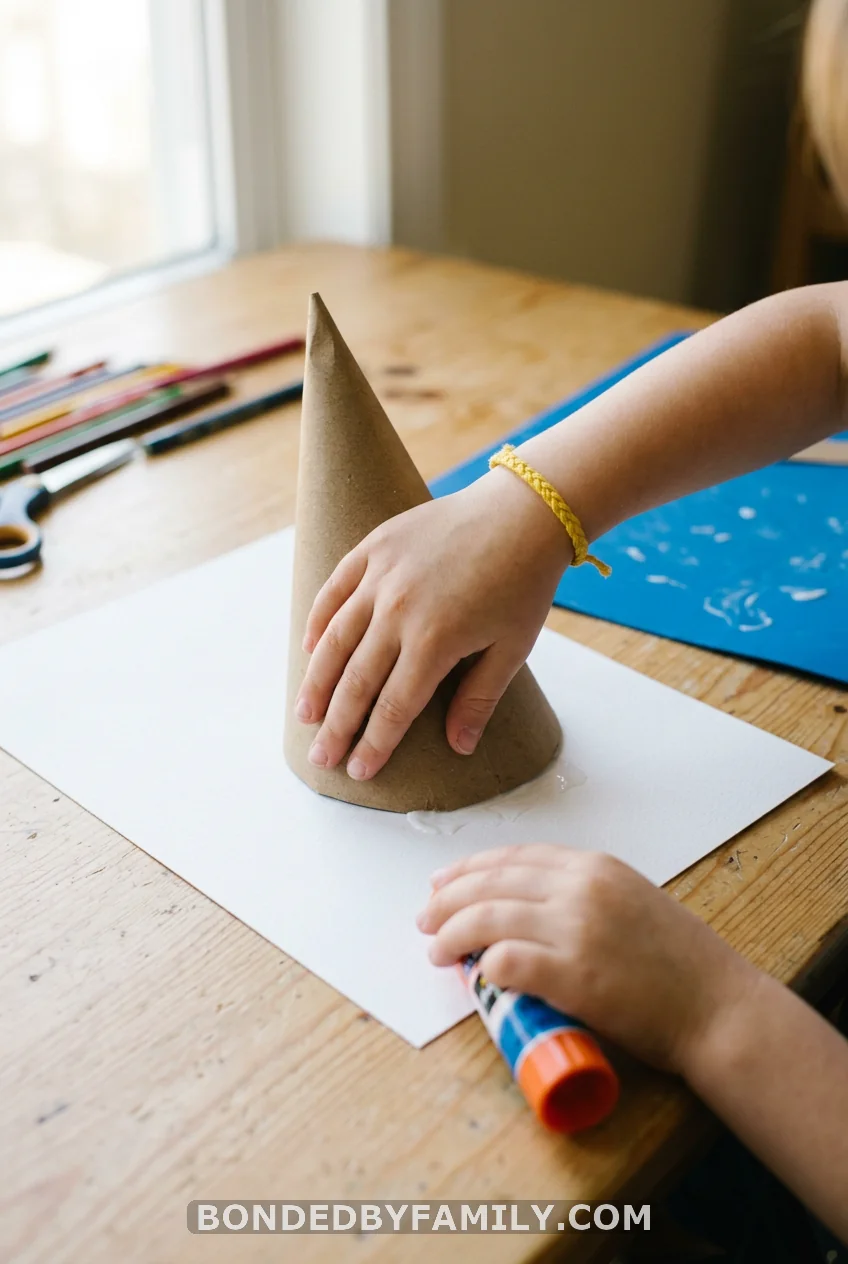
Run the glue stick along the back of the cone. Press it onto the lower third of your cardstock, point at the bottom. Leave plenty of room above it. That space is where the scoops go, and kids always want more room than you’d think.
Step 3: Cut Your Sponge “Scoops”
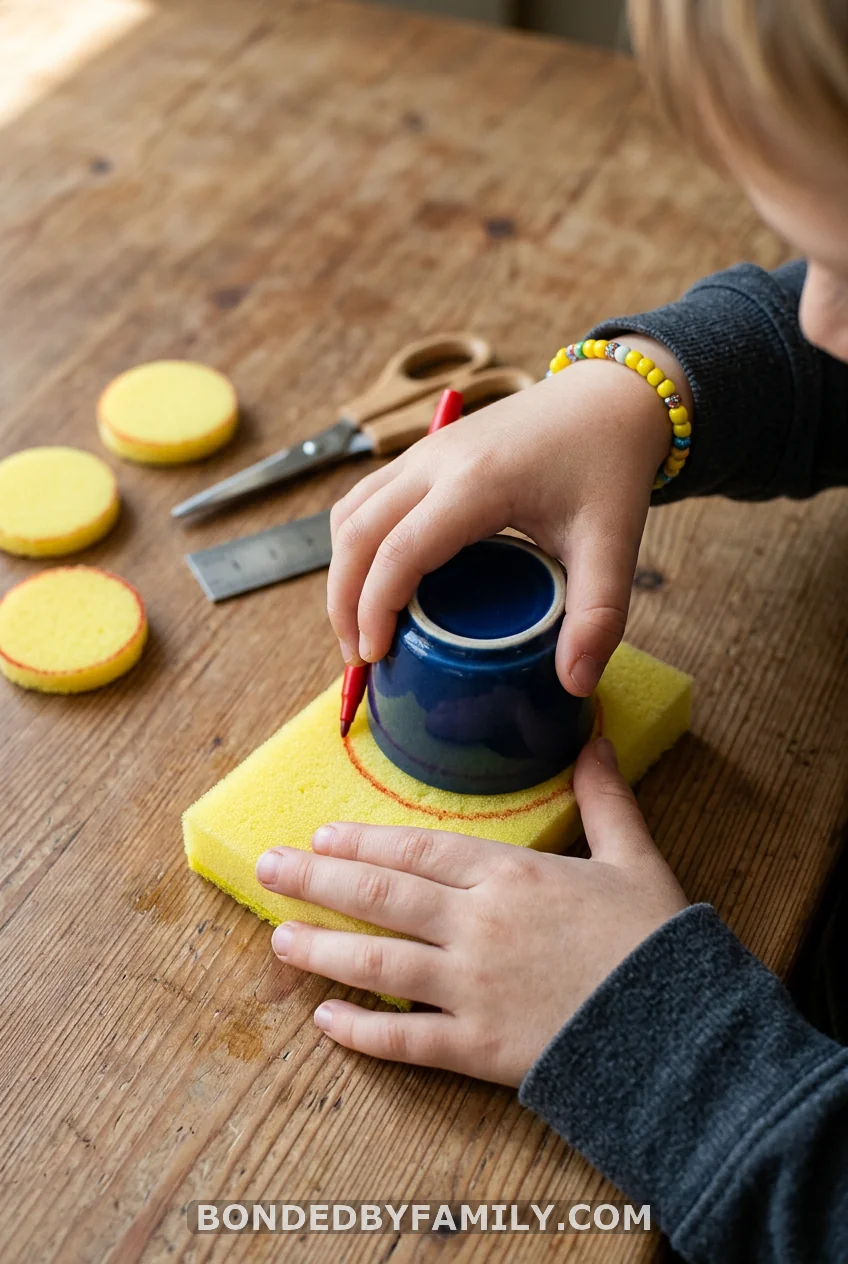
Flip the cup over and trace its rim onto the sponge with a pen. Cut out the circle. Make two or three. Different cup sizes give you different scoop sizes, which is a nice touch for older kids who want a fancy stacked cone.
Cellulose sponges cut cleanest when they’re dry. Wet ones squish and tear.
Step 4: Set Up Your Paint Palette
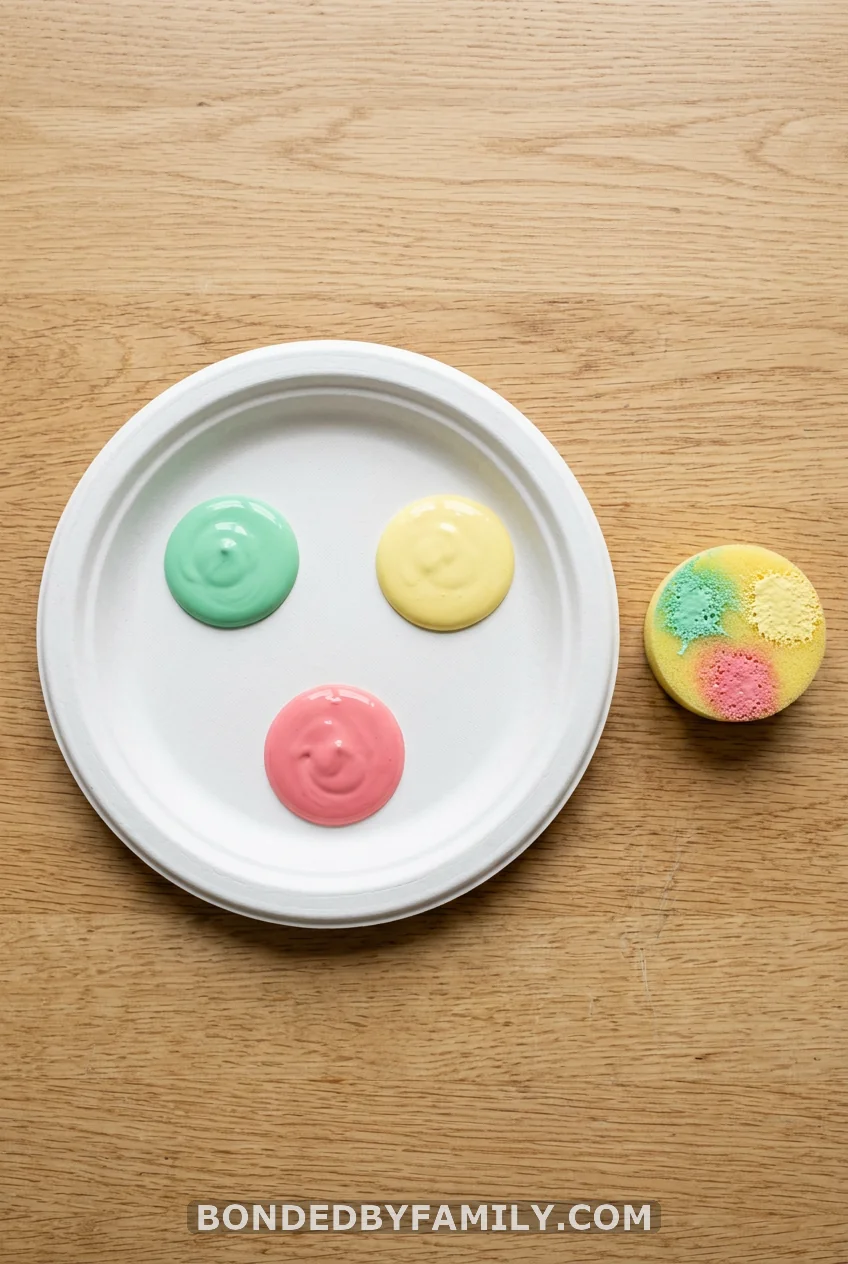
Squeeze a coin-sized blob of each color onto the paper plate. Keep them apart. This is the part most tutorials skip, and it’s the part that matters most. More on that in a second.
Step 5: Stamp the Scoops
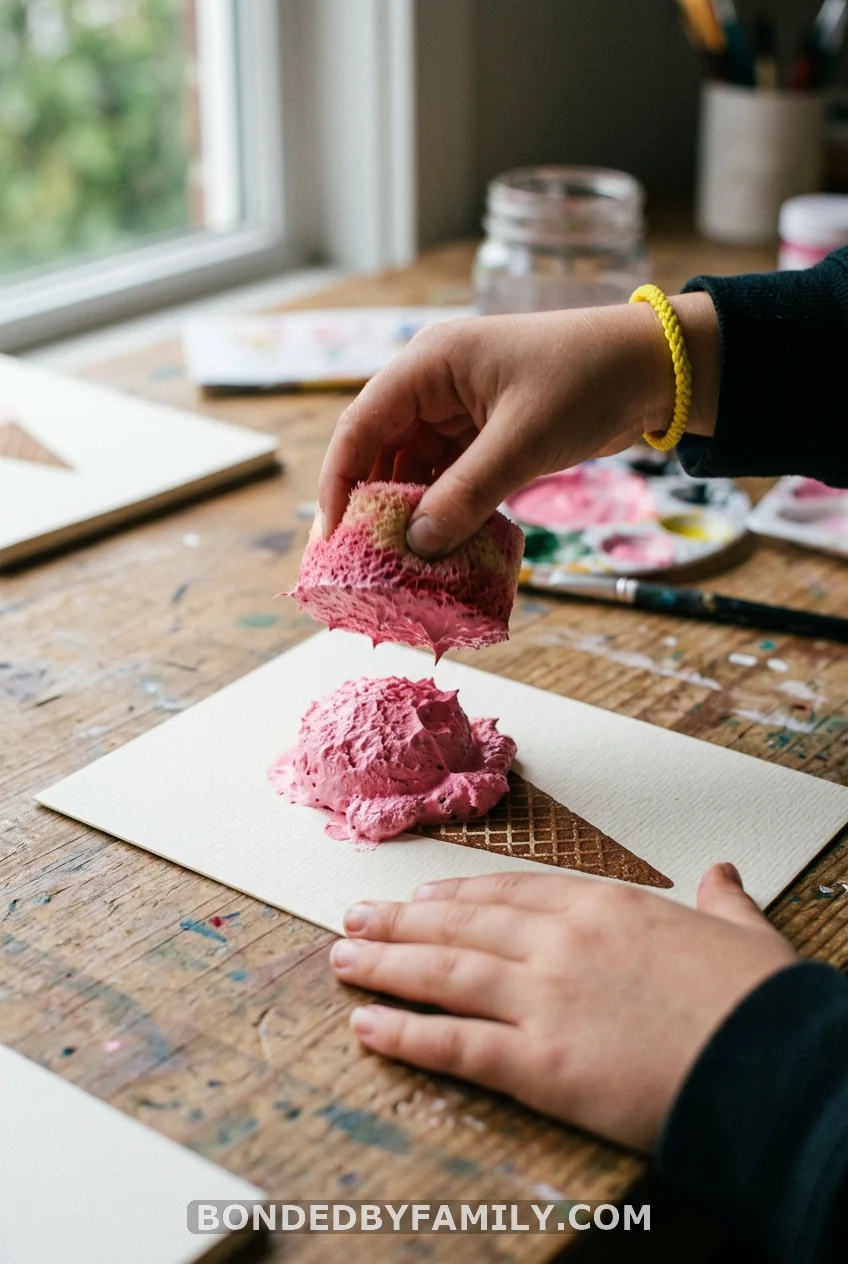
Press the sponge into one color, then stamp it above the cone. Lift straight up. A soft, fluffy scoop appears. Stack a second scoop on top in a new color. Then a third.
Let kids stamp freely. A leaning, overloaded cone is half the fun.
Step 6: Add Details and Let It Dry

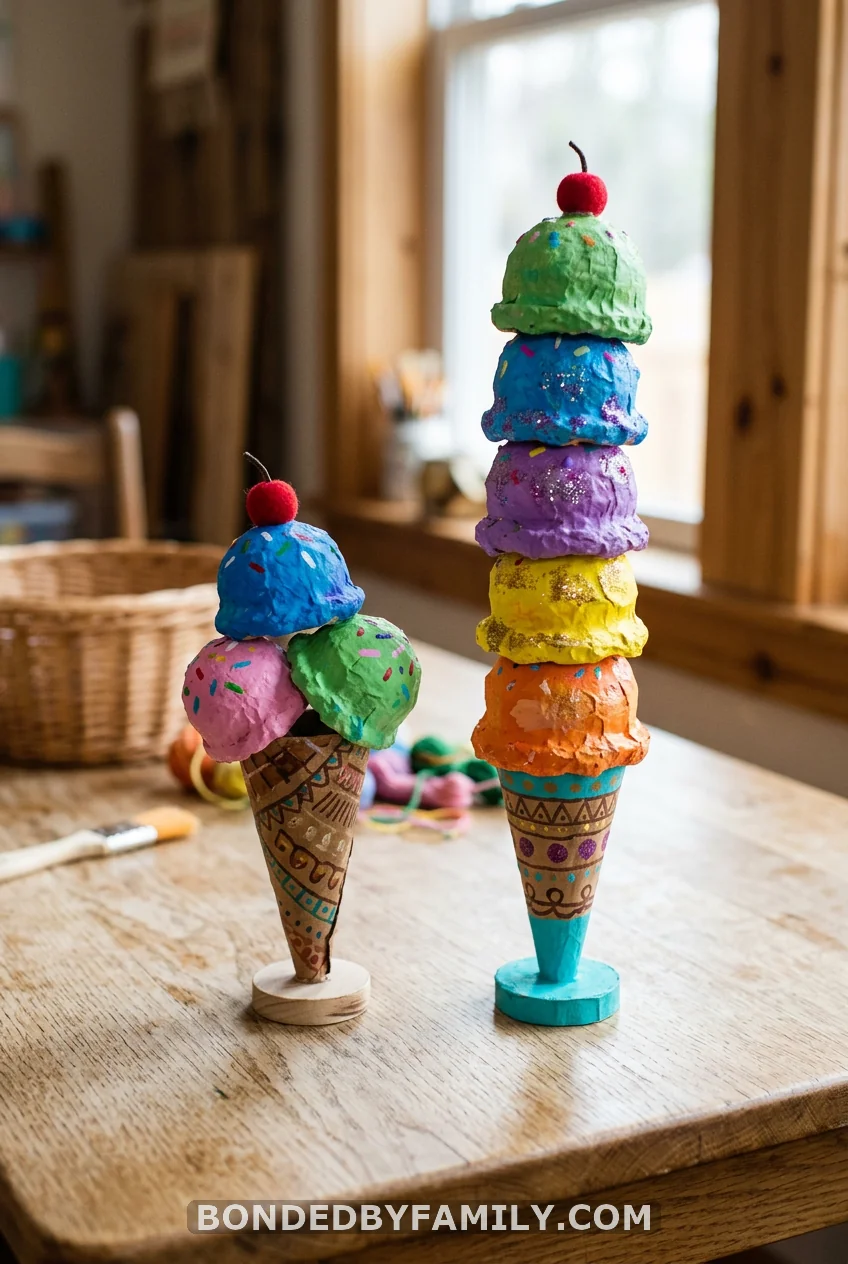
Give the paint 20 to 30 minutes to dry. A small fan cuts that in half. Once it’s dry, hand over markers for sprinkles, a glued-on pom-pom cherry, or a paper spoon. Done.
The One Mistake That Turns Every Scoop Brown
Here’s the fix that saves the whole craft: keep the colors apart, and use a fresh corner of the sponge for each one.
When kids dip the same sponge spot into pink, then green, then yellow without a rinse, the colors blend on the sponge, and every scoop comes out muddy brown. It happens fast. Give each color its own sponge if you can spare them, or rinse and squeeze the sponge between colors.
Want to lean into mixing instead? Let them. Stamp yellow, then dab a little red on top, and watch orange appear. Just decide on purpose, so the brown scoop is a choice and not a surprise.
Quick Tips for Each Age
Toddlers (2 to 3) do best with one big sponge and one or two colors. Pre-cut the cone for them. Let them stamp wherever they want — the wall of the page included.
Preschoolers (4 to 5) can stamp scoops and add their own sprinkles. This is a strong age for talking about which color goes on which scoop and counting as they stack.
School-age kids (6 to 10) can run the whole thing solo. Hand them the scissors, the cup, and the paint, and step back. Challenge them to build the tallest cone that won’t tip, or to copy a real ice cream flavor.
Fun Twists When They Want More
The same sponge-stamping trick works for a stack of other summer crafts for kids. Stamp a row of scoops along a paper strip for an ice cream garland. Swap the cone for a popsicle stick and a rectangle, and you’ve got sponge-painted popsicles. Cut a watermelon-slice shape and stamp red with black bean “seeds” on top.
Save the finished cones, too. Laminate one as a placemat. Tape a magnet to the back for the fridge. String a few together for a summer party banner.
Cleanup in Five Minutes
Washable tempera is your friend here. Wipe the table with a damp cloth before the paint sets. Toss the sponges or rinse them well and let them dry flat. Paint on clothes? Soak in cold water, then a normal wash. The pre-laid towel catches most of it anyway.
Wrapping Up
A handful of sponges, a few squirts of paint, and a sheet of cardstock — that’s all it takes to turn a long, hot afternoon into something kids feel proud of. The texture sells it, the open-ended stamping keeps every age happy, and the brown-scoop tip keeps the colors bright. Print this, bookmark the supply list, and you’ve got a go-to for the next rainy summer morning. Now go make a mess worth keeping.
FAQ
What’s the best paint for sponge-painted ice cream crafts?
Washable tempera, like Crayola Washable, gives thick, bright stamps and rinses off skin and most surfaces with water. Acrylic works but stains, so save it for older kids in smocks.
What summer crafts for kids work for both toddlers and older kids?
Open-ended ones with no single “right” result. Sponge stamping, paper-plate painting, and salt or watercolor projects all scale up or down by age, so siblings can craft side by side at one table.
How do I stop the paint colors from mixing into brown?
Keep each color in its own spot on the palette and use a fresh part of the sponge — or a separate sponge — for each color. Rinse and squeeze the sponge between colors if you’re sharing one.
What paper should I use so it doesn’t curl?
Cardstock. It’s heavy enough to hold wet paint without buckling. Printer paper warps and smears, and construction paper sits somewhere in between.
How long does this craft take?
About 15 minutes of hands-on work, plus 20 to 30 minutes of drying time. A small fan speeds up the drying if you’re short on patience.