You do not need a $40 fondant sculpture to throw a dino-mite party. Honestly? Half the cakes crushing it on Pinterest right now are just a round layer, some green frosting, and a herd of Target dollar-bin dinosaurs. That’s the whole secret. Nobody’s judging your piping skills at a 5-year-old’s birthday party – they’re judging whether there’s enough cake and whether the dinos look cool.
This roundup skips the single-cake tutorials you’ve already scrolled past a hundred times. Instead, you’re getting 15 real dinosaur cake ideas – sorted by pan shape, skill level, and how much of your Saturday it’ll actually eat – so you can pick one in the next ten minutes and get back to wrangling party favors.
1. Classic Round Cake With a Plastic Dino Herd
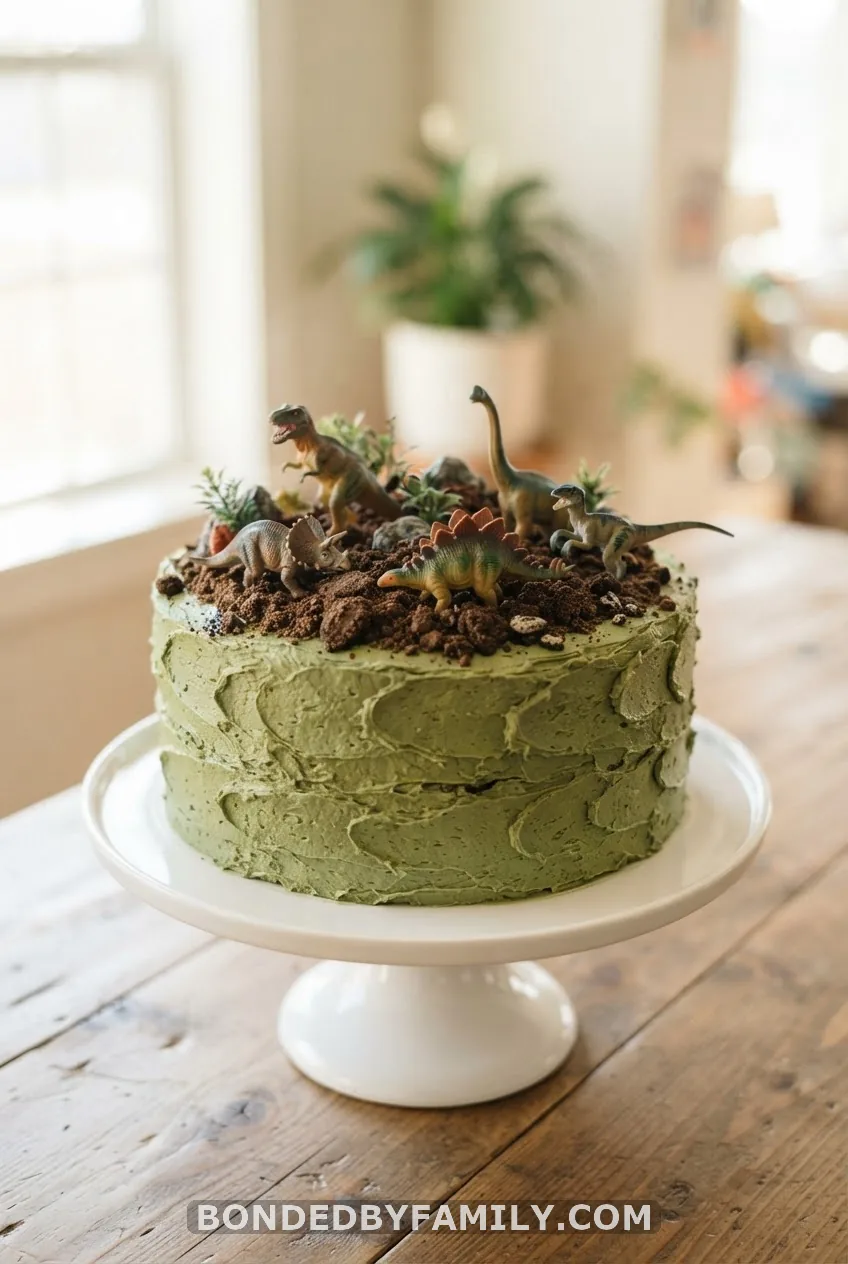
This is the cake that started the whole trend, and it still wins. Bake two 8-inch rounds of vanilla or buttermilk sponge, stack them with a thin buttercream filling, then crumb coat and chill for 30 minutes before the final frosting layer. Spread green buttercream roughly with an offset spatula – don’t smooth it, texture reads as “grass.” Crush Oreos or chocolate graham crackers for a dirt ring around the base, then set 4-6 clean plastic dinosaur figures on top like they’re grazing.
Budget note: a bag of plastic dinos runs about $6-10 at Target or the Dollar Tree, and a boxed cake mix plus a tub of frosting covers the rest. You’re looking at under $20 total and roughly 20 minutes of decorating.
2. Dino Footprint Cake
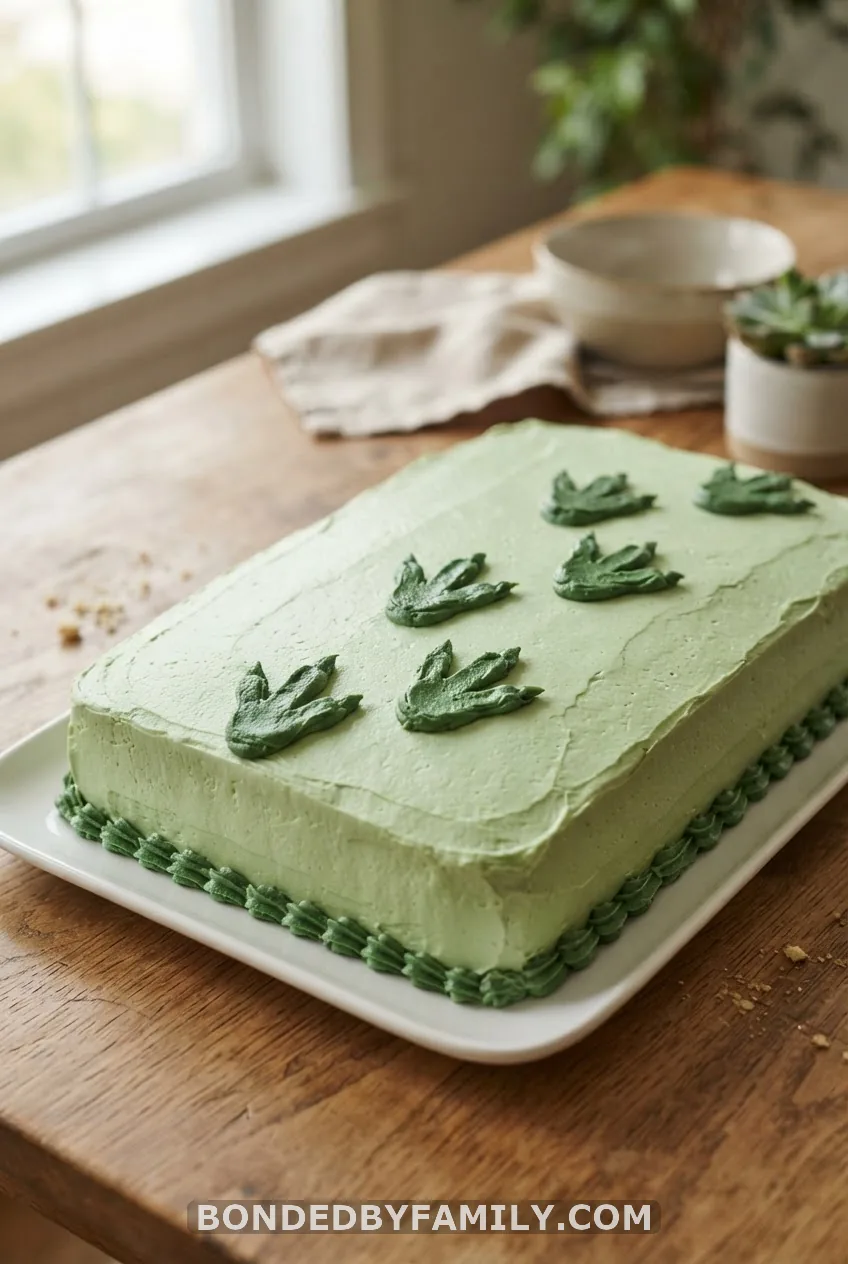
Frost any round or rectangle cake in solid light green. Then pipe a trail of three-toed footprints in a darker green using round tip 5, dragging each toe to a point. Drop a candy pearl at the tip of each toe. That’s it – five minutes of piping, zero sculpting, huge visual payoff.
3. Volcano Cake With Lava Drip
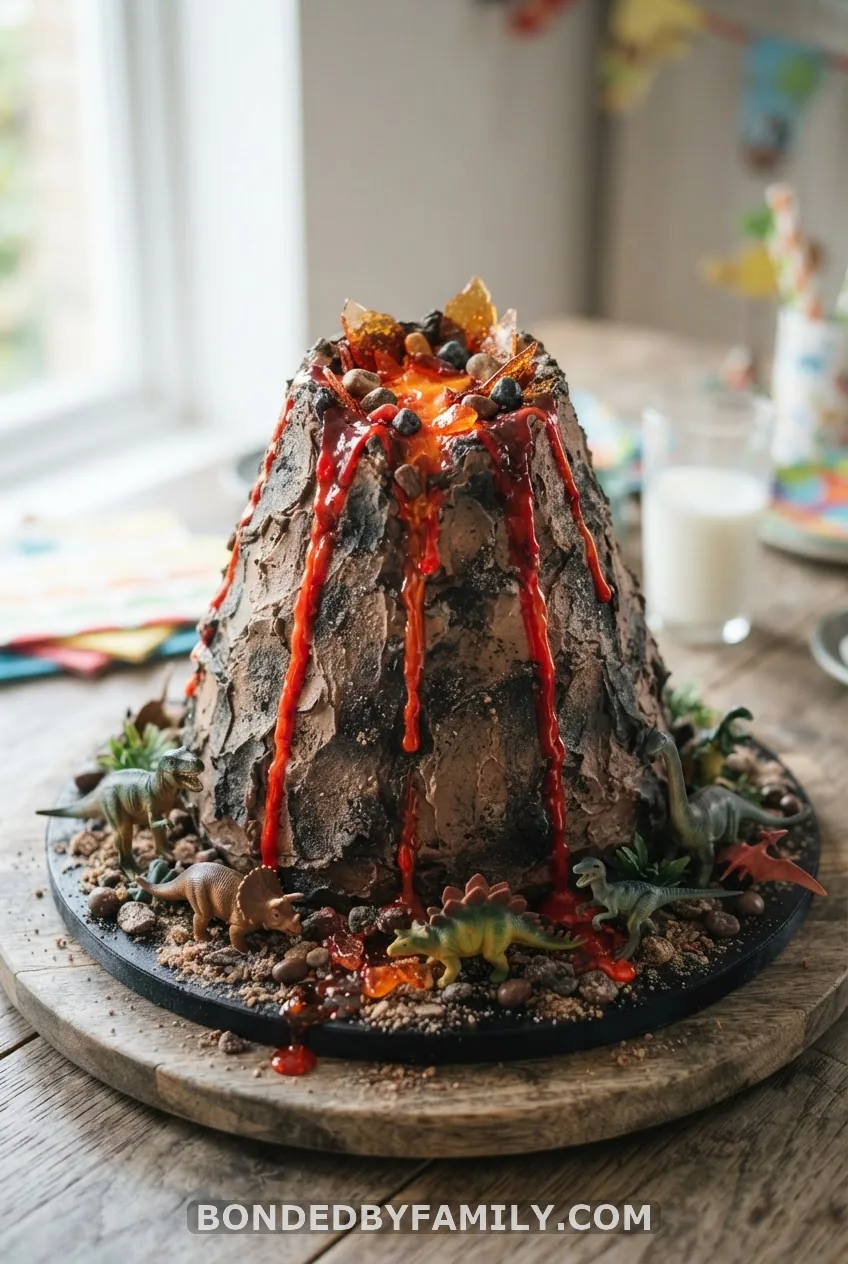
Shape a foil cone over a small round cake layer, or carve a mound from a baked dome cake, then cover it in gray and brown buttercream dragged upward with a fork for texture. Melt red and orange candy melts separately and drizzle them down the sides right before serving so the “lava” doesn’t set stiff. A few plastic dinosaurs at the base, fleeing the eruption, sell the whole scene.
Cost reality: candy melts run about $4 a bag at any craft store, and you’ll only need half a bag. The volcano shape itself costs nothing extra – it’s just carved cake and foil.
4. Shaped Dinosaur Pan Cake (Full Piping Build)
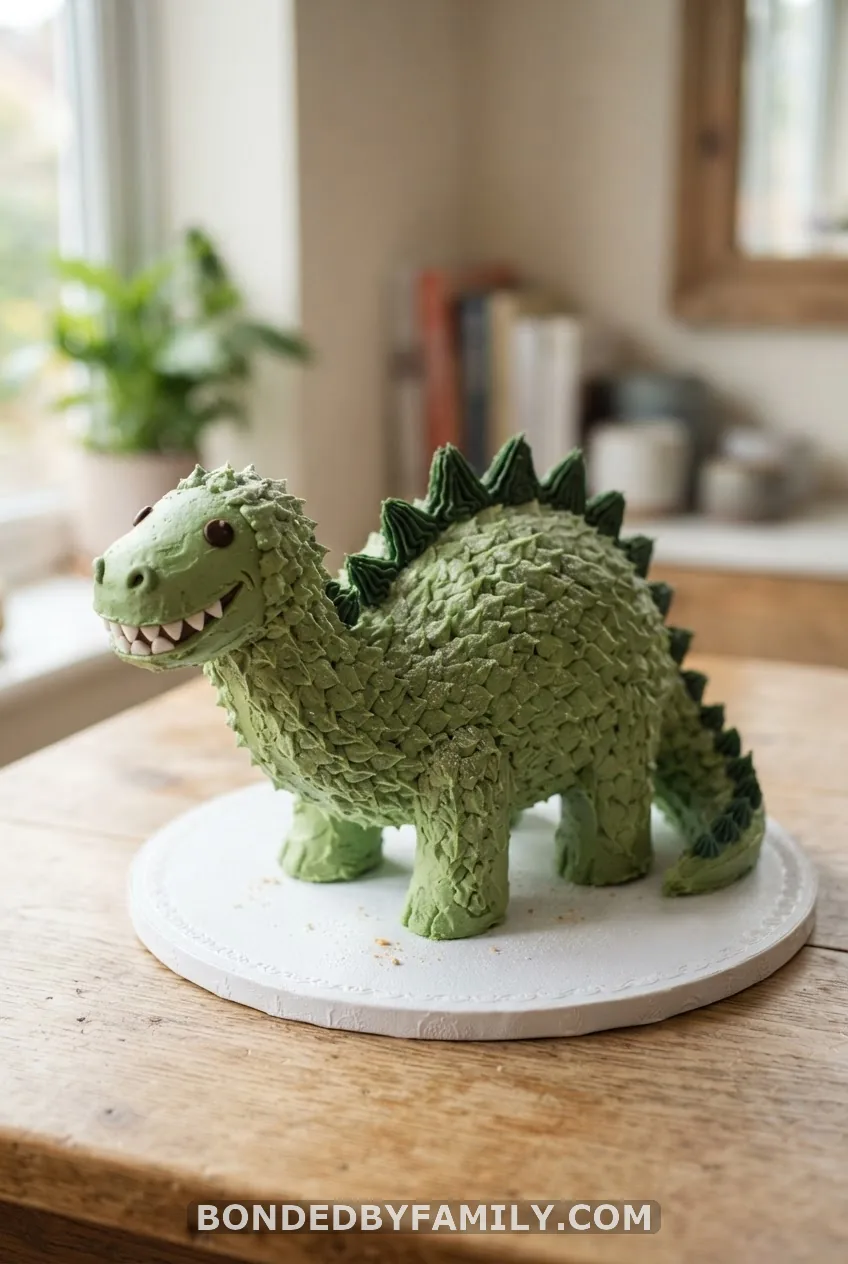
This is the one to attempt if you actually want a dinosaur-shaped cake, not just a cake with dinosaurs on it. It takes longer, but every step is manageable if you follow it in order.
What you need: a Wilton dinosaur cake pan (around $17-20), two boxes of Betty Crocker Super Moist Devil’s Food Cake Mix, a tub of Betty Crocker Rich & Creamy Vanilla Frosting (or homemade buttercream), leaf green and moss green gel food color, disposable piping bags, Wilton round tips 3 and 5, an open star tip 18, a small offset spatula, and cornstarch for smoothing.
Step-by-step:
1. Grease and flour the pan heavily – the ridges and spikes trap batter, so don’t skip the flour step even with a nonstick pan.
2. Bake per box instructions, checking 5-8 minutes early since the shaped pan is thinner in spots.
3. Cool the cake in the pan for 15 minutes, then invert onto a rack and cool completely before touching frosting to it.
4. Crumb coat with a thin layer of untinted buttercream and chill 30 minutes. This step matters more here than anywhere else, because the ridged surface loves to pull up dark cake crumbs.
5. Tint two batches of frosting – one leaf green, one a shade darker with added moss green – for depth between the body and the belly.
6. Fill in the body using the star tip 18 in tight rows, working from the tail toward the head.
7. Switch to round tip 5 and pipe zig-zag spikes down the ridge of the back, then smooth each point with a cornstarch-dipped fingertip so they hold a crisp edge instead of drooping.
8. Add eyes and nostrils with round tip 3, and press in chocolate chips or candy eyes for pupils.
Common mistakes to avoid: frosting the cake while it’s still warm (it melts and slides), skipping the chill after crumb coating (dark crumbs bleed through pale green), and overfilling the piping bag past halfway, which makes your hand cramp before you’ve finished the spikes.
Why this works: the shaped pan does the sculpting for you – you’re only piping texture on top of a form that’s already dinosaur-shaped, which is a fraction of the effort of hand-carving a 3D dino from a slab cake.
5. First Birthday Smash Cake
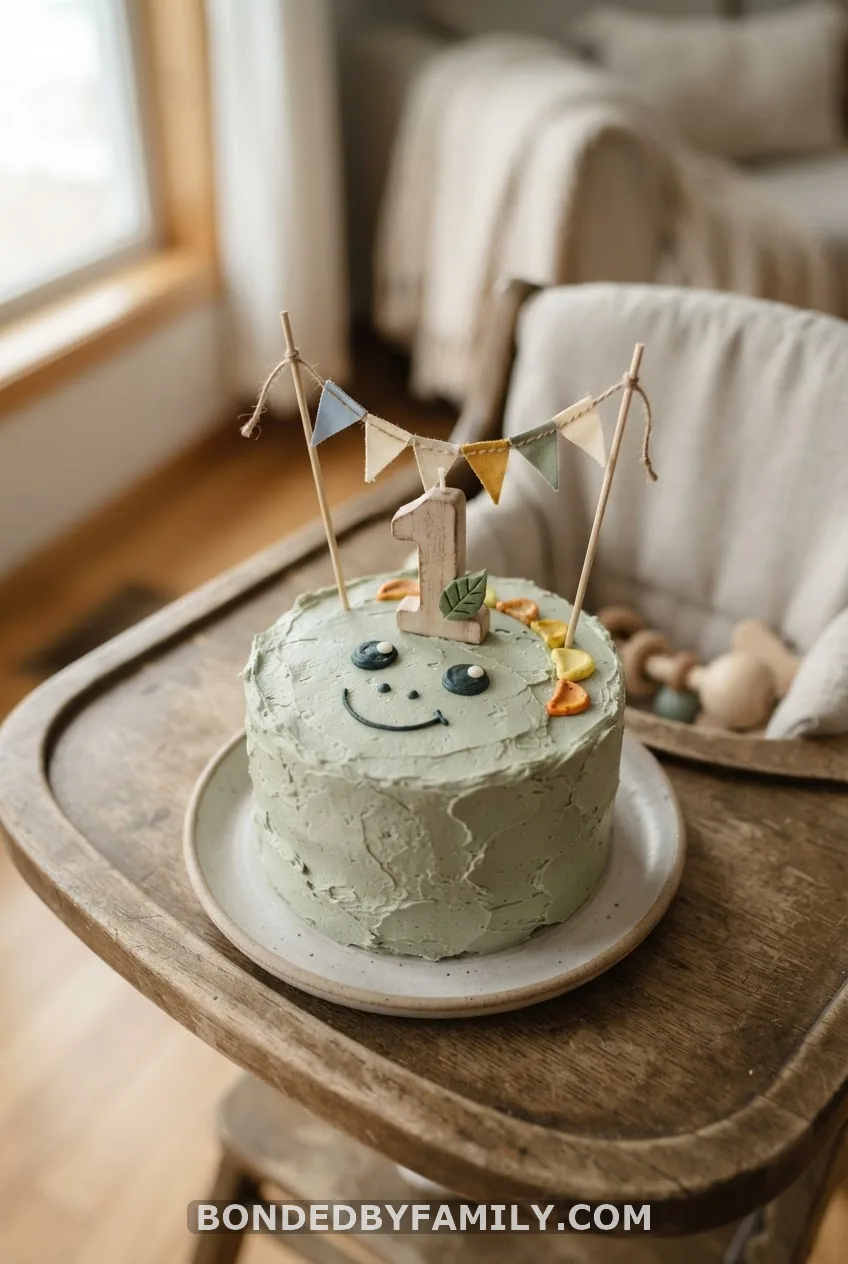
Bake a single 6-inch round in a mild banana or vanilla sponge – easier on a 1-year-old’s stomach than dense chocolate. Keep the sugar in the frosting on the lighter side, or swap in a whipped cream cheese frosting if your pediatrician’s fine with dairy. Frost it in a soft sage green, pipe on two simple oval eyes and a smiling mouth, and stick a wooden number “1” topper dead center. If you’re dealing with an egg or dairy allergy, most boxed gluten-free mixes and coconut-cream frostings hold up fine at this small size – just test-bake a mini version the week before so you’re not troubleshooting on party day.
6. Pink Ombre Dinosaur Cake
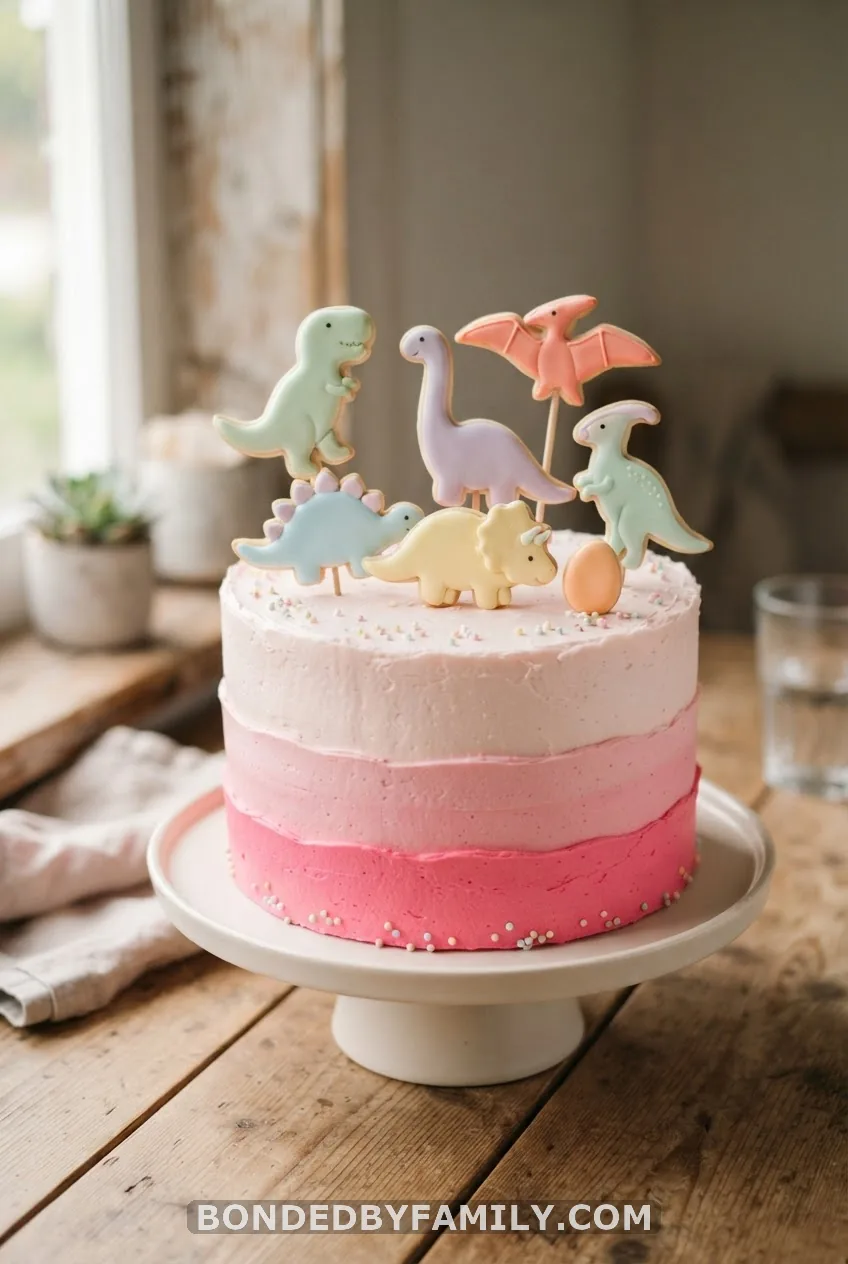
Tint three bowls of buttercream in ascending shades of pink, then spread darkest at the base and lightest near the top, blending the seams with a bench scraper for a soft gradient. Top with pastel-colored dino cookies or fondant cutouts instead of the usual green plastic figures – it keeps the palette consistent and it’s a genuinely cute answer to “dinosaurs are for boys” nonsense.
7. Pastel Dinosaurio Cake
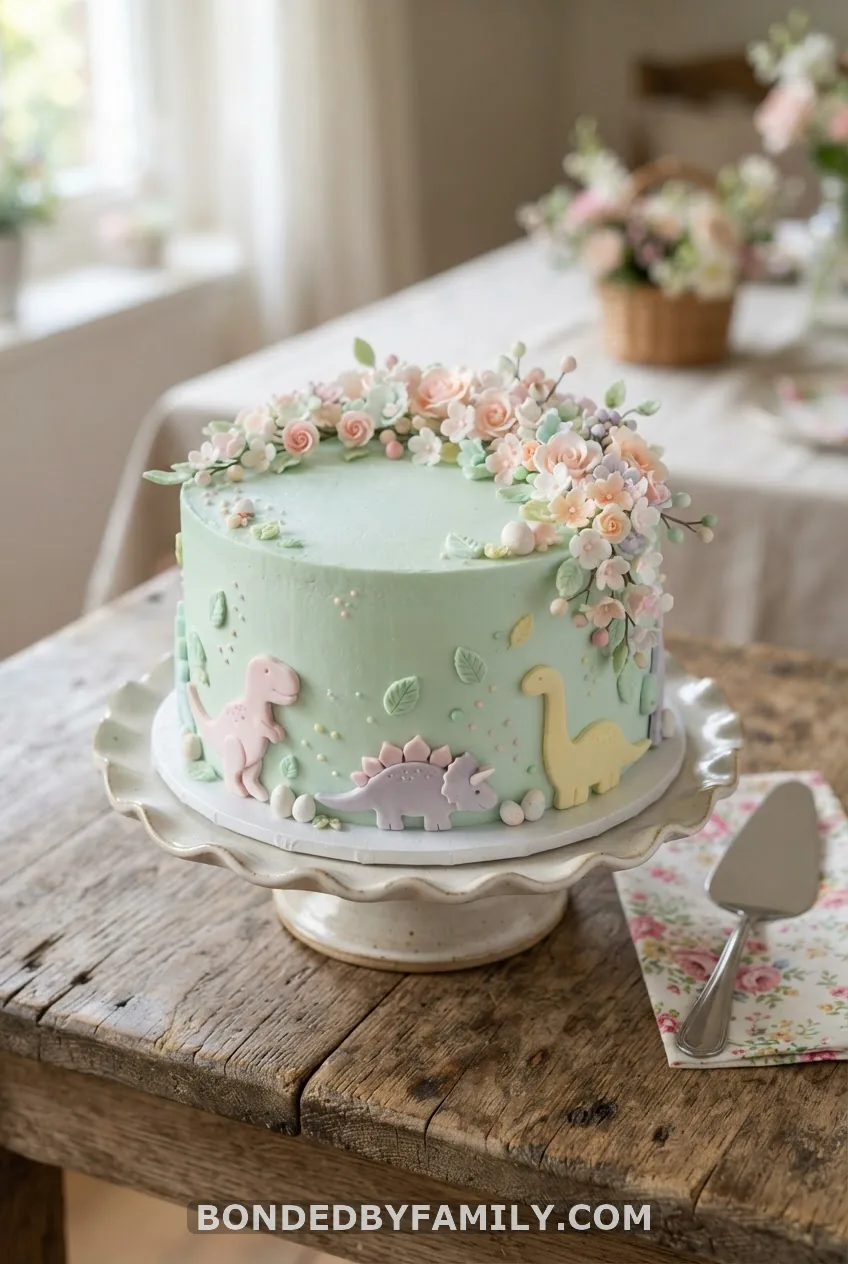
Mint and blush pink together, with a single pastel dino topper on a bed of white sprinkle “clouds.” This palette is trending hard on Pinterest under dinosaurio searches – it swaps the jungle-green expectation for something softer and works beautifully for a girl’s party or a gender-neutral theme.
8. Two-Tier Dinosaur Cake
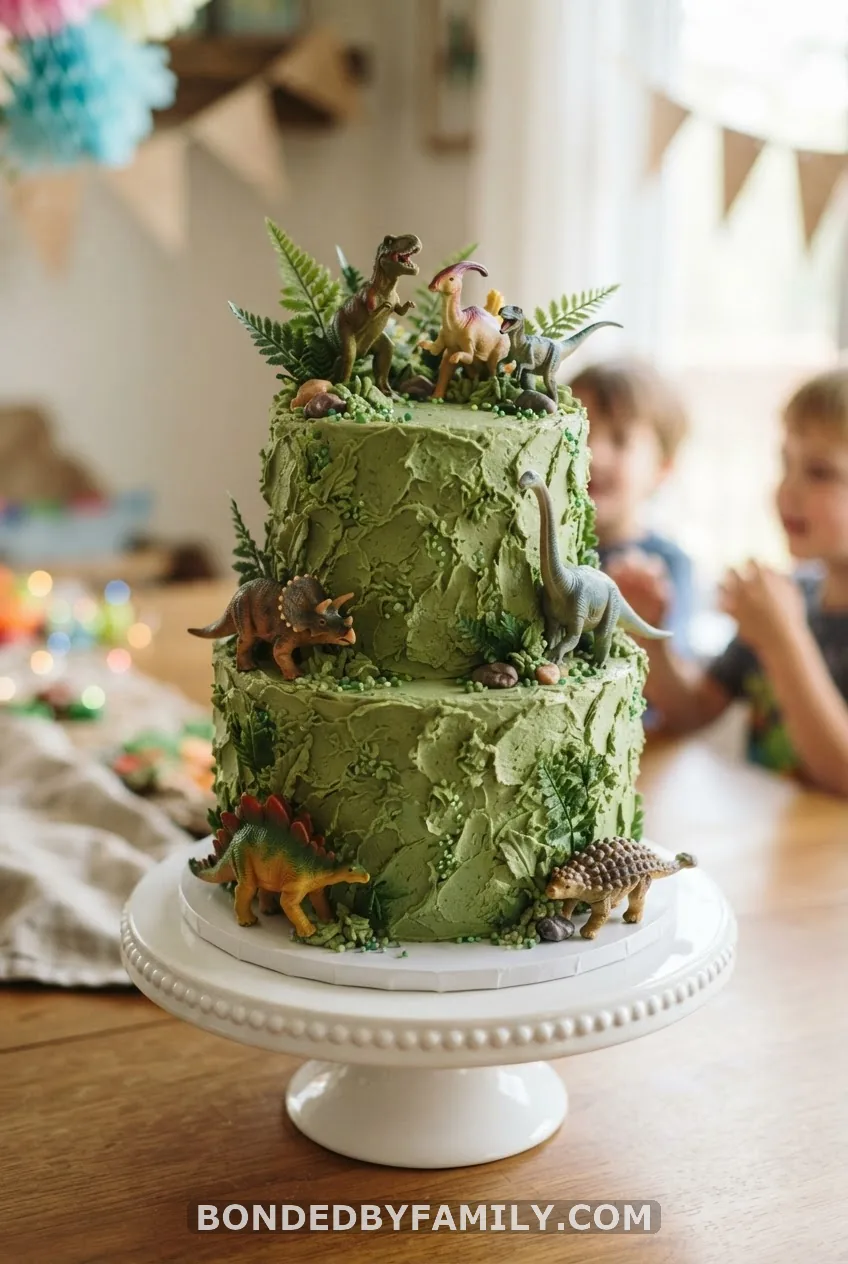
For a real two-tier build, bake and frost an 8-inch round for the base and a 6-inch round for the top. Insert 4 plastic dowels into the bottom tier, trimmed level with the frosting surface, then set a thin cake board on top of the dowels before stacking the second tier – the board keeps the top tier from sinking into the bottom one. This size combination serves roughly 25-35 guests, which covers most backyard birthday parties with slices to spare. Vary your greens between tiers – leaf green on the bottom, moss green on top – so the cake reads as layered jungle foliage instead of one flat block of color.
9. Waterfall-Cliff Two-Tier Illusion
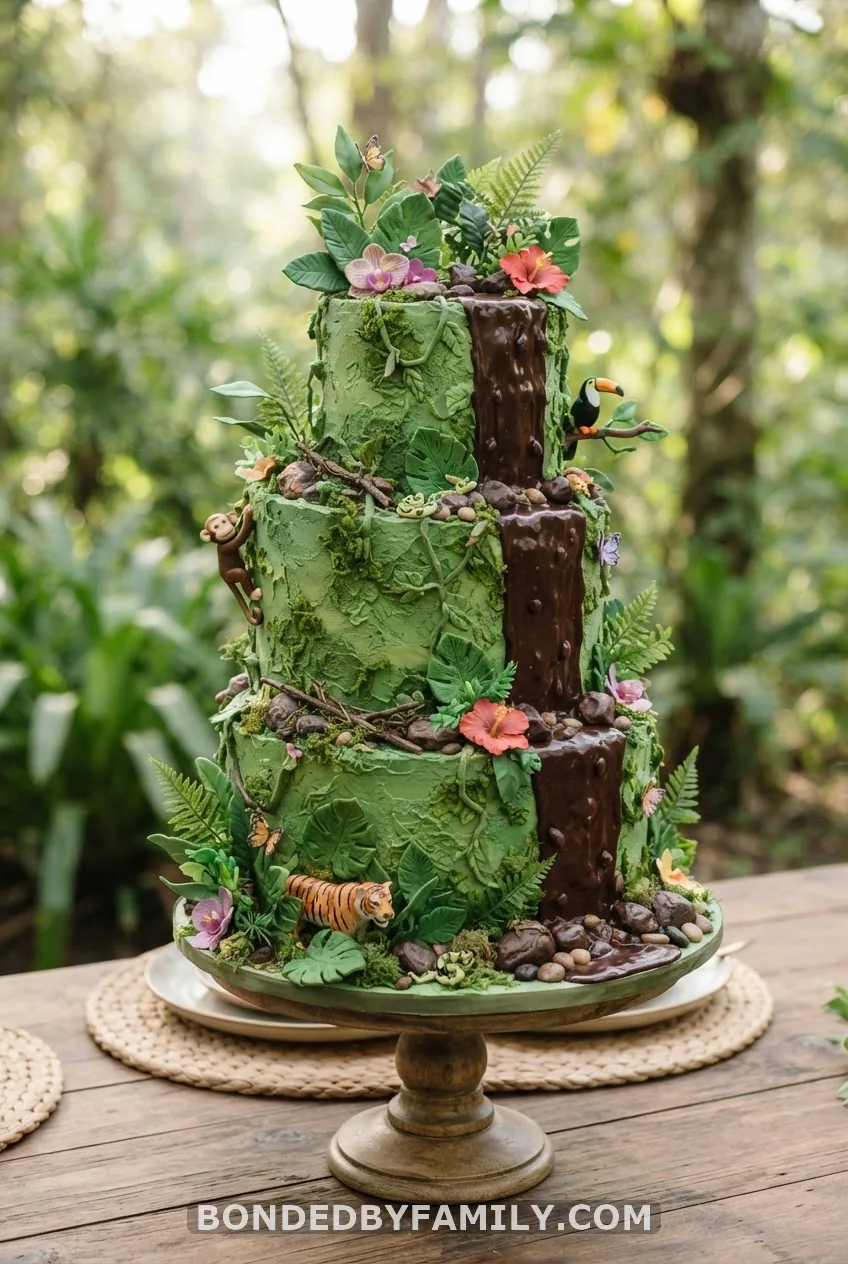
Here’s a trick that fakes a third tier without baking a third cake: slice one 8-inch round in half, stack the two halves on top of each other off-center from your main tiers, and frost the whole thing as one continuous cliffside. Add a chocolate ganache “waterfall” running down one side. It photographs like a three-tier masterpiece but only costs you two pans of batter.
10. Sheet-Pan Dinosaur Cake From a Template
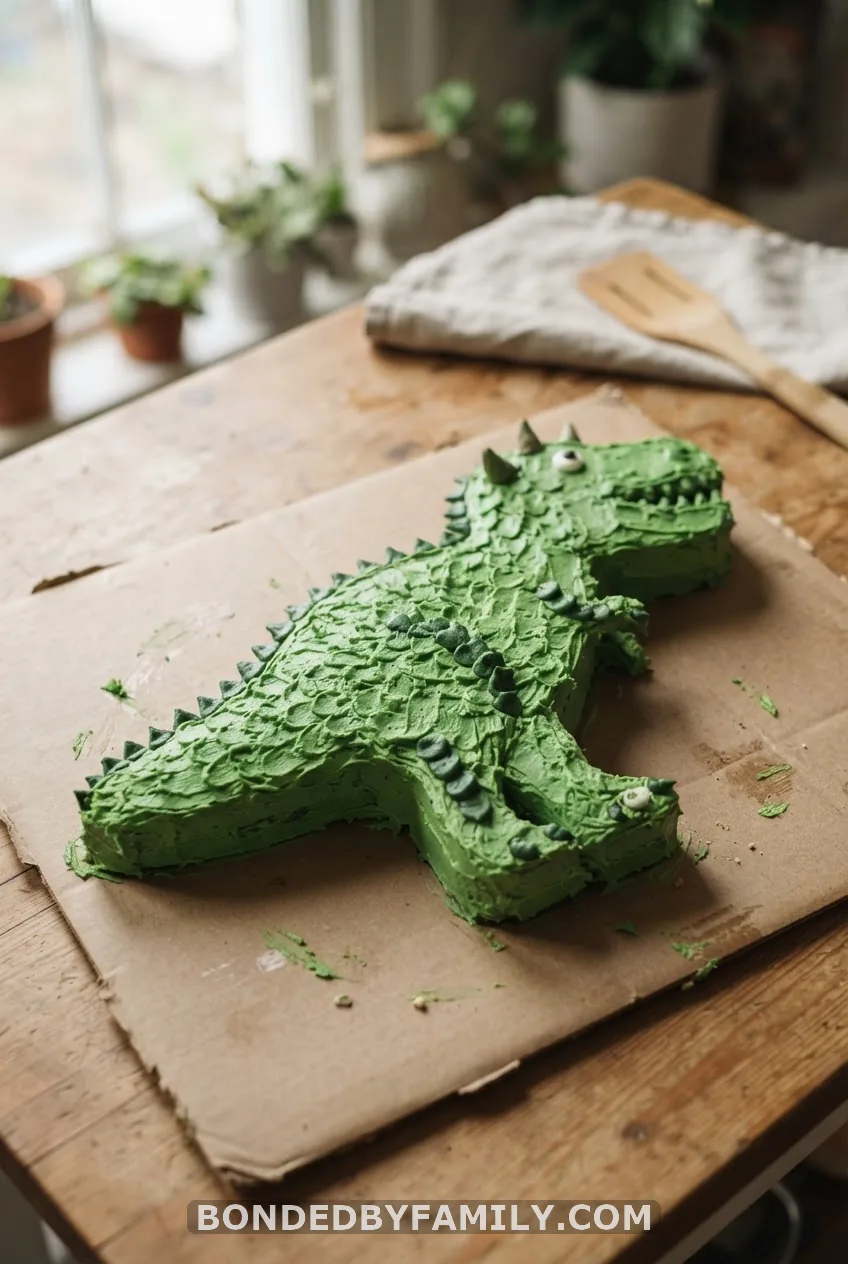
Print or hand-draw a dinosaur silhouette, lay it over a baked 9×13 sheet cake, and cut around it with a sharp paring knife. This is the Betty Crocker “Rex” method, and it’s genuinely one of the most beginner-friendly builds on this list because you’re cutting a shape, not sculpting one. A 9×13 feeds 15-20 people, it travels flat in the pan it was baked in, and the scraps you trim off make excellent cake pops for the grown-ups later.
11. Two Squares Joined Into One Dino Body
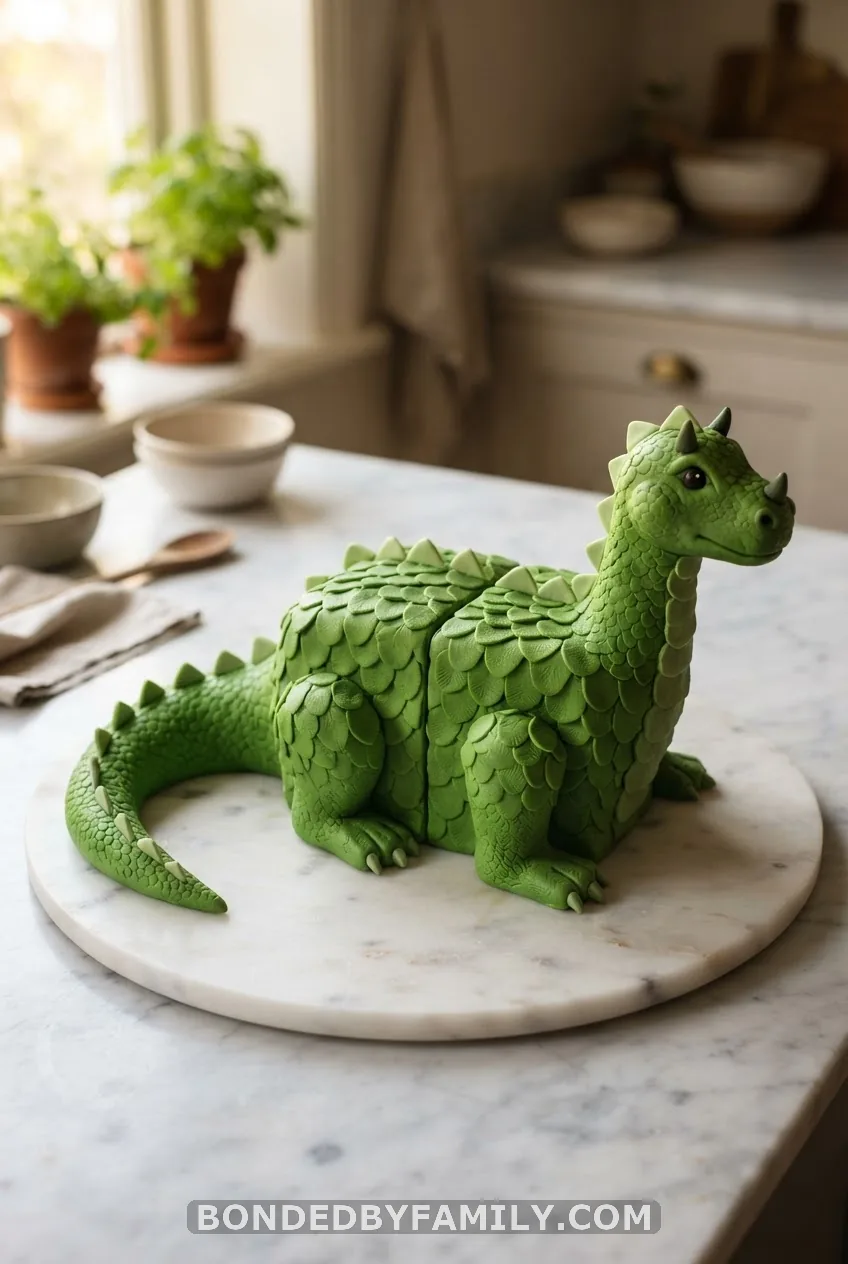
Bake two 8-inch square cakes, trim one into a tail-and-leg shape, and butt it against the other for the body and head. It’s the low-effort cousin of the shaped-pan cake – no special pan required, and square edges are far easier to cut clean lines with than rounds.
12. Jurassic Park Logo Cake for Older Kids
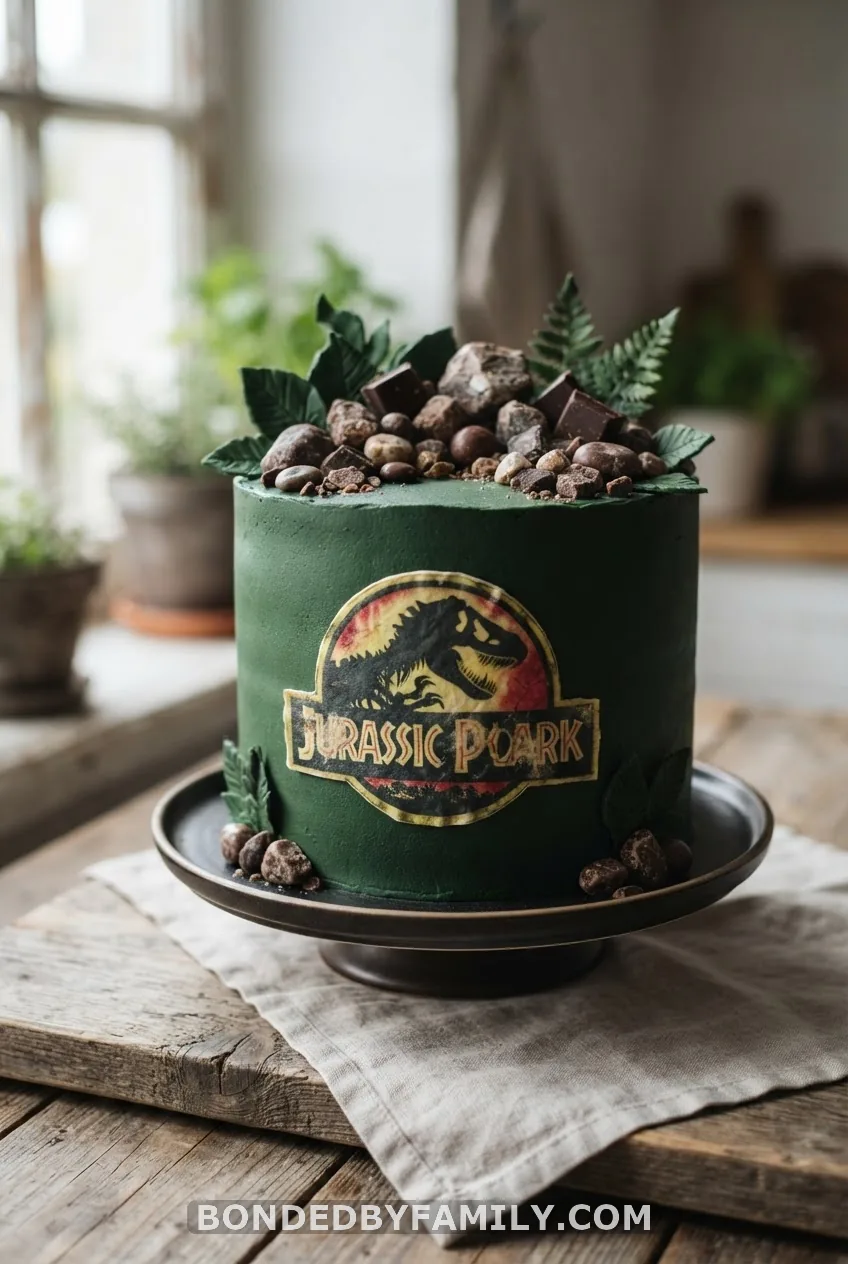
Bigger kids age out of cute dino faces fast, so lean into a Jurassic-Park-inspired scene instead. Print an edible image on sugar paper (any bakery counter or Amazon edible-printer kit handles this for about $10) and press it onto a smooth-frosted side. Scatter chocolate rocks and chocolate-chip “scales” across the top, and use darker forest greens and browns instead of bright kid colors – it instantly reads as more grown-up.
13. Realistic Chocolate-Soil Dino Cake
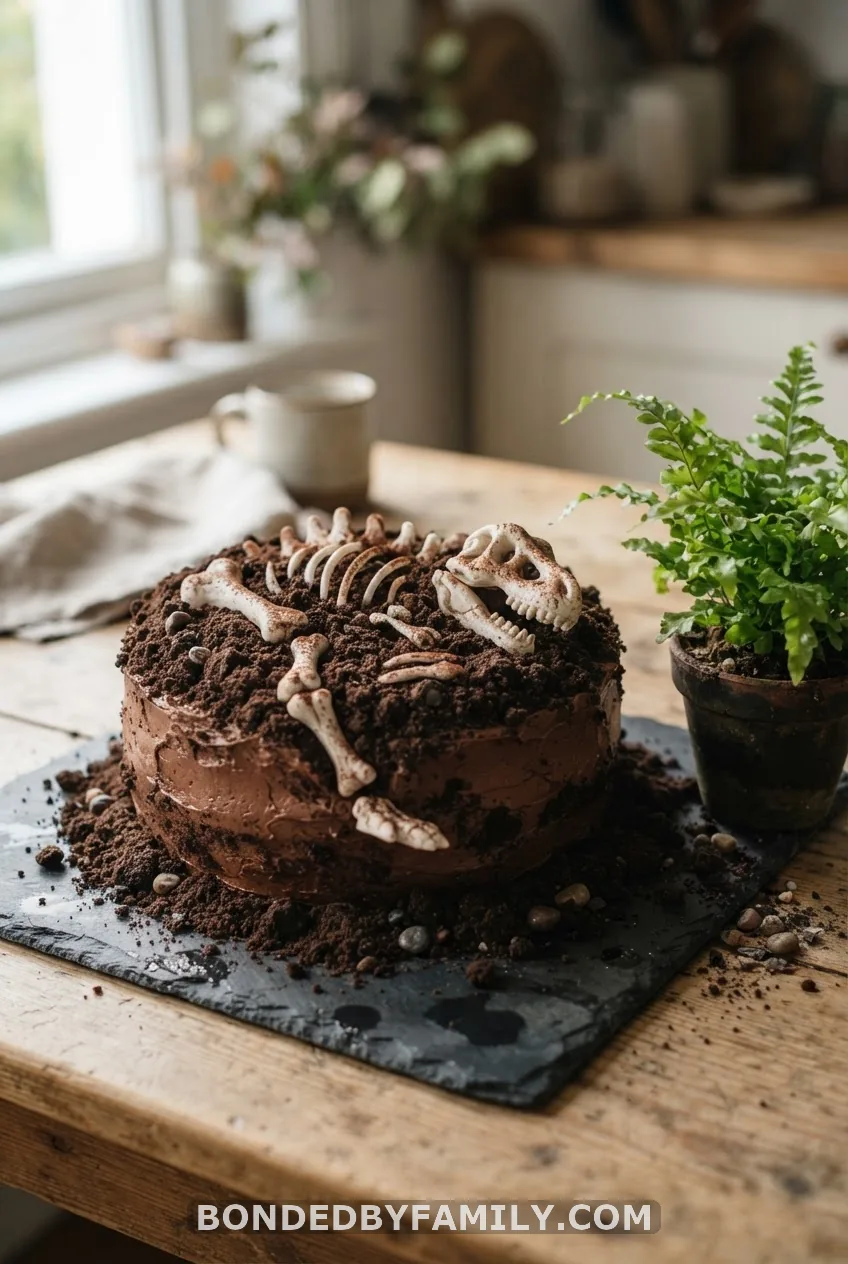
Skip the bright greens entirely. Frost the cake in warm browns, press crushed chocolate cookies into the sides for soil, and scatter candy rocks and dark chocolate chunks across the top. It’s moodier, more textured, and takes half the piping time of a bright cartoon build.
14. Cupcake Dino Herd (What Not to Do, and the Fix)
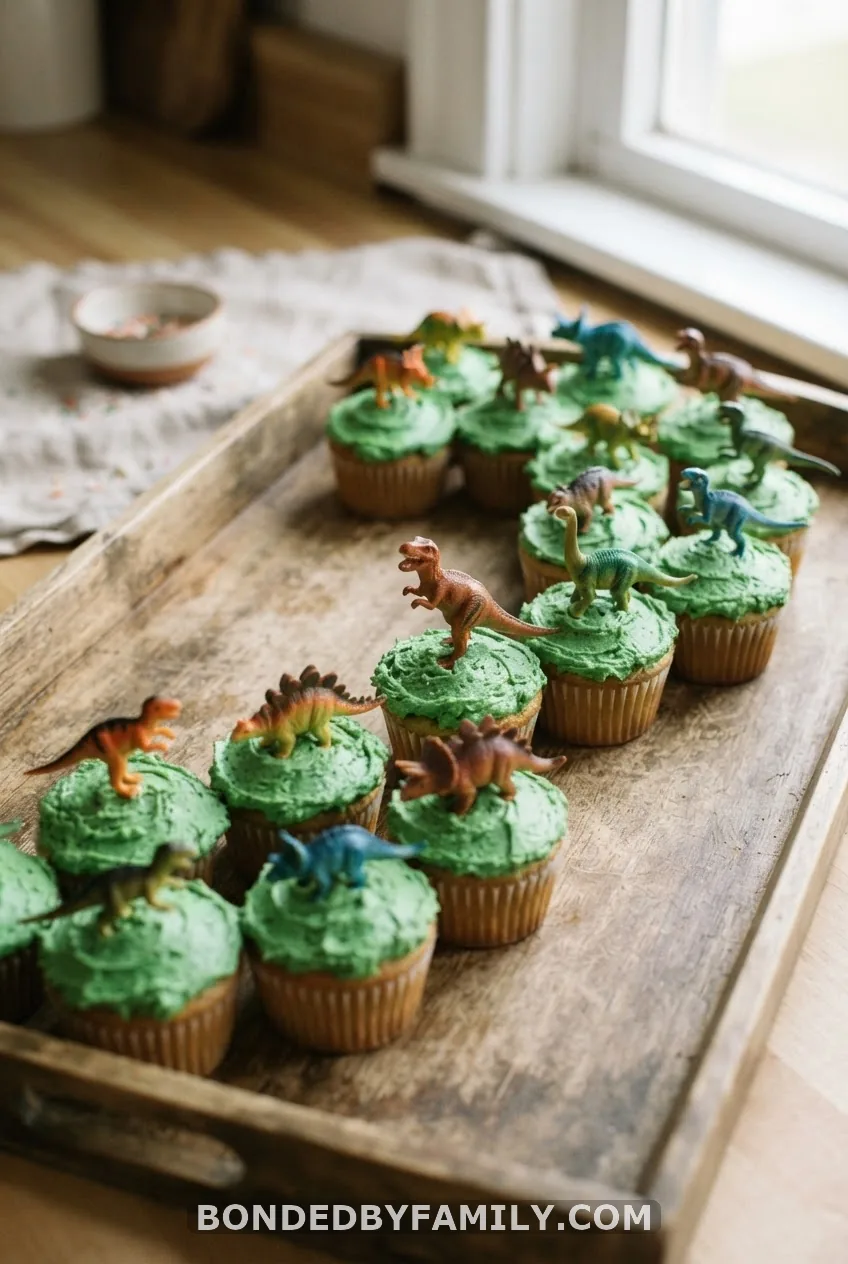
A friend of mine tried pairing a full sheet cake with two dozen matching cupcakes for a joint birthday party, and it went sideways fast. She frosted the cupcakes the morning of, then left the plastic dinosaurs sitting in warm frosting for six hours before the party started. By the time guests arrived, half the dinos had slid sideways into the frosting like they’d been caught in a swamp.
The fix is embarrassingly simple: frost the cupcakes ahead of time, chill them, and only press the plastic dinosaurs on right before serving. Cold, firm frosting holds a figure upright for hours. Warm, fresh frosting holds it up for about ten minutes. If you want cupcakes alongside a cutting cake, treat the cupcakes as the last thing you touch before the party, not the first.
15. Rainbow-Spotted Friendly Dino Cake
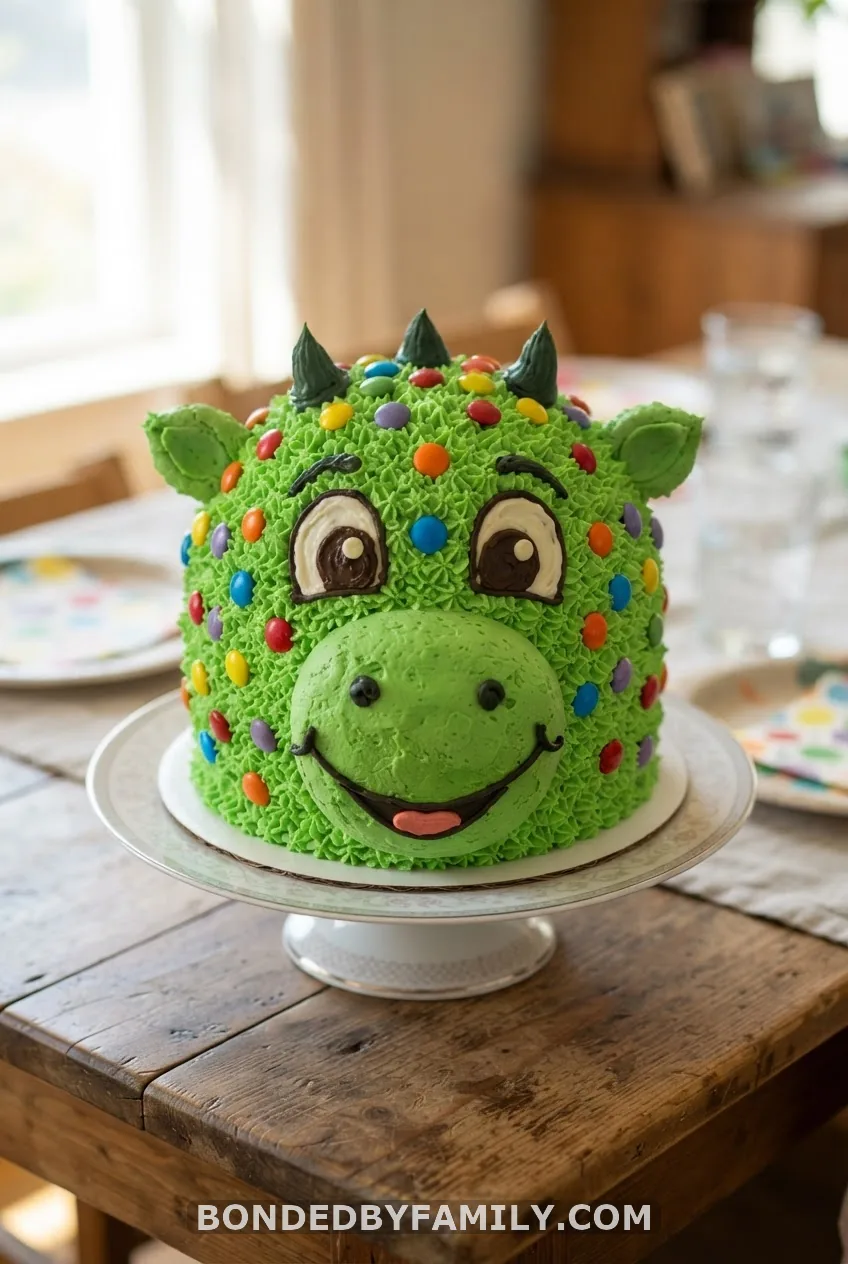
For toddlers who want cute over fierce, skip the spikes and teeth entirely. Frost a round or oval cake in bright green, press M&Ms across it in a random spotted pattern, and pipe a wide smiling mouth. It’s the friendliest possible take on this theme, and it takes less time than almost anything else on this list.
Flavors, Frosting & Color Basics That Hold Up
A sturdy sponge matters more than people think once you start piping. Vanilla, buttermilk, devil’s food, and marble all hold their shape under a crumb coat and multiple frosting layers, while very moist “from scratch” recipes can be too soft to carve. For color, gel food color gives you true, saturated greens – a few drops of leaf green plus a touch of lemon yellow gets you a classic dino green, while moss green alone gives a dustier, more realistic shade. Liquid food coloring drops work fine for pastels but wash out and go grainy if you try to push them toward a deep green.
Budget note: a set of Wilton gel colors runs about $8-12 and lasts through several cakes, which is cheaper per-use than the liquid drops most grocery stores sell.
Tools Worth Having Before You Start
You don’t need a professional kit, but a few items make every idea on this list faster: a Wilton dinosaur cake pan if you’re going the shaped route, round tips 3 and 5 for outlines and detail, an open star tip 18 for fast fill-in work, disposable piping bags, an angled spatula, a cake lifter for moving finished tiers, and a cooling grid. Add plastic dinosaur figures, a number candle, and a cake board sized to your final design. Most of this is available at a craft store or Walmart for under $30 total if you don’t already own decorating basics.
Make It Ahead Without the Panic
Bake and freeze unfrosted cake layers up to a month in advance, wrapped tightly in plastic. A fully crumb-coated and chilled cake keeps in the fridge up to 3 days before final decorating. Buttercream-frosted cakes are fine at room temperature for a party, but anything with cream cheese frosting or fresh fruit filling needs to stay refrigerated until serving. Save the fragile stuff – sparklers, plastic dinosaurs, drippy lava – for the last 30 minutes before guests arrive, transported flat in a box with the cake board taped down so nothing shifts in the car.
Fast Fixes for Common Dino Cake Problems
Dark crumbs bleeding through pale green frosting almost always means you skipped the chill after crumb coating – 30 minutes in the fridge solves it. If your greens bleed into each other where two shades meet, you frosted them too close together while both were still wet; let one crust for 10 minutes before piping the next color beside it. Drooping spikes usually mean the buttercream was too warm; switch to candy melts, which hold their shape at room temperature far better than piped frosting. And if a tier looks like it’s leaning, it’s a dowel problem – pull the top tier off, add one more dowel, and re-chill before restacking.
So back to that dollar-bin dinosaur cake I mentioned at the start – the one that beats out fondant sculptures on Pinterest every single time. That’s really the whole lesson here. Pick the version that fits your Saturday, not the version that looks hardest, and let a few plastic dinosaurs do the heavy lifting.
FAQ
What’s the easiest dinosaur cake to make at home?
A frosted round or 9×13 cake with green buttercream “grass,” crushed-cookie dirt, and a few clean plastic dinosaurs on top. No special pan, no fondant, about 20-30 minutes of decorating start to finish.
Can I make a dinosaur cake without fondant?
Yes – nearly every idea on this list is buttercream-only. Plastic dinos, candy melts, chocolate chips, mini ice cream cones, and piped spikes build all the detail fondant usually handles.
How do I make green frosting for a dinosaur cake?
Start with white buttercream and add gel food color a little at a time – leaf green plus a touch of lemon yellow for a classic bright dino green, or moss green alone for something softer and more sage-toned. Gel gives truer color than liquid drops without thinning your frosting.
How many people does a two-tier dinosaur cake serve?
An 8-inch bottom tier with a 6-inch top tier serves roughly 25-35 guests depending on slice size. A single 9×13 sheet cake covers about 15-20.
Can I make a dinosaur cake ahead of time?
Yes. Bake and freeze unfrosted layers up to a month ahead, or crumb-coat and chill the assembled cake up to 3 days before the party. Add fragile pieces like plastic dinosaurs, sparklers, or lava drip right before guests arrive.