Sound activities for kids tend to go one of two ways. Either the experiment barely works, and your child stares at you blankly, or you spend forty-five minutes gathering materials only to produce a sad, silent rubber band taped to a shoebox.
I’ve been there. More than once.
But sound is one of those rare science topics where the experiments can be genuinely thrilling — the kind where your kid gasps, covers their ears, or says “do it again” before you’ve even finished explaining what happened. Sound activities for kids work so well because the results are immediate. No waiting for crystals to grow. No watching paint dry. You make a noise, something happens, and a four-year-old suddenly understands vibrations better than most adults.
These 11 activities range from two-minute setups to longer afternoon projects. Some are whisper-quiet. Others will make your dog leave the room. All of them teach real science concepts — pitch, frequency, vibration, amplification, sound travel — using materials you probably already have in your kitchen.
Grab some plastic wrap and a handful of rice. We’re about to get loud.
Dancing Rice on a Drum (See Sound Waves Move)

Stretch plastic wrap over a large mixing bowl. Pull it tight — taut like a real drum skin. Sprinkle a teaspoon of dry rice on top.
Now clap. Hard.
The rice jumps. It bounces and skitters across the plastic like tiny popcorn kernels. Your child just saw sound waves for the first time.
The sound waves from your clap travel through the air and hit the plastic wrap, causing it to vibrate. Those vibrations transfer energy to the rice, making each grain bounce. Louder sounds create bigger vibrations, which means higher rice jumps. Try placing a Bluetooth speaker inside the bowl before stretching the plastic — play a song with heavy bass and watch those grains dance in rhythm.
Cost: Free (you have all this)
Time: 3 minutes
Ages: 2+
Science concept: Sound waves create vibrations that move objects
Straw Pan Flute
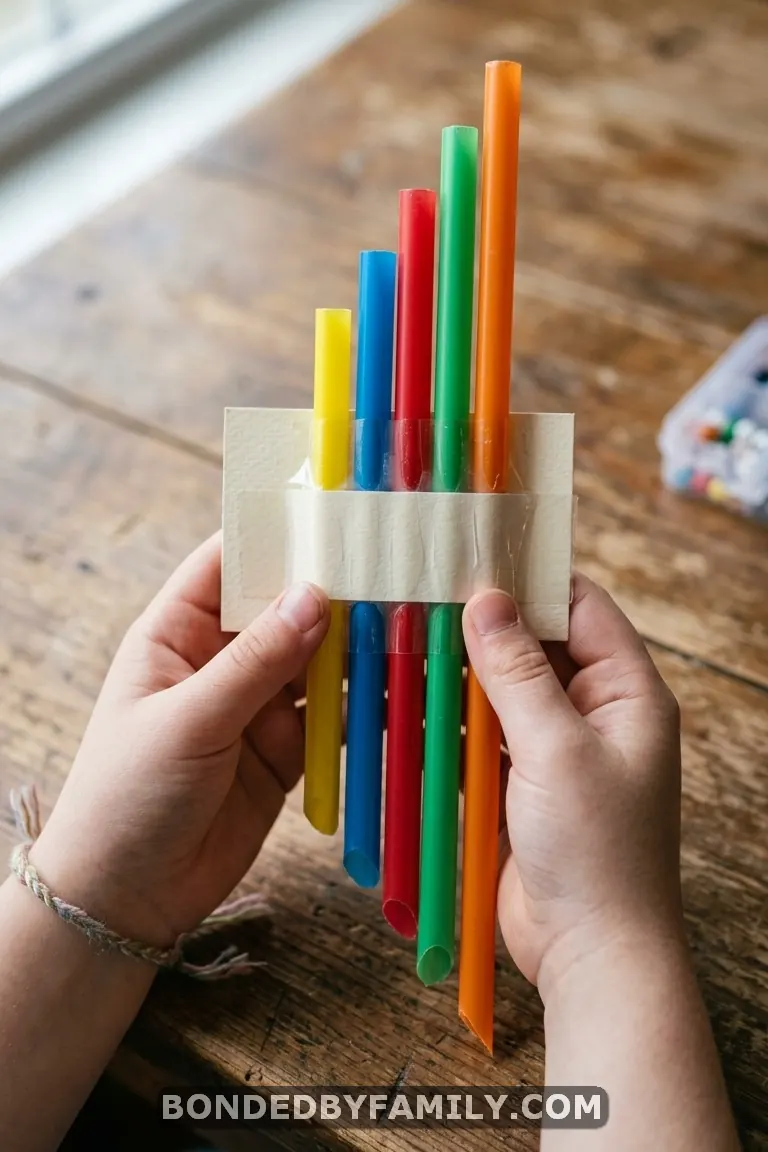
This one earned over 9,000 Pinterest saves for good reason. It’s cheap, it’s fast, and the finished instrument plays recognizable notes.
Here’s what you need: five wide drinking straws, a strip of cardstock (about 7 inches by 1.5 inches), scissors, and tape.
How to Build It
- Cut the straws to five different lengths. Start with 6 inches and work down — 6 inches, 5.5 inches, 5 inches, 4 inches, and 3.5 inches. Let your child measure and cut. That’s math and fine motor practice built right in.
- Line the straws up from longest to shortest on the cardstock strip. Keep the top edges even.
- Tape each straw to the cardstock. Flip the whole thing over and tape a second strip of cardstock to the back, sandwiching the straws in place.
That’s it. Blow gently across the top of each straw. Each one produces a different note.
Why It Works
When you blow across the open end of a straw, the air inside vibrates. Shorter straws mean shorter columns of air. Shorter columns vibrate faster — higher frequency — which produces a higher pitch. Longer straws vibrate slower, creating lower notes. The same principle makes a piccolo sound higher than a tuba.
Want a Full Scale?
Use eight straws cut to these measurements for a proper do-re-mi:
- Do: 17.5 cm
- Re: 15.5 cm
- Mi: 13.5 cm
- Fa: 12.5 cm
- So: 11 cm
- La: 10 cm
- Ti: 9 cm
- Do (high): 8.5 cm
Pro Move
Seal one end of each straw with a small piece of tape or clay before assembling. The sealed-end version produces a noticeably cleaner, louder tone because the air column bounces back instead of escaping. Compare a sealed pan flute next to an open-ended one — the difference is dramatic, and it makes a great side experiment on its own.
Common Mistakes
- Straws too close together: Leave a millimeter of space between each straw so your breath hits one at a time. If two straws sound at once, the notes blur.
- Blowing into the straw instead of across it: The technique is the same as blowing across a bottle top. Angle your lower lip so air skims across the opening. Kids under five often struggle with this — have them practice blowing across a single straw first before assembling the full flute.
- Paper straws collapsing: Stick with plastic straws for this one. Paper straws absorb moisture from your breath and lose their shape within minutes. If you only have paper straws, coat the tops lightly with clear tape before assembly.
- Uneven top edges: If the straw tops aren’t level with each other, you’ll have to change your blowing angle for each note. Take an extra minute during assembly to align them flush.
Extension Ideas
Once your child has a working pan flute, try these follow-up experiments:
Build two flutes with different diameter straws — wide boba straws versus standard drinking straws cut to the same lengths. The wider straws produce a noticeably different tone quality (called timbre) even at the same pitch. This teaches kids that the width of a tube changes how a note sounds, even when the pitch stays identical.
Record each straw’s note using a free spectrum analyzer app and show your child the waveform on screen. They can see the visual difference between a high note and a low note — fast, tight waves versus slow, spread-out ones.
Cost: Under $2
Time: 15–20 minutes
Ages: 4+
Science concepts: Pitch, frequency, air column vibration
Cup and String Telephone

Poke a hole in the bottom of two plastic cups. Thread string through both, kot each end inside. Pull tight between two people. Talk into one, listen from the other.
Your voice vibrates the cup bottom. Those vibrations travel along the taut string and vibrate the second cup. Slack string kills it completely — the difference between tight and loose is the whole lesson.
Cost: Free
Time: 5 minutes
Ages: 3+
Science concept: Sound travels through solids via vibration
Water Xylophone

Fill five to eight glass jars or drinking glasses with increasing amounts of water. Add food coloring to each one for a rainbow effect that makes the pitch differences visual too.
Tap each glass gently with a wooden spoon or chopstick. The glass with the most water produces the lowest pitch. The one with the least water rings the highest.
Wait — that seems backward, right? Most people assume more water means higher pitch. But the water dampens the vibration of the glass. Less water lets the glass walls vibrate freely and quickly, producing higher-frequency sound waves.
Tune your glasses using a free pitch-detection app (Pitchlab works well on both iOS and Android). You can get a surprisingly accurate major scale by adjusting water levels carefully. My daughter played a recognizable version of “Mary Had a Little Lamb” within twenty minutes.
Cost: Free
Time: 10 minutes
Ages: 3+
Science concepts: Pitch, vibration dampening, frequency
The Screaming Balloon
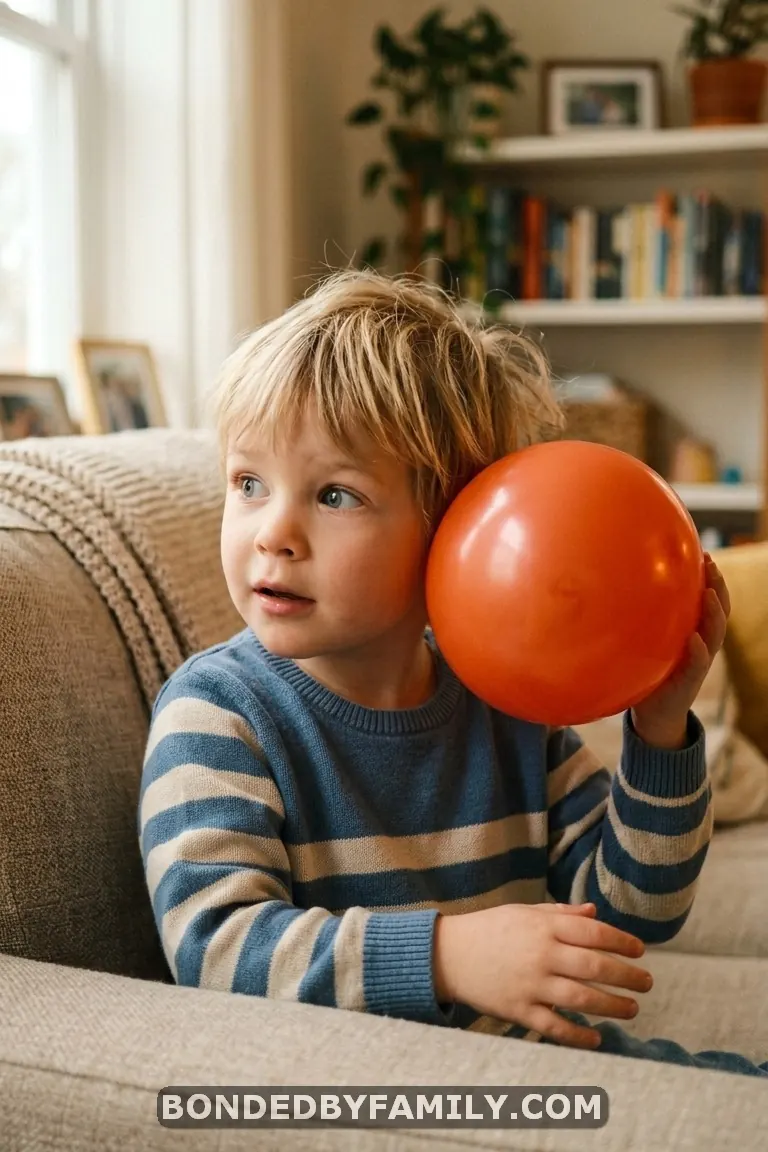
Most balloon sound experiments tell you to tap the balloon and listen. That’s fine. Mildly interesting. But the screaming balloon? That’s the one kids talk about at dinner.
Drop a small hex nut (the kind from a hardware store — costs pennies) inside a balloon before inflating it. Blow the balloon up and tie it off. Now swirl the balloon in a circular motion.
The hex nut rolls around the inside of the balloon and screams. Not metaphorically. It produces an actual high-pitched shrieking sound that is startling the first time you hear it.
Here’s what most “balloon experiment” articles get wrong: they say the noise comes from the nut “bouncing around.” It doesn’t bounce. The hex nut’s six flat sides create rapid, rhythmic vibrations against the rubber as it rolls. Those vibrations happen so quickly that they produce a continuous high-frequency tone rather than individual tapping sounds. A marble in the same balloon rolls silently because its smooth surface creates no vibration interruptions.
That contrast — hex nut versus marble in identical balloons — is the real experiment. Kids instantly grasp that the shape of the vibrating object changes the sound it produces. Smooth objects vibrate evenly. Angular objects create jagged, fast vibrations that our ears register as higher-pitched and louder.
Try different-sized hex nuts. Bigger ones produce a lower-pitched scream. Smaller ones go higher. Same principle as the straw pan flute — but inside a balloon.
Cost: Under $1 (hex nuts are a few cents each at any hardware store)
Time: 5 minutes
Ages: 4+
Science concepts: Vibration frequency, how object shape affects sound
Singing Spoons (Sound Through Solids)
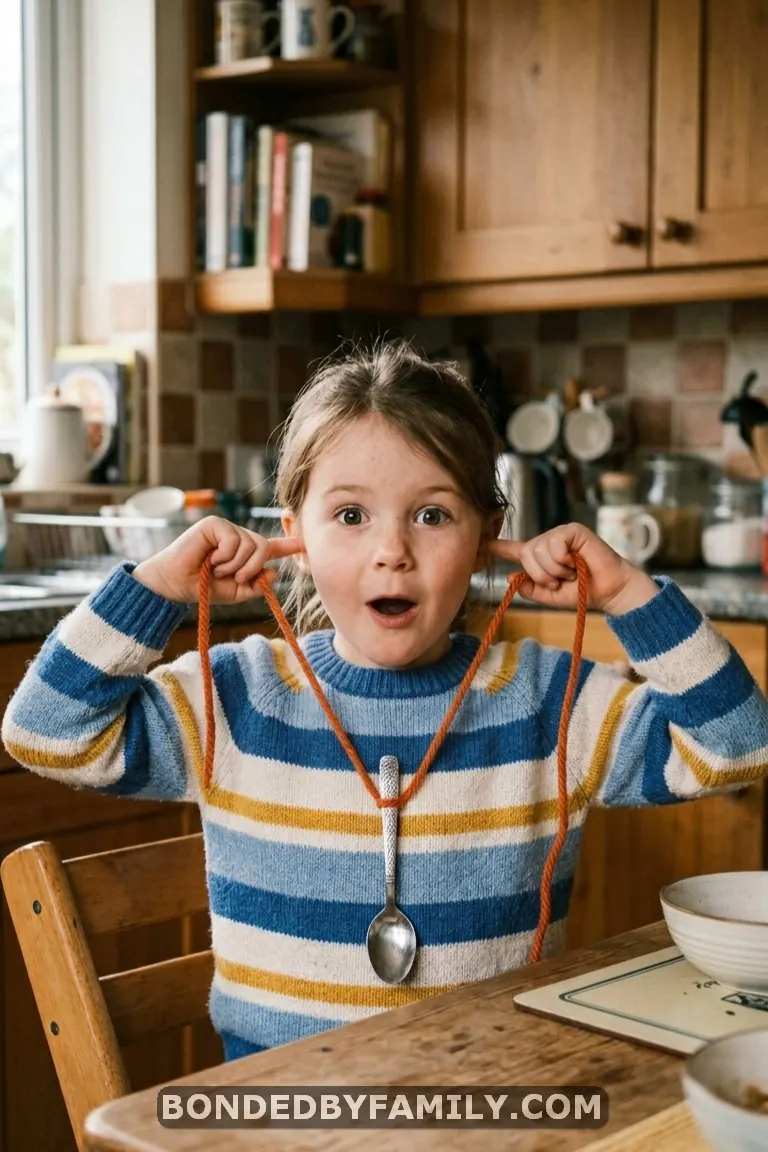
Tie a metal spoon to the center of a two-foot piece of yarn. Wrap each end of the yarn around your index fingers. Press your yarn-wrapped fingers into your ears — gently, just enough to block outside sound.
Now lean forward so the spoon hangs freely and swing it into the edge of a table.
The sound inside your head will be enormous. A deep, resonant gong that reverberates and fades slowly. It sounds nothing like a spoon tapping a table — it sounds like a church bell.
Nobody else in the room hears it the way you do. They hear a quiet tap. You hear a cathedral.
Sound travels faster and more efficiently through solids than through air. The yarn carries the vibrations from the spoon directly into your ear canal, bypassing the air entirely. It’s the same principle behind a stethoscope — the tubing carries sound vibrations straight to the doctor’s ears.
Try different utensils: a fork sounds sharper and more metallic. A whisk creates a shimmery, complex tone. A large serving spoon goes deeper than a small teaspoon.
Cost: Free
Time: 2 minutes
Ages: 3+
Science concept: Sound travels more efficiently through solids than air
DIY Rainstick

A rainstick is one of those projects that looks complicated but comes together in about twenty minutes. You need a cardboard tube (paper towel or wrapping paper tube), aluminum foil, dry rice or small dried beans, tape, and something to decorate with.
Crumple a long strip of aluminum foil into a loose snake shape — don’t compress it too tightly. You want bumps and ridges. Push the foil snake inside the tube in a spiral pattern. This creates the internal maze that slows the rice down as it falls.
Cap one end of the tube with tape and cardstock. Pour in a quarter cup of rice. Cap the other end. Tilt slowly.
The sound is genuinely soothing. The rice grains fall through the crumpled foil maze, bouncing off the ridges and the tube walls, creating hundreds of tiny impacts that blend together into a continuous, rain-like wash of white noise. Each grain follows a slightly different path, so the sound stays random and organic rather than rhythmic.
Experiment with the fill material. Rice produces a lighter, higher-pitched rain sound. Dried lentils land more heavily and lower. Small pebbles create a thunderstorm effect. Try mixing materials for a layered, complex sound.
Cost: Under $3
Time: 20 minutes
Ages: 4+ (younger kids will need help with foil insertion)
Science concepts: Sound frequency varies by object mass, sound absorption, and reflection
Paper Towel Tube Speaker

Set your phone inside one end of a paper towel tube and play music. Noticeably louder. The tube channels sound waves in one direction instead of letting them scatter, concentrating the energy toward the listener. Same principle as cupping your hands around your mouth to yell — amplification without electricity.
Cost: Free
Time: 2 minutes
Ages: 2+
Science concept: Sound amplification through wave focusing
Rubber Band Guitar

Stretch three to five rubber bands of different thicknesses around an open-topped tissue box. Slide a pencil under the bands near one edge as a bridge. Pluck each band. Thicker bands vibrate slowly — low notes. Thin bands vibrate fast — high notes. Press a band against the box at different points while plucking to shorten the vibrating length and raise the pitch. Your child just reinvented the guitar.
Cost: Free
Time: 5 minutes
Ages: 3+
Science concepts: Tension, thickness, and length affect pitch
Sound Scavenger Hunt

Hand your child a clipboard and a printed checklist: bird singing, dog barking, car engine, wind in trees, footsteps on gravel, water running, door closing, someone laughing.
Go outside. Close your eyes for thirty seconds. Just listen.
Kids are shockingly bad at this at first — they want to talk, move, point. But after that initial fidgety thirty seconds, something shifts. They start hearing things they’d normally filter out. The hum of a distant lawnmower. A squirrel chattering. The specific crunch of their own shoes on different surfaces.
Check items off the list as you find them. Add new sounds you didn’t expect. Draw a map of your neighborhood and mark where each sound came from. This becomes a geography lesson and a science lesson at the same time.
For the car ride home, play “guess that sound” — record sounds on your phone during the hunt and quiz each other later.
Cost: Free
Time: 20–30 minutes
Ages: 3+
Science concepts: Sound awareness, environmental acoustics, sound identification
DIY Soundproofing Challenge
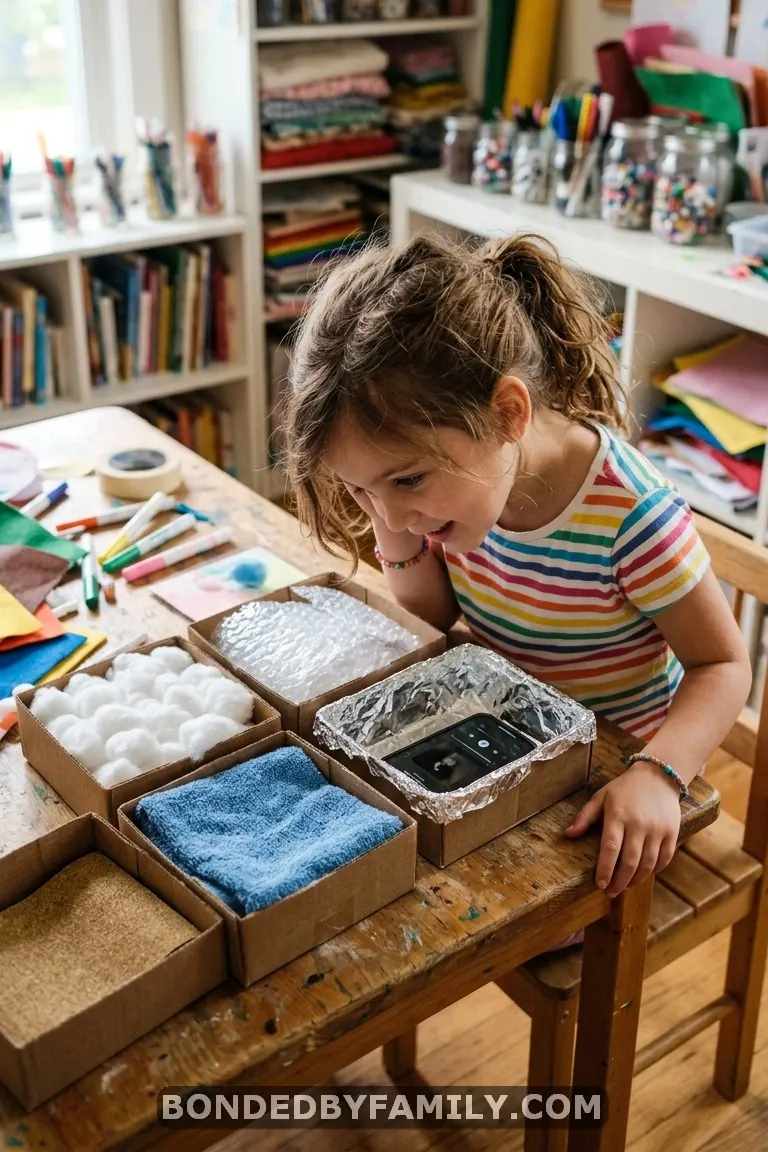
This one turns the question around: instead of making sound, how do you stop it?
Place a phone playing music inside a small cardboard box. Listen to how loud it is. Now line the box with different materials — one at a time — and close the lid. Which material blocks the most sound?
Test cotton balls, bubble wrap, aluminum foil, a folded dish towel, egg carton foam, crumpled newspaper, and an empty box as your control.
Soft, porous materials like cotton and towels absorb sound waves by converting their energy into tiny amounts of heat through friction within the fibers. Dense materials block sound by reflecting it. Smooth, hard surfaces like foil barely absorb anything — they bounce the waves right back.
The surprising winner in most home experiments is a thick, folded towel. Not glamorous. But effective.
For older kids, use a free decibel meter app to measure the actual volume reduction for each material. Create a bar chart comparing them. That’s a complete science fair project in a single afternoon.
Cost: Free (all household items)
Time: 20 minutes
Ages: 5+
Science concepts: Sound absorption, reflection, insulation, material properties
Quick-Reference: Which Activity Teaches What?
| Science Concept | Best Activities |
|---|---|
| Vibrations create sound | Dancing Rice, Screaming Balloon, Singing Spoons |
| Pitch and frequency | Straw Pan Flute, Water Xylophone, Rubber Band Guitar |
| Sound travels through solids | Singing Spoons, Cup Telephone |
| Sound amplification | Paper Towel Tube Speaker |
| Sound absorption | DIY Soundproofing Challenge |
| Sound identification | Sound Scavenger Hunt |
| Multiple concepts combined | Rainstick (frequency + absorption + reflection) |
FAQ
What age is best for sound activities?
Most of these experiments work for ages three and up with adult guidance. The dancing rice experiment and paper towel tube speaker need almost zero fine motor skills, making them ideal starting points for toddlers. The straw pan flute and soundproofing challenge work better for kids five and older who can follow multi-step instructions and engage with the “why” behind what they’re hearing.
Do I need special materials for sound experiments?
No. Every activity on this list uses common household items — plastic wrap, rubber bands, string, straws, cardboard tubes, spoons, cups, and dry rice. The only possible purchase is a small hex nut for the screaming balloon experiment, which costs a few cents at any hardware store. No specialty science kits required.
How do I explain sound waves to a young child?
Skip the textbook definition. Drop a pebble in a bowl of water and point to the ripples spreading outward. Tell your child that sound works the same way — something vibrates (like the pebble hitting the water), and those vibrations ripple outward through the air until they reach our ears. The ripples in water are waves you can see. Sound waves are ripples you can hear.
Can these activities be used in a classroom?
Every one of these experiments works in a group setting. The sound scavenger hunt is especially strong for outdoor classroom time, and the soundproofing challenge lends itself naturally to team competition. The straw pan flute is a reliable crowd-pleaser for STEM fairs — kids leave with a working instrument they built themselves.
What’s the easiest sound experiment for a quick setup?
The singing spoons experiment takes under two minutes to set up with just a metal spoon and a piece of yarn. Zero prep, zero mess, and the result is dramatic enough that kids remember it for weeks. The dancing rice is a close second — it takes about three minutes and requires only a bowl, plastic wrap, and rice.