By age five, a child’s hand has performed roughly one million grasping motions just from eating, dressing, and playing – and every single one of those movements was rehearsed somewhere first. That’s the surprising part nobody tells you about fine motor development: it isn’t a subject you teach. It’s a byproduct of repetition, and repetition is exactly what Christmas hands you on a silver platter, wrapped in ribbon.
If you’ve searched christmas fine motor activities and landed on a list of thirty ideas that all require a laminator, a Cricut, and a trip to Michaels, I get the eye-roll. This isn’t that list. Every activity below uses things you already own – paper plates, cotton swabs, the pom poms rattling around in last year’s craft bin – and every one doubles as ten minutes of actual connection with your kid, not just busywork to survive naptime.
By the end, you’ll have seven activities sorted by age, mess level, and prep time, plus the exact skill each one builds and why that matters long after the tree comes down.
Why Fine Motor Skills Matter at Christmas
Fine motor skills are the small, precise movements made by the muscles in the hands, fingers, and wrists – the stuff behind buttoning a coat, holding a fork, or gripping a crayon correctly. They’re not automatic. Kids build them through thousands of tiny repetitions, and most of those repetitions need to feel like play, not practice.
Specifically, the activities in this list target five things: pincer grasp (thumb and index finger pinching small objects), hand strength (squeezing, rolling, pressing), hand-eye coordination (placing an object exactly where you meant to), scissor control, and bilateral coordination (using both hands together, one holding while the other works). Every one of those shows up later as handwriting, shoe-tying, and independent dressing.
Christmas is a gift here, honestly. Pom poms, jingle bells, pipe cleaners, cotton balls – the whole holiday aesthetic is basically a fine motor toy box that happens to be red and green. You don’t need worksheets. You need a paper plate and twenty minutes before dinner.
Stock Up on These Simple Supplies
You likely have most of this already: paper plates, child-safe scissors, glue, yarn or ribbon, pom poms, play dough, Q-tips, pipe cleaners, and buttons. Raid the recycling bin for cardboard tubes, egg cartons, and cereal boxes – they make sturdier bases than anything store-bought. If you want the lacing cards and Santa beard templates ready to print, keep a laminator sheet or two of clear packing tape handy so they survive more than one December.
1. Pom-Pom Christmas Tree Transfer
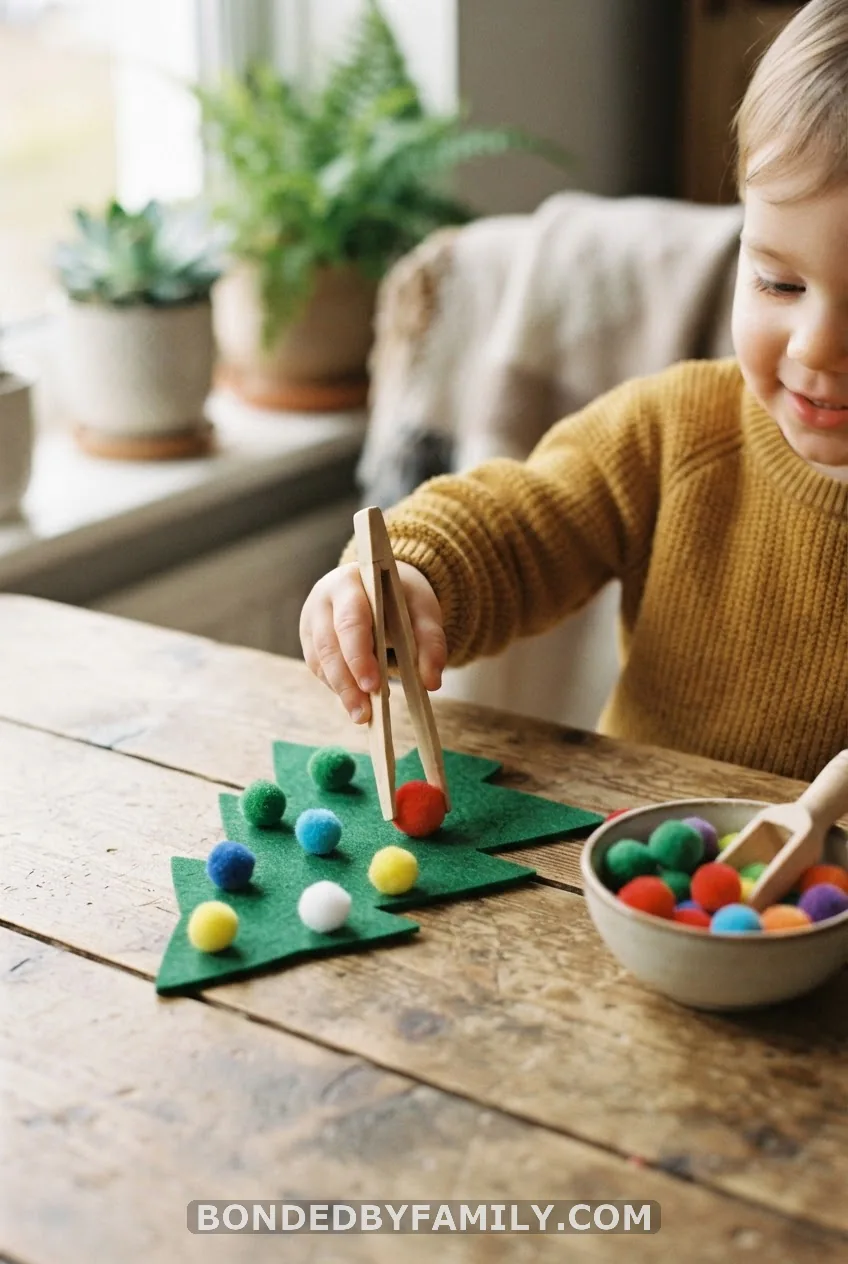
Draw a triangle tree on cardstock, or print one, and set a small bowl of pom poms next to it. Kids use fingers, kitchen tongs, or toddler tweezers to transfer poms onto the tree one at a time. That’s it. That’s the whole activity, and it works because the pincer grasp required to pick up a squishy pom pom is almost identical to the grip needed to hold a pencil correctly two years later.
For babies and young toddlers still working on cause and effect, skip the tweezers entirely and let them use whole fists – crumpled tissue paper or cotton balls work if pom poms feel like a choking risk in your house. For four- and five-year-olds, add a die: roll it, count that many pom poms onto the tree, and you’ve folded in early math without announcing it.
One caveat:
Pom poms are a genuine choking hazard for kids under three. Swap them for jumbo 2-inch pom poms or crumpled paper balls, and never leave a toddler unsupervised with the small ones, even for a bathroom break.
2. Snowman Pom-Pom Drop
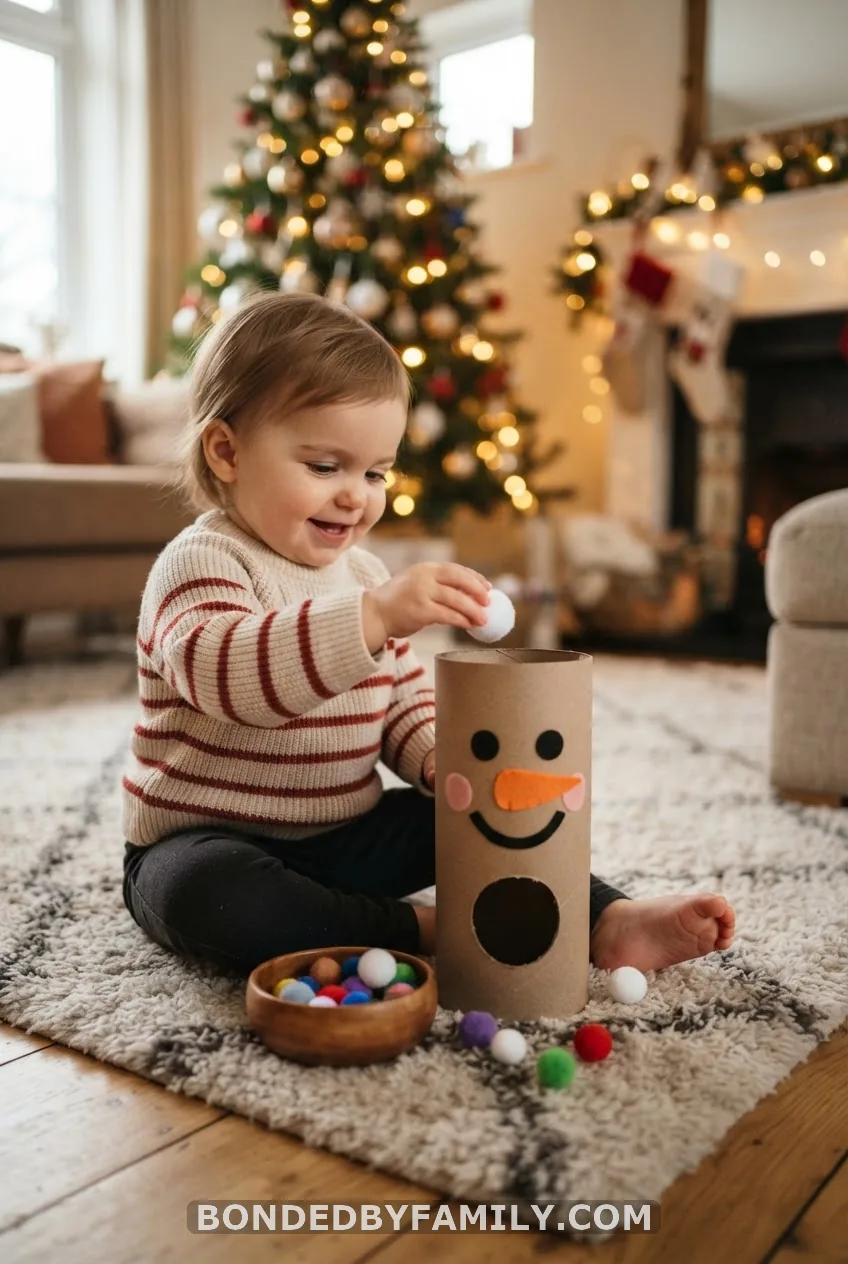
Take an empty cardboard tube – a paper towel roll works better than toilet paper size for beginners – and decorate one end like a snowman face with a marker or googly eyes. Cut a hole in the top and let your child drop white pom poms through it, listening for the little thunk at the bottom.
This one’s built for babies and young toddlers who are still mastering finger release, which sounds simple but is actually one of the harder fine motor milestones. Grasping is easy. Letting go on purpose, at the right moment, over a specific spot, takes real coordination. Make the hole wide for a first attempt, then switch to a narrower slot as your child gets steadier – the challenge scales itself.
3. Cut Santa’s Beard
The catch:
Cutting is the single skill parents underestimate most, and it’s also the one that separates a confident kindergartener from a frustrated one on day one of school. This activity is a genuine deep-dive because there’s more to teach than “here, cut this.”
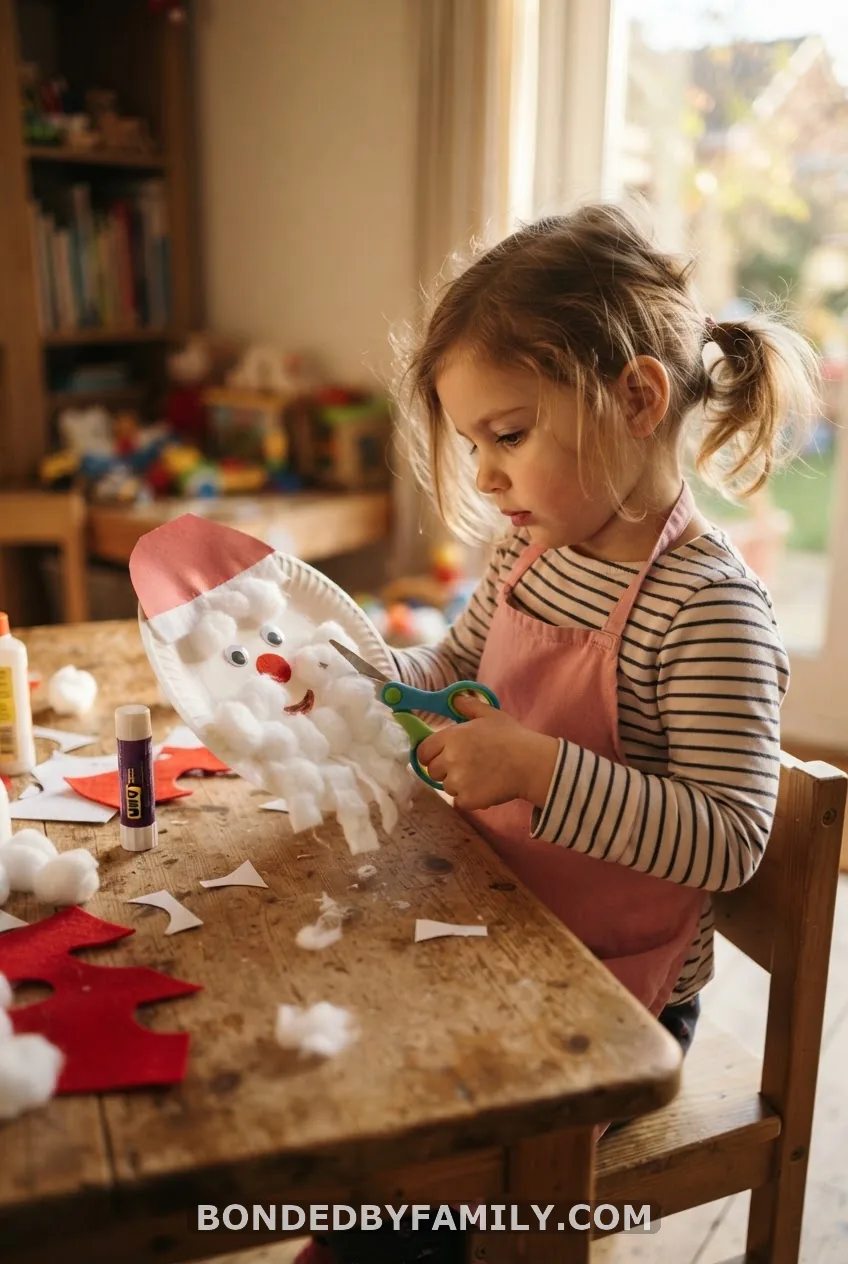
Start with a paper plate. Draw or print a simple Santa face – round cheeks, a red hat triangle – and skip the beard entirely at first; that comes from your child. Glue thin strips of cotton wool, white yarn, or shredded white cardstock around the lower half of the plate, loosely enough that scissors can catch individual strands rather than one solid mat.
Hand your child child-safe scissors with a spring-loaded handle if they’re brand new to cutting – Fiskars’ blunt-tip training scissors are the classic choice and cost around $6-8 at most craft stores. For kids with more scissor experience, regular round-tip scissors work fine.
Here’s the sequence that actually builds skill instead of just producing a craft:
1. Model the grip first. Thumb in the small hole, middle finger in the large hole, index finger resting along the outside for control.
2. Let them make single snips before attempting continuous cuts. A snip is thumb-close, fingers-open, repeat.
3. Draw one straight guideline through the beard strips and ask them to cut along it.
4. Progress to a zig-zag line, then a gentle wave, for kids who’ve got straight cuts down.
5. Glue the trimmed beard pieces back onto Santa’s chin as the finishing step – it gives the cutting practice a visible payoff.
Common mistakes: letting kids cut paper that’s too thick (cardstock is harder than construction paper and frustrates beginners), or handing over scissors with no warm-up snips first. Both lead to a kid who declares they “hate cutting” within five minutes.
This builds bilateral coordination – one hand cuts, the other rotates and steadies the paper – plus frustration tolerance, since the beard rarely comes out looking like the picture on the box, and that’s fine.
4. Spiral Christmas Tree Cut & Fold
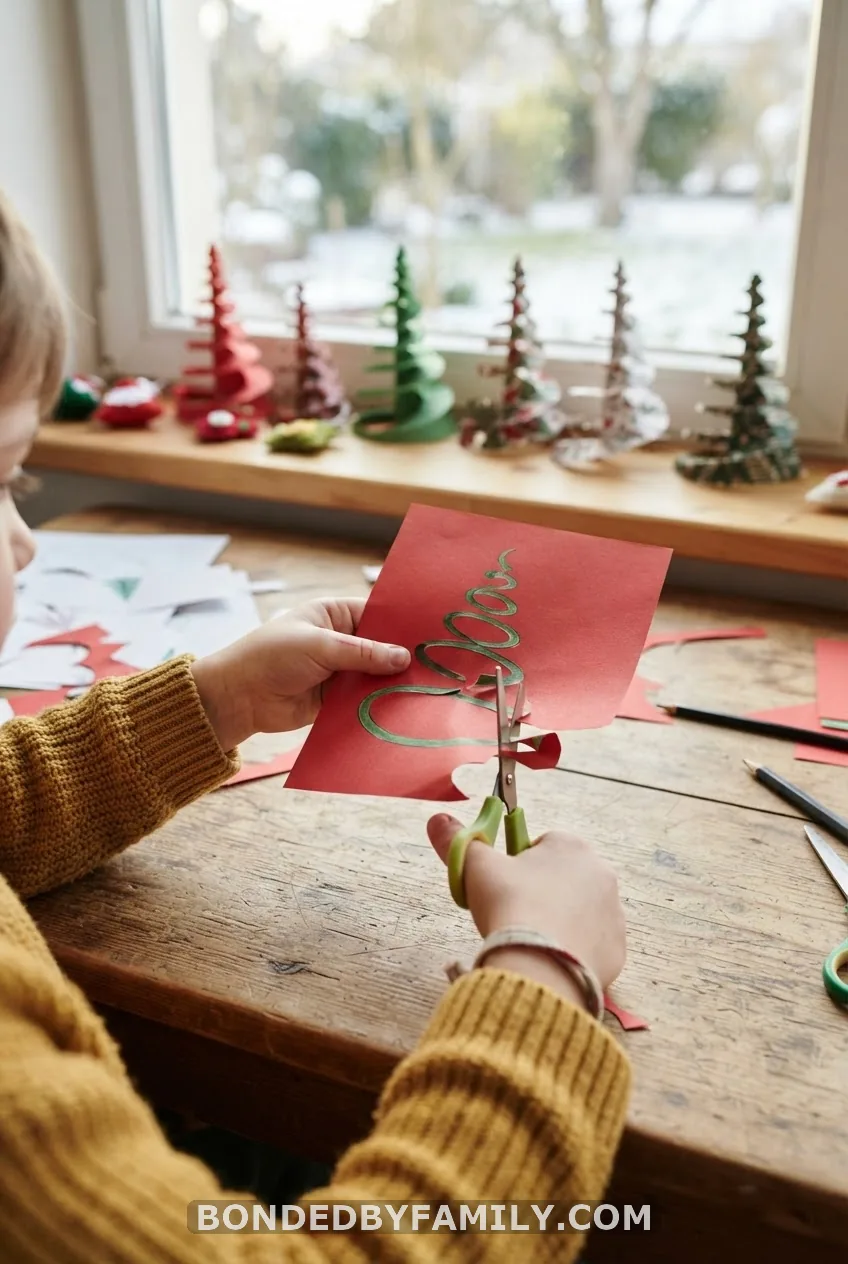
Print a spiral tree template (a simple green circle with a spiral line drawn through it, tree-shaped at the outer edge). Kids cut along the spiral from the outside in, then the strip naturally coils into a 3D tree when you fold up the wide base. This is a step up from straight-line cutting because it demands constant hand rotation – the paper turns while the scissors stay roughly still, which is the exact motion adults use without thinking.
It’s best suited to four- to six-year-olds who’ve had some scissor practice already. Hang the finished trees from string as ornaments, or line up a forest of them on a windowsill – either way, the payoff is immediate and visible, which keeps kids motivated through the trickiest part of the cut near the center.
5. Q-Tip Christmas Tree Dot Painting
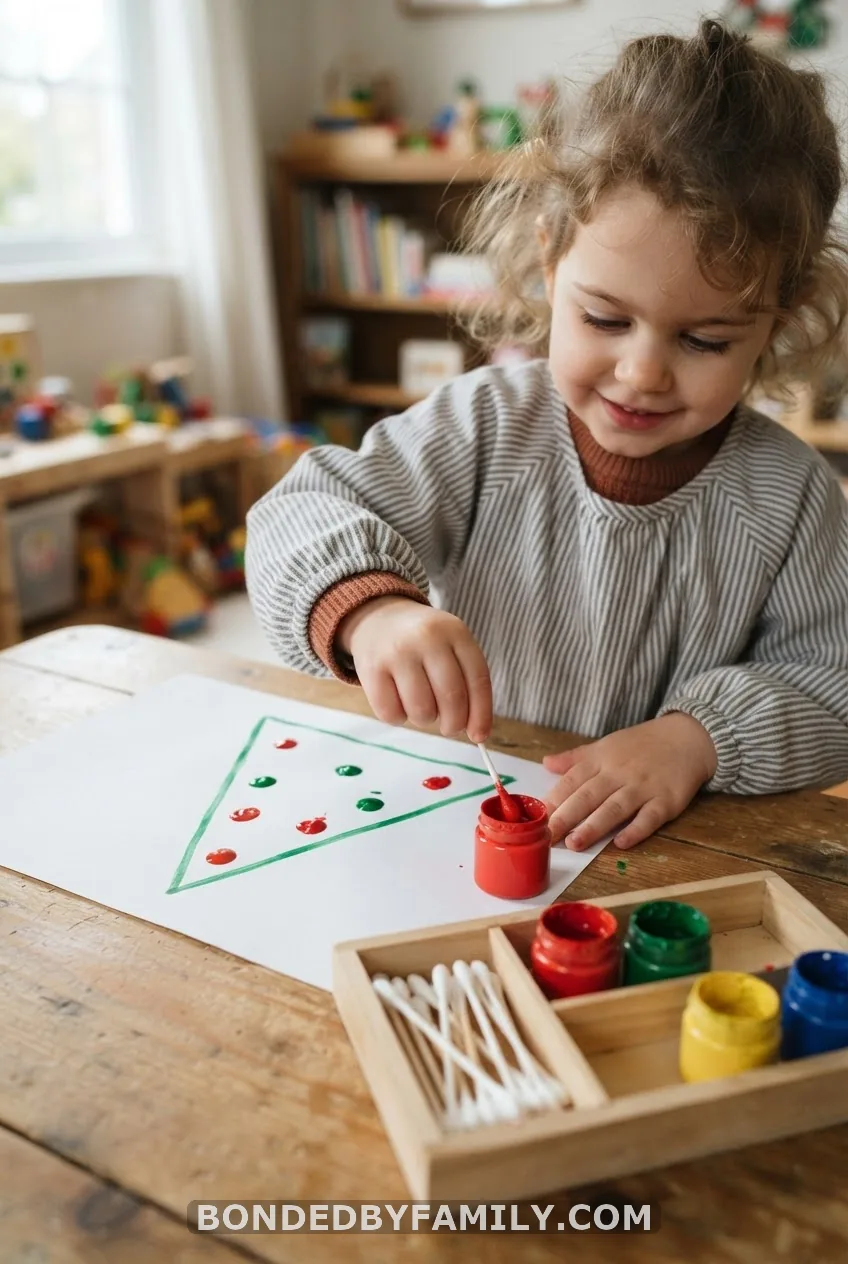
Draw a tree outline – or use the same one from the pom-pom activity – and swap paintbrushes for Q-tips. Dip, dot, repeat. Each dot becomes an ornament, a string of lights, or a snowflake if you’re using white paint on a dark background.
This works because a Q-tip forces a tripod grasp (thumb, index, middle finger) automatically, without a single instruction from you. For extra resistance, clip a clothespin onto the Q-tip and have kids paint by squeezing the clothespin open and shut – it’s a stronger workout for the exact muscles used later to grip a pencil for long stretches.
Budget note:
Skip buying specialty craft paint. A $1 bottle of washable tempera and a $2 bag of cotton swabs covers a whole classroom’s worth of trees.
6. Playdough Christmas Trees
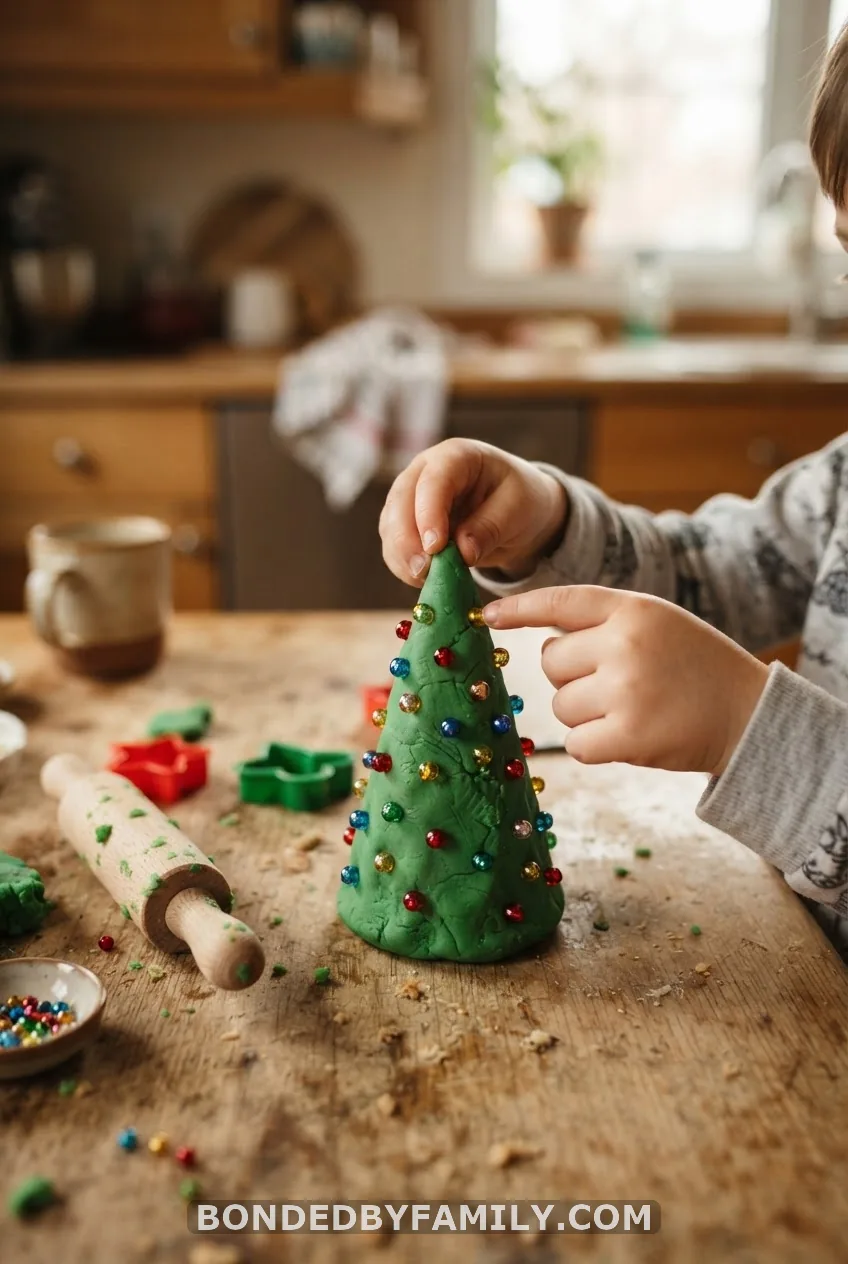
Roll green play dough into a cone, then let kids press in beads, buttons, or dry mini pasta as ornaments. That single motion – press, release, reposition – builds real hand strength, the kind kids need for opening lunch containers and gripping pencils firmly enough that letters don’t look like ghosts on the page.
Add a mini rolling pin and star-shaped cookie cutter for extra mileage: rolling flat, cutting a shape, then re-rolling it into a ball works three different muscle groups in about ninety seconds. Homemade dough (flour, salt, water, oil, a few drops of green food coloring) lasts about two weeks in an airtight container if store-bought Play-Doh isn’t on hand.
7. Christmas Sweater Lacing Cards
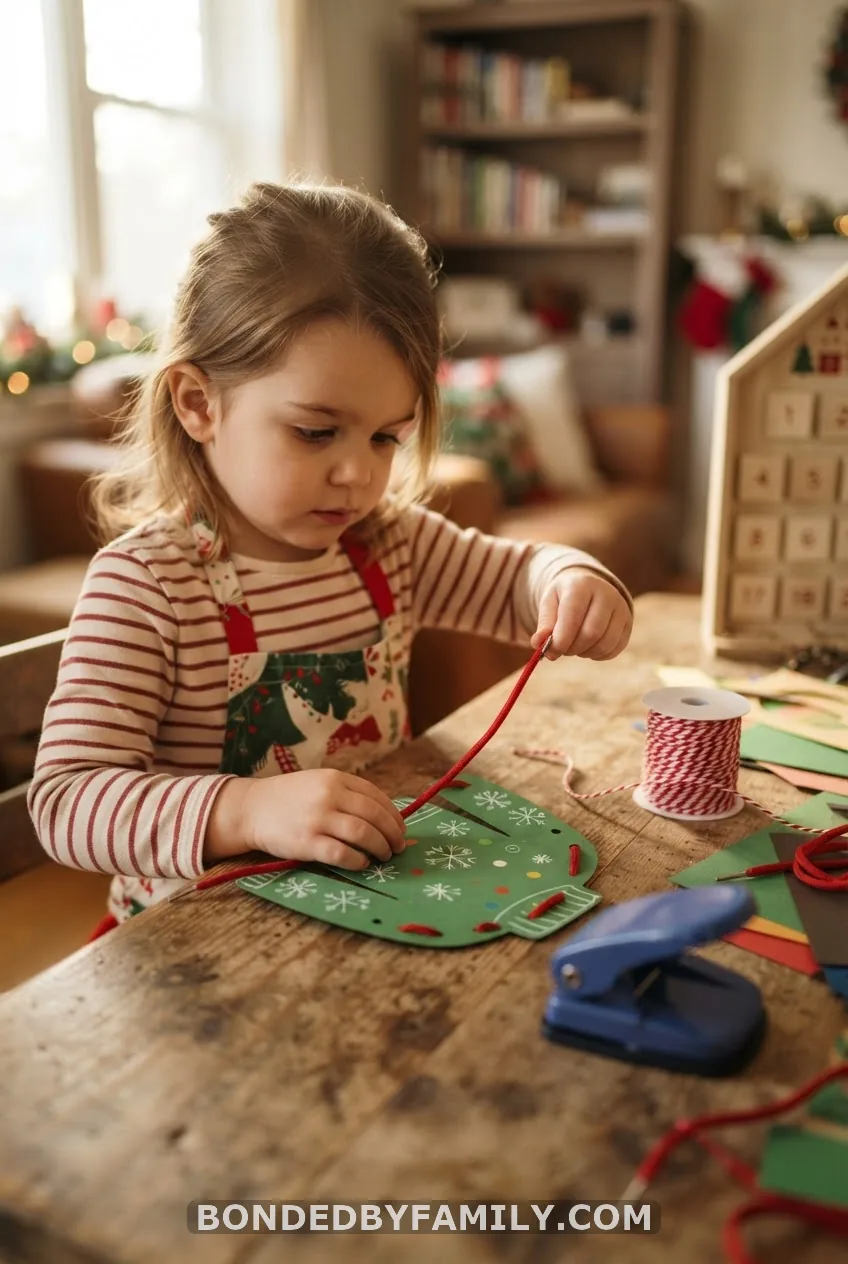
Cut a sweater shape from cardstock – a rectangle with a notch at the top for the neckline does the job – and punch holes around the border with a standard craft hole punch. Give your child a shoelace with the tip dipped in glue and left to dry stiff (an easy at-home substitute for a plastic lacing needle), or a length of ribbon with tape wrapped around the end.
Lacing builds hand-eye coordination and bilateral coordination at once, since one hand feeds the lace while the other steadies the card, and it’s genuinely the closest thing to pre-sewing most four-year-olds will do. Laminate the card, or cover both sides with clear packing tape, and it survives being laced and unlaced dozens of times across multiple Decembers. Our free printable sweater template (search “christmas fine motor activities pdf” style resources, or trace a store sweater onto cardstock) makes this a five-minute setup.
When it’s worth it:
This activity earns its keep for kids three and up who already have basic hole-punching or beading experience. For younger toddlers still working on pincer grasp, stick with the pom-pom transfer instead – lacing asks for more coordination than most two-year-olds have yet.
The Short Version
None of this required a Cricut. It required a paper plate, a bag of pom poms, and about fifteen minutes squeezed in before the Christmas movie starts. That’s the whole point – the same small hands that will one day tie their own shoes and write their own names are getting there one dropped pom pom, one snipped beard strand, one laced sweater card at a time. The tree will come down in January. The grip strength, the scissor control, the patience for a fiddly task – that sticks around.
FAQ
What are Christmas fine motor activities?
They’re festive play ideas that ask kids to use the small muscles in their hands and fingers – cutting, pinching, lacing, or placing tiny objects – dressed up in holiday themes like trees, Santas, and snowmen so the practice doesn’t feel like practice.
What age can start Christmas fine motor activities?
Babies as young as six months can try a supervised pom-pom drop with jumbo-sized poms, while preschoolers and kindergarteners are ready for scissor work, lacing cards, and bead sorting with real challenge behind them.
What supplies do I need for fine motor Christmas activities?
Almost everything on this list is already in a typical home: paper plates, child-safe scissors, glue, yarn, pom poms, Q-tips, and play dough. Cardboard tubes and cereal boxes from the recycling bin cover the rest.
Why are Christmas fine motor activities important for kids?
They build finger strength, hand-eye coordination, pincer grasp, and bilateral coordination – the same skills behind buttoning a coat, holding a pencil correctly, and eating independently, all rehearsed through play instead of drills.
Do these activities work for busy toddlers?
Yes. The pom-pom drop, sticker trees, and Q-tip painting all take under ten minutes to set up and hold a toddler’s attention because the payoff – a dot, a drop, a sticker placed – is instant. Just keep small parts supervised and swap in jumbo sizes where needed.